Thursday, August 13, 2015

SOUTHWEST SUMMER SALAD WITH MANGO VINAIGRETTE


I travel a fair bit for work, and when I travel, I try to keep to my usual eating habits. Especially in places that I know will have excellent fresh vegan/vegetarian food. A few months ago I was in a small town in southern CA and I looked around for lunch spots. I found a cafe near my site which served only vegan food - I *had* to go! And I was hooked!! I ate there every single day of my trip, and I ate their version of this salad. It's *that* good! And so filling.

And the mango vinaigrette - let's just say I now have this dressing in the fridge *all* the time in case I suddenly crave it! You can really put any vegetables you wish on this salad... if you don't have jicama, use radishes. Toss on some roasted vegetables: cauliflower, carrots, parsnips, potatoes, sweet potatoes, a whole jalapeño, etc. Add a bit of roasted chicken or a filet of salmon to make it heartier.

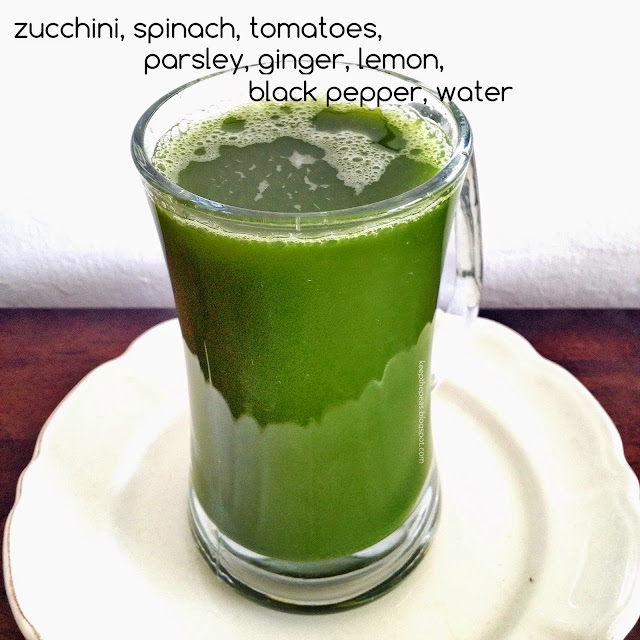
Garnish with parsley instead of cilantro, or coarsely chopped almonds instead of pumpkin seeds. So many ways to make this your own...

Southwest Summer Salad with Mango Vinaigrette
makes: 2 servings

- 1/2 cup diced tomato
- 1/2 cup diced cucumber
- 1 small jicama, peeled and cut into batons
- 1 avocado, halved
- 1/2 cup sliced red onion
- 2 tbsp. lime or lemon juice
- 2 tsp. sea salt
- 3 cups mixed salad greens
- 2 cups cooked quinoa (or rice, millet, or lentils), cooled
- 1/4 cup cilantro leaves, roughly chopped
- 2 tbsp. roasted pumpkin seeds
- 2 tbsp. currants or raisins
- 1 tsp. cayenne pepper
- 1 jalapeño, sliced
- 1 cup Mango Vinaigrette (recipe below)
  1. In a bowl, combine tomato, cucumber, and red onion. Toss with lemon juice, salt, and cayenne pepper.
  2. Divide salad greens into two salad bowls or plates.
  3. Top each with 1 cup of cooked quinoa/millet/rice. Arrange the tomato mixture, jicama, and an avocado half on the greens. Drizzle with 2-3 tbsp. of the vinaigrette. Garnish with the sliced jalapeño, cilantro, pumpkin seeds, currants/raisins, and cayenne pepper.
  4. Serve additional dressing on the side.
Mango Vinaigrette
makes: approximately 1 cup

- 1 cup chopped fresh (or frozen) mango
- 1/2 cups safflower oil
- 1/8 cup maple syrup
- 1/4 cup lime juice
- 1 tbsp. rice vinegar (use lime juice if you don't have rice vinegar)
- 1/2 tsp. salt
- 1/2 tsp. freshly ground pepper
- 1/2 in. piece of fresh ginger, peeled
  1. Place all ingredients in a blender and blend until smooth. Adjust salt and pepper to taste.
  2. Store leftovers in the fridge.

Friday, August 7, 2015

MAFÉ: SENEGALESE GROUNDNUT STEW (VEGAN)


I *love* stews and soups. This is one of my all-time favourite stews and I don't know why I haven't shared it here! It's so delicious and versatile. I typically make this vegan version unless meat-eater friends are coming over then I make it with lamb, chicken, venison, elk, etc. I've never made it with fish but I think it would be superb!

Use any vegetables you've got or want to use. Swap the sweet potatoes with a winter squash like butternut, kabocha or acorn. Swap the meat for tempeh or add in sliced boiled eggs just before serving. The variations are endless! For the brave of tongue, add in a chopped habanero while sautéing the vegetables.

MAFÉ: SENEGALESE GROUNDNUT STEW (VEGAN)
makes: 6-8 servings

- kernels from 1 ear of corn (or approx. 3/4 cup corn kernels)
- 2 small sweet potatoes, peeled and chunked
- 1 med. potato, chunked
- 3 carrots, chunked
- 2 cups cauliflower florets
- 1 cup young shiitake mushrooms (or 1 cup any mushrooms)
- 2 cups diced capsicum
- 3 cups chopped kale (or any greens)
- 2 cups chopped or lightly crushed tomatoes
- 1/2 cup peanut butter
- 2 leeks, sliced (omit if not available)
- 1 large onion, diced
- 1 tbsp. minced ginger
- 1 tbsp. minced garlic
- 1 tbsp. fresh thyme (or 1 bay leaf, or 1 tsp. dried thyme)
- 1 tbsp. coconut oil (or any oil of choice, not olive oil)
- 4-5 cups water (or vegetable broth)
- 1-2 tbsp. salt, adjust to taste
- 2 tsp. red chile powder (adjust to taste)
- 1 lemon, juiced
- garnishes (as many as you wish): sliced boiled eggs, chopped peanuts, fried onions, parsley, cilantro, sliced chiles, flaked coconut
  1. On medium-low, heat the oil in a heavy bottomed large pan. Add the onions, leeks, garlic, and ginger and sauté until translucent.
  2. Turn the heat to medium and add the carrots, potatoes, sweet potatoes and kale and sauté for 3-4 minutes. Add the rest of the vegetables and sauté for 5-7 minutes. Turn the heat up to high, add the water (or broth) and the thyme (or bay leaf). Once everything starts to bubble, turn the heat down to medium.
  3. Add the tomatoes, peanut butter, chile powder, and salt. Let everything cook for 10-15 minutes until the vegetables are cooked, stirring occasionally. Adjust salt and spice to taste.
  4. Turn the heat off, stir in the lemon juice, and let the stew rest for 10 minutes.
  5. Serve over rice or bread and garnishes of choice.

Monday, July 20, 2015

BASIL MAYONNAISE


This basil mayonnaise is a gorgeous green and tastes superb! So summery and full of the bright basil flavour that enhances any summer vegetable, especially when simply prepared by steaming. Pair with a light crisp rosé and some fresh bread for an easy meal.


Although mayonnaise can be made in a food processor, whisking by hand gives you more control over it and will help prevent it from breaking. It will also build excellent arm strength! 


Basil Mayonnaise
makes: approximately 1 cup

- 2 egg yolks
- 1 tsp salt
- juice of 1 lemon
- 1 cup neutral oil (rice bran, safflower, sunflower, or any other neutral oil - not olive oil)
- 1/2 cup packed basil leaves
- 1/2 cup packed parsley leaves
  1. Make the basil oil: Put the parsley and basil leaves into a blender jar (not a food processor) and pour 3/4 cups of the oil over the leaves. Blend until smooth. Strain the oil into a bowl using a fine-mesh strainer or a chinois, pressing the solids down to get all the oil out.
  2. In a large bowl, whisk the egg yolks, lemon juice, and salt until pale yellow and slightly thickened. Start adding the basil oil in a thin stream, whisking continuously until the mixture starts to thicken and fluffs up. If it gets too thick and hard to whisk before most of the oil is used up, add 1 tbsp. lemon juice and carry on whisking while adding oil. Whisk until the oil is incorporated into the mix and you have a fluffy mayonnaise. Over-whisking will break the mayo! If that happens, you'll have to either start over or salvage it using another egg yolk, a clean bowl, and a lot more whisking while gradually adding the broken mayo! Try to avoid breaking the mayo :-)
  3. Enjoy immediately with steamed or roasted vegetables or seafood, or in any way you wish. Refrigerate leftovers for a few weeks.

BALSAMIC ROASTED TOMATO SOUP


I don't much care for raw tomatoes, but I love them cooked into sauces, tarts, roasted and tossed into a salad or in sandwiches, or in this soup that I've been making for years. I make it so often, I don't know why I haven't written the recipe here until now.

Anyway, this gorgeous soup is a beautiful colour and so light. It's vegan, gluten-free, low fat and low carb. And since it practically cooks itself in the oven, it's perfect for summer. The high heat roasting really deepens the flavours of all the vegetables including the onion and garlic. And it softens the black pepper so when you blend it, the peppery flavour really gets into the soup. So delicious!


Balsamic Roasted Tomato Soup
makes: 4 large servings

- 1 large sweet potato, peeled and cut into chunks
- 1 large carrot, peeled and cut into chunks
- 1 (28-ounce) can whole tomatoes
- 1 cup coarsely chopped onion
- 5 garlic cloves
- 2 cups water (or vegetable broth), divided
- 2 tsp sugar
- 2 tbsp balsamic vinegar
- 1 tablespoon tamari (or regular) soy sauce
- 1 tbsp coarsely ground black pepper (Tellicherry pepper works best)
- 1 tbsp extra virgin olive oil
  1. Preheat oven to 450 F/230 C.
  2. Put the tomatoes (and their liquid), sweet potato, onion, garlic and black pepper in a lightly greased, deep oven-proof pan. Mix 1 cup of water, sugar, vinegar, and soy sauce in a bowl and pour the mixture over the vegetables. Push the vegetables into the pan so they are more or less submerged in the liquid. Bake at 450 F/230 C for 50-60 minutes or until vegetables are cooked.
  3. Remove the vegetables from the oven and cool. Add to a blender jar along with the olive oil  and blend until smooth, adding the remaining 1 cup water as needed to get the desired consistency. Taste and adjust salt and sugar.
  4. Serve chilled or warmed on medium heat. Top with freshly ground black pepper and/or a drizzle of olive oil or a dollop of cashew cream if desired.

Saturday, June 20, 2015

STIR-FRIED SWEET PEPPERS WITH COCONUT AND PEANUTS


Summer comfort food at it's best! I love these stir-fried peppers - or shaak as we call it in Gujarati - with rotli, these gluten-free flatbreads, or rice. It's flavourful, healthy, fresh, and light. Try it!

Adapted from here.

Stir-Fried Sweet Peppers with Coconut and Peanuts
makes: 4 servings


- 1 lb. (~1/2 kg) sweet mini peppers, stemmed, washed and sliced into rounds
- 1/4 cup raw peanuts
- 2 dried whole cayenne chiles
- 1/4 cup desiccated coconut (unsweetened)
2 tsp. salt
- 1 tsp. sugar
- 2 tbsp. coconut, safflower, sunflower, or other neutral oil (not olive oil!)
- 1 tsp. cumin seeds
- 1 tbsp. caraway seeds (shah jeeru, or cumin seeds)
- 1 tsp. mustard seeds
- 1/2 tsp. turmeric powder
- 1/8 cup water
- 2 tbsp. lemon juice
  1. Dry roast the peanuts, caraway seeds, and dried chiles on medium-low heat till they are fragrant and the peanuts and chiles are lightly browned in some spots. Turn the heat off and cool. Transfer the roasted peanuts, cumin, and chiles to a blender or spice grinder. Add the coconut, sugar, and salt and grind into a coarse powder.
  2. Heat the oil in a pan on medium heat and add the cumin and mustard seeds. Once they sizzle and the mustard seeds start to pop, add the turmeric and sliced peppers and mix well. Add the water, cover, and cook for 4-5 minutes.
  3. Uncover, add the coarsely powdered spices, and mix well. Cook for an additional 2-3 minutes uncovered, stirring once.
  4. Turn off the heat, add the lemon juice, stir.
  5. Transfer to a bowl and garnish with the chopped cilantro. Serve with roti or rice.

LAHMACUN: SPICY TURKISH "PIZZA"


Lahmacun: Spicy Turkish "Pizza"
makes: 8-10 lahmacun

Crust:
- 2-1/2 cups AP (all-purpose) flour
- 3/4 cup milk or water (milk will make the bottom of the crust a nice golden colour)
- 2 tbsp. olive oil
- 1 tsp. salt
- 1/2 tsp sugar
- 1-1/2 tsp. active dry yeast

Topping:
- 1/2 lb. ground lamb
- 1 green chile, finely chopped (cayenne, jalapeño, serrano, any...)
- 1 tomato, finely chopped
- 1 onion, finely chopped
- 2 cloves garlic, minced
- 1 tbs. Turkish red pepper and tomato paste
  (if you can't find this, use a coarsely blended roasted red capsicum and tomato)
- 2 tsp. red chile powder
- 1 tsp. cumin powder
- 1 tsp. black pepper powder
- 2 tsp. salt
- 1 tsp. smoked red paprika
- 1/4 cup fresh parsley, minced
- 1 tbsp. olive oil
  1. In a large bowl mix the topping ingredients until everything is mixed well but don't over mix. Let everything sit in the fridge for a few hours, up to 24 hrs.
  2. Combine all the ingredients for the crust in a bowl. Mix and knead for 5-7 min. into a smooth supple dough, using a bit more water or milk if needed. Transfer into a large bowl and let it rise for 1-1/2 to 2 hrs. It doesn't need to rise like pizza dough so don't worry if it hasn't doubled after rising.
  3. After the dough has risen, gently deflate and divide into 8 - 10 small balls (about the size of a lemon). Cover with a kitchen towel so the dough balls don't dry out, and allow to rest for 10-15 min.
  4. Preheat the oven to 400 F / 200 C.
  5. Flour your work surface, and roll out one dough ball at a time into a fairly thin round, about as thick as a tortilla or a wrap or a roti. Evenly spread 1 - 1-1/2 tbsp. of the meat mixture on the dough. Don't make too thick a layer of meat otherwise it won't cook properly.
  6. On a pizza stone or in a baking tray, bake each lahmacun for about 5-7 min. All ovens heat differently so keep a close eye on the oven when baking the first couple to figure out the exact time your oven takes to fully cook these.
  7. Continue rolling, topping, and baking the lahmacuns and stack them as they come out of the oven.
  8. Before eating, squeeze a bit of lemon on your lahmacun, top with red chile flakes and a bit of green salad if you want, roll and enjoy! Store leftovers in the fridge for up to 2 days.

Sunday, May 10, 2015

PEPPERY ROSE COCKTAIL


A pretty cocktail - rosebud-infused vodka, red grapefruit juice, bay laurel and peppercorn simple syrup, and muddled fresh peppermint and pink peppercorns - perfect for summer afternoons and evenings!

The rose vodka adds a delicate floral top note just before you take a sip of this pink peppercorn- and mint-laced concoction. And the peppercorn and bay laurel simple syrup nicely rounds out the grapefruit.

Peppery Rose Cocktail
makes: 4 servings

- 1 cup vodka
- 1/3 cup dried rosebuds (or rose petals)
- 1 cup grapefruit juice
- 4 tsp. pink peppercorns
- 4 sprigs peppermint (or any other mint)
- 1 cup water
- 1 cup sugar
- 2 bay laurel leaves
- 3 tbsp. peppercorns, coarsely crushed
- 1 cup San Pellegrino (or any other carbonated water / club soda)
- ice for serving the cocktail
- lidded jar or cocktail shaker, 1 oz. jigger
  1. In a small bottle mix the vodka and rosebuds and let it steep for at least 8 hours. Strain before using.
  2. On medium-high, heat the sugar, water, bay laurel and crushed peppercorns in a saucepan. Bring to a boil, reduce the heat to medium-low, and simmer for 15 min. Turn the heat off and let the bay laurel and peppercorns steep in the syrup at least until it cools completely. Strain the syrup and discard the peppercorns and bay laurel leaves. This is more simple syrup than you need for the cocktails but it stores well in the refrigerator for up to 2 months.
  3. To make one cocktail: 
    • add 1 tsp. pink peppercorns and leaves from 1 sprig of mint to the cocktail shaker and muddle until fragrant
    • add 2 oz. vodka, 2 oz. grapefruit juice, 1 oz. simple syrup, and shake well
    • add more simple syrup to taste
    • pour over ice and top up with San Pellegrino
    • garnish with a mint leaf
  4. Salud!

Wednesday, April 15, 2015

TEMARIZUSHI: EASY SUSHI!


Temari are beautiful vibrant balls of thread, originally a Japanese folk art. Temarizushi - or temari sushi in English - is named as such because this form of sushi resembles temari balls. It's really versatile, pretty, and you can get creative with the patterns you make with the various toppings! If you can get fresh sashimi-grade fish, do use that. Otherwise, you can make do with smoked fish or of course, vegetables if you're vegetarian. No matter what, you can't really go wrong with this. And it's a fresh, healthy, gorgeous meal! Perfect for warm weather, and even as an appetizer at a party.

Do make the proper sushi rice or your temari (or whatever sushi you're making) will taste awful and bland! It doesn't matter if you don't have the perfect texture of the rice and all that - mine seldom does - as long as it's properly seasoned.

Temarizushi: Easy Sushi!
makes: 12 - 16 pieces

- 2 cups prepared sushi rice (use Marc Matsumoto's recipe here)
- 1 cup sliced assorted sashimi grade fish (salmon, tuna, seabass, shrimp, etc.)
- 1 cup sliced vegetables (avocado, lemon, jalapeno, carrots, asparagus, cucumbers, etc.)
- 1/4 cup fish roe (optional)
- 2-3 squares of plastic wrap or wax paper (4 in - 6 in. squares)

Garnishes:
- 1/3 cup (or more, to taste) tamari or regular soy sauce
- 4 - 5 tbsp. fresh grated wasabi (or packaged if you don't have fresh wasabi root)
  1. Put the plastic wrap/wax paper on your palm. Starting with the fish or vegetables you want at the top, layer the ingredients and then add two tbsp. rice on top. Gather the edges of the plastic wrap and pull to the center to wrap the whole thing.
  2. Twist the loose ends of the plastic wrap around the fish, vegetables, rice, etc. tightly enough to press everything together into an even round ball, but not so tightly that you tear the plastic!
  3. Your temari sushi is almost ready! Unwrap and place the round temari sushi on a plate. Repeat with the rest of the rice and ingredients, replacing the plastic wrap as needed. I can usually use one piece of plastic wrap for 4 - 5 temari before it gets too worn to use again.
  4. Serve the temari sushi with tamari or regular soy sauce and wasabi. Or, not so Japanese but delicious nevertheless: with a hot sauce, additional sliced jalapenos, thinly sliced lemon, etc.

Friday, February 20, 2015

RED RICE AND VEGETABLE THAI CURRY STEW


This gluten-free one-pot meal is bursting with flavour and vegetables! It's a frequent work lunch for me, and it freezes really well if you want to do that so you can have a grab-and-go meal ready anytime. I used spring vegetables I had in the fridge, but you can use any seasonal produce - can't go wrong. Adjust spice levels to taste, and even top with sliced fresh chiles if you want!

Red Rice and Vegetable Thai Curry Stew
makes: 6 servings

- 3 cups cooked red rice (or black, brown or any other unpolished rice)
- 1 medium onion, diced
- 3-4 cloves garlic, minced
- 2-3 green chiles, chopped
- 1 tbsp. grated ginger
- 4-5 cups chopped greens (chard, spinach, kale, collards, beet/radish/mustard greens, etc)
- 1 bulb fennel, diced
- 1 cup diced celery
- 2 sweet potatoes, peeled and cut into chunks
- 2 potatoes, peeled and cut into chunks
- 1 capsicum, cut into chunks
- 1-2 carrots, diced
- 1 tbsp. cold pressed coconut oil (or ghee, safflower/sunflower/peanut oil - not olive)
- 2 tbsp. Thai red curry paste
- 1 tbsp. Thai palm sugar (or Demerara sugar)
- 5-6 cups vegetable stock (or water)
- 1 tbsp. salt
- 1 tbsp. crushed red chile
- a handful of mint and cilantro leaves, coarsely chopped
- 2 limes, halved

  1. Heat the oil in a large pan and sauté the red curry paste over medium-low heat. If it starts to stick, add a bit of stock and stir to mix. When it's fragrant add the onions, garlic, ginger, and chiles and sauté till the onions are soft.
  2. Add the vegetables except the greens and stir. Turn the heat up to medium and cook for 5-7 minutes, stirring occasionally so the vegetables don't stick to the pan. Add the greens and mix. Cook for 2 minutes until the greens are just wilted. Mix in the cooked rice. 
  3. Add 1/2 of the stock and mix to combine. Cook everything until the potatoes are cooked through.
  4. Add the sugar, salt, crushed chile and mix. After the sugar dissolves, taste and adjust seasonings.
  5. Remove the stew from the heat and squeeze in the lime.
  6. Serve in bowls and garnish with the cilantro and mint. Pass around extra lime wedges.

Tuesday, February 17, 2015

SMOOTHIES GALORE, SWEET AND SAVOURY!

My family and friends often ask me for smoothie recipes and everytime - despite having this blog which I started so I could easily share recipes with everyone - I end up typing the recipes a few times to send to each person. So I decided to do a bit of a smoothie compendium. In this post I'm including some of the smoothies I make very often, if not almost everyday.

PRODUCE
Select fresh seasonal produce for your smoothies when its at peak flavour. There are some things I make a point to buy organic - herbs, tomatoes, root vegetables, apples, peaches, all berries, leafy greens, and corn- to name a few. But if you can't get organic produce, it's ok. Use whatever you get at your local market, just make sure its fresh and not wrinkled, stale looking, or partly rotten. Turmeric I always use raw but you could use powdered as well.

SEASONINGS
Remember that seasonings go a *long* way when blended so start small and add more if you want. I sometimes add a small amount of salt to my savoury smoothies because I like the slightly savoury element salt brings to the smoothie. You can, however, easily leave out the salt without negatively affecting the taste. Interestingly, celery adds a hint of saltiness to smoothies so you can use it instead if you wish. To savoury smoothies (sometimes also called raw soups) I add a bit of garlic, pepper, or crushed chile for a slight kick.

STORING SMOOTHIES
Smoothies and juices are of course best within 8-12 hours of blending, but if you really need to, you can safely store them in the fridge for 2 days. Or freeze them for a few days. Before I travel somewhere, I often freeze a couple of smoothies so I have a healthy meal or breakfast ready when I'm back.

Smoothies will develop flavour over a few hours, which is especially great when you're trying to ease into intense tasting things like kale, collard greens, mustard greens, etc. I don't ever have time to make smoothies in the morning so I make them at night and by the next morning, after everything has had time to meld together, I have a refreshing energising and filling bottle of the best meal ever!

The photos below are just ideas, feel free to modify ingredients based on whatever's in season or in your fridge. I don't use dairy in my smoothies and I also don't mix melons with other fruits. Herbs and greens like spinach are ok with melons. More on food combining later... 


Saturday, February 14, 2015

PESTO OF FAVA (BROAD) BEAN GREENS


I love Lidia Bastianich. She has an amazing story, cooks incredible food, doesn't get too fusion-y with her food, and her recipes are bonafide. And, I love watching her show on television if she's on when I'm around a TV. I much prefer reading to TV - which I haven't owned in decades - so I don't watch shows too often but I do love watching her, Jacques Pepin, Hubert Keller, and a couple of others. So Lidia had - as she often does - her mum on the show once. And she was cooking while her mum entertained with stories of Lidia's cooking escapades. Apparently, Lidia started cooking when she was 4 - 5 yrs. old, for her dolls! She'd make different dishes everyday for her dolls - SO ADORABLE!!! How can that visual not make anyone smile? It's so cute!

Anyway so I never plan meals... I buy things then make meals around whatever I've found at the market. I'd already bought plenty of greens so I didn't need yet another bunch of anything to stir-fry or make into soup or smoothies... but the fava greens were too pretty to pass up. Especially because they're very much a spring thing, available for a short time since the young leafy tops and flowers of the plant are the best tasting. So if you can find some in the farmer's market, do get them.

So I had the last bit of walnuts in the fridge, the fava greens that were not meant to be anything specific, a few Meyer lemons from a gracious coworker's tree, a couple of leftover garlic cloves I'd roasted for a soup, and some fresh spearmint. I decided to throw it all together in a blender and call it done. And I'm so glad I did! From here on, this clean and bright-on-the-palate pesto is my favourite way of enjoying the earthy buttery flavour of fava greens! Unlike basil pestos, this one doesn't dull in colour so no need for covering with a layer of oil. If you don't have fava greens, use spinach or a combination of spinach and arugula (rocket leaves). And use a regular lemon or any variety of lemons.

To quickly roast garlic, put a few cloves skin-on in a pan and roast on medium-high heat turning occasionally until the garlic is soft and blackened in spots. This won't take more than 5-7 minutes.

Pesto of Fava (Broad) Bean Greens
makes: 1 cup

- 4 cups washed fava greens (leaves, flowers, and tender stems only)
- 1/2 cup mint leaves, washed
- 2-3 cloves roasted garlic
- 1 Meyer lemon, juiced
- 2 tbsp. extra virgin olive oil
- 1 tsp. salt
- 1 tsp. freshly ground black pepper
  1. Put everything in a blender and blend into a smooth pesto.
  2. Taste and adjust salt and pepper to taste.
  3. Store in the fridge for up to a week.

Tuesday, January 27, 2015

RAW BLUEBERRY LEMON "CHEESECAKE"


This clean refreshing yet rich dessert is totally free of dairy, refined sugars, soy, grains, and eggs. And it's so easy to put together! Its gorgeous enough to serve at a party, or just to enjoy over a cozy dessert date. In short, it's a no-fail recipe! And, no one will be able to tell that it's totally dairy-free.

If you don't have blueberries, use raspberries, blackberries, strawberries, or whatever fruit you'd like. Make sure it's not a watery fruit like watermelon or your cream filling won't be as thick. Also use very ripe fruit so you can have a luscious, sweet tasting cream filling rather than a bland one.

The cashew cream is quite light tasting but in fact this dessert is quite rich thanks to all the nuts and dried fruits. So I wouldn't recommend eating it as a meal, although some of us might want to :-) 

Raw Blueberry Lemon "Cheesecake"
makes: 8 - 10 servings

Crust:
- 10 dried medjool dates (or any other variety of dates)
- 8 - 10 dried figs (~1/2 - 3/4 cups)
- 1/2 cup sprouted raw almonds (or unsprouted will do as well)
- 1/2 cup raw hazelnuts (or any other kinds of nut)

Cream Filling:
- 2-1/2 - 3 cups cashews (soaked overnight)
- 2 cups fresh blueberries
- 1/2 cup raw honey
- 1/4 cup raw unrefined coconut oil
- 2 lemons, juiced
- 1 tbsp. vanilla extract
  1. Line an 8 in. spring-form tin or any similarly sized container with wax paper (or plastic wrap), leaving a little extra over the edge. Make room in the freezer for the lined tin. Drain the cashews really well.
  2. Put the ingredients for the crust into a food processor and pulse until the mixture resembles crumbs. Transfer to the lined tin and press firmly into an even layer. Put it into the freezer while you make the filling.
  3. Except the blueberries, add the ingredients for the filling into the food processor (you can use a blender for this but why use two gadgets when you can clean just one?!) and blend until smooth. Taste and adjust the sweetness, or add more lemon if you want it more lemony.
  4. Remove the tin with the crust from the freezer and spread half of this filling over the crust to make a thick layer. If you're making this on a warm day, put the tin back into the freezer while you make the next layer. If it's cool enough, no need to freeze the tin while you make the blueberry cream layer.
  5. For the blueberry cream layer: add the fresh blueberries to the remaining filling in the food processor and blend into a smooth, blueberry-flecked cream. Take the tin out of the freezer and spread the blueberry cream over the first layer. Freeze the whole thing for a few hours, or overnight until firm.
  6. Thaw for 15 or 20 minutes, slice, serve, enjoy! Refrigerate or freeze leftovers.