Showing posts with label comfort food. Show all posts

Saturday, December 6, 2014

WARMING BUCKWHEAT, BEAN SPROUTS, AND SWEET POTATOES

After a number of weeks of travelling for work and eating out, I came back to SF looking forward to my regular workouts and home-cooked meals. I got that, and a week of cold rainy gloomy weather! I wanted to make something that's high on the feel-good factor - inside and out. Something that's not raw, not bread, not any grain, not eggs, definitely not meat, and something that makes the whole kitchen smell divine and home-y. Enter this dish...


This perfect-for-cold-rainy-weather dish takes very little time but is nourishing and big on flavour. And, the sweet potatoes, mung bean sprouts and buckwheat combination will keep you full without weighing you down. If you're diabetic or otherwise watching your sugar, use cauliflower instead of sweet potato.


Buckwheat is amazing! Contrary to the name, it's not related to wheat and in fact it's not even a grain. It's a seed - like quinoa. It's delicious, easy to cook, light on the digestive system, gluten-free, low glycemic index which makes it suitable for diabetic diets, and is a complete protein since it contains all essential amino acids. And if you must have a gilded lily: like artichoke flowers, buckwheat flowers smell incredible and make a luscious honey with floral notes. It's the bees knees!

Mung beans sprout really fast and since they're a small bean, they're easy on the stomach even when sprouted for just a day. Growing sprouts is really easy, and if you haven't grown them before, you can see my post here on growing sprouts.

Warming Buckwheat, Bean Sprouts, and Sweet Potatoes
makes: 4 main servings

- 1/2 cup buckwheat
- 2 cups mung bean sprouts (or sprouts from any other small bean/legume)
- 2 cups cubed sweet potatoes
- 1 small onion, diced
- 1 clove garlic, minced
- 1 tsp. minced ginger
- 1 tsp. black pepper, freshly ground
- 1 tsp. cayenne powder
- 1 tsp. turmeric
- 1 tsp. coriander powder
- 1 tsp. cumin powder
- 1 tsp. garam masala (or any curry powder)
- 2 tsp. mustard seeds
- 3 tsp. salt
- 1 tsp. coconut oil (or ghee, or any neutral oil - *not* olive oil)
- 1-1/2 cups water
- 1 tbsp. ghee
- 1 tbsp. lemon juice
  1. Preheat the oven to 425 F/220 C. Rinse the buckwheat well and soak in a bowl in plenty of water. In a small bowl mix all the dry spices except the garam masala and mustard.
  2. In a large bowl, toss together the sweet potatoes, 1 tsp. salt, 1-2 tsp. spice mixture, coconut oil, and 1 tbsp. water so that the sweet potatoes are evenly coated. Transfer to a baking tray and bake for 25 - 30 min. or until the sweet potatoes are cooked.
  3. While the sweet potatoes are baking, heat the ghee in a deep pan, saucepan or Dutch oven on medium heat. Add the mustard seeds and when they start to pop, turn the heat to medium-low, add the onion, garlic, and ginger and saute until the onion is mostly translucent.
  4. Add in the spice mixture and bean sprouts. Stir well and cook for 3 - 4 minutes. Drain and add the buckwheat. Turn the heat up to medium-high, stir everything well and cook for 1 - 2 minutes. Add the garam masala and 1 cup  of water. Cover the pan, turn the heat down to low or medium-low and cook for 12 - 15 minutes. Take the lid off, give everything a quick stir - if you can still see water, turn the heat up to medium-high and cook the water off.
  5. Turn off the heat and mix in the the sweet potatoes, lemon juice and remaining salt. Taste and adjust salt if needed.
  6. Enjoy this delicious warming dish on its own or with a quick salad of diced cucumbers mixed into 1/2 cup of yogurt! Refrigerate leftovers for up to a day - max 2 days.

Monday, September 15, 2014

SPICY SICHUAN NOODLES


These noodles - a riff on the very popular dan dan noodles - are fiery and addictive! Don't be put off by the ingredient list. Although they sound hard to find, Sichuan pepper, Chinese pickled vegetables, and preserved chillies are easily found in any Asian grocery store, or even at a well-stocked regular grocery store.


Use any greens you'd like - this time I used sweet potato leaves from my garden but in the past I've also used sliced bok choy and spinach. I like spice but not infernal heat, so for some people these might not be spicy enough - simply adjust the spice level to your taste!

Spicy Sichuan Noodles
makes: 4 servings

- 1 recipe homemade noodles (or 1 packet of dried or fresh noodles of your choice)
- 3 - 4 dried red cayenne peppers (or any other dried red chillies)
- 4 scallions, sliced
- 3 cloves garlic, minced
- 1 in. piece of ginger, peeled and minced
- 1 jalapeño, sliced
- 2 carrots, julienned
- 1 zucchini, julienned
- 1 cup bean sprouts
- 1 cup sweet potato leaves (or any other greens)
- 3 tbsp. pickled mustard greens and/or bamboo shoots, chopped (optional)
- 1 tbsp. crushed red pepper (flakes)
- 2 tbsp. rice wine (sake is fine) (optional)
- 2 tbsp. peanut oil (or safflower oil, but not olive oil!)

Sauce:
- 1 tbsp. sesame oil
- 1 tbsp. sesame paste (tahini is fine)
- 1-2 tbsp. Chinese preserved chillies (or red pepper flakes soaked in 1 tbsp. distilled vinegar)
- 1/4 cup soy sauce
- 1 tbsp. sugar
- 1/4 cup water
- 1 tbsp. Sichuan pepper, crushed (optional)
- 1 tsp. corn starch (optional)

Garnish:
- 1/2 cup bean sprouts
- 1 cucumber, julienned
  1. In a small bowl mix all the ingredients for the sauce and set aside.
  2. In a large pot heat water to a rolling boil. Add the noodles and boil for 7 - 10 min. till they are al dente or cooked to your preference. Drain the noodles.
  3. On medium-high, heat the peanut oil in a large pan. Add the dried peppers, scallions, garlic, ginger, and jalapeño, and give it a quick stir. Add the carrots, zucchini, sweet potato leaves, and pickled vegetables if using, and sauté, stirring constantly. Deglaze the pan with the rice wine. Add the soy sauce and crushed red pepper and stir.
  4. Add the noodles and sauce, turn the heat to high and quickly stir everything together. Turn the heat off.
  5. Serve in bowls, garnished with bean sprouts and julienned cucumber.

HOMEMADE NOODLES


Homemade Noodles
makes: 4 servings

- 3/4 cup whole wheat flour
- 3/4 cup all-purpose flour
- 3/4 tsp. baking soda
- 1 tsp. salt
- 1 egg
- 1/4 cup cold water
- 1/4 cup cornstarch (or tapioca starch)
  1. Mix the flours, salt, and baking soda in a large bowl. Make a well in the center of the dry mix and add the egg. Mix the egg into the flour using a fork or your fingers, till you have a shaggy dough. Add water 1 tbsp. at a time and mix till you have a stiff dough. Knead really well - about 10 minutes - to make the dough supple and smooth. Cover and let it rest at room temperature for at least 15 min., up to 2 hrs. Dust your hands with cornstarch and divide the rested dough into 4 pieces.
  2. If using a pasta roller: Take one piece of dough and roughly shape it into a rectangle. Roll it through the pasta roller at the widest setting. Fold into thirds like a letter and roll it through again. Repeat two more times. After that, roll through without folding, and at successively narrower settings till you have sheets of the desired thickness (you don't want to go too thin or the dough will tear, but you don't want to be too thick because the noodles will swell slightly when cooked). Lightly dust with corn starch as needed, if the dough gets sticky. Hang the rolled sheet of dough over a hanger or the back of a chair to dry for 10 - 15 min. Repeat with the rest of the dough. On the pasta maker select the noodle width you want, and pass one sheet at a time through the cutter to make noodles. Gather the cut noodles into a loose pile and set aside while you cut the remaining sheets into noodles.
  3. If rolling by hand: flatten one piece of the dough and dust lightly with corn starch. Roll into a circle or rough rectangle, as thin as possible without tearing the dough. Let it dry for 10 - 15 min. Repeat with the remaining dough. Working with one sheet of rolled dough at a time, fold the sheet into thirds and use a sharp knife to cut evenly into noodles as wide or narrow as you want. Gather the cut noodles into loose piles and set aside while you cut the rest of the rolled dough into noodles.
  4. Steam the noodles for 5 - 7 minutes. Allow to cool. If not cooking immediately, store in a covered container in the fridge for up to two days. If cooking immediately, see Step 5 below.
  5. Finish cooking the noodles by boiling for 7 - 10 min. and enjoy in your favourite recipe!

Sunday, September 14, 2014

IRAQI AUBERGINE AND LAMB STEW


My favourite cuisines other than Gujarati are - in no particular order - French, Arabic (from Levantine countries), Afghani, Persian, Mexican, Greek, Italian, and Japanese. I love cuisines that effortlessly combine ingredients to create deep complex flavours. Especially cuisines that have a variety of vegetarian foods, since I am mostly vegetarian and seldom cook meat at home.

This delicious sweet and tangy Iraqi lamb stew is not vegetarian, but it contains a small enough bit of meat to remain light on the body. It's also very versatile - this time I made it with lamb because I needed to use up some leftover ground lamb but I usually make it vegetarian. I find that the split yellow peas add enough meatiness to make a substantial stew - it makes a great meal with bread or rice and of course, a small crisp salad. 

Iraqi Aubergine and Lamb Stew
makes: 4 - 6 servings

- 1 large aubergine, cubed
- 2-1/2 tbsp. salt
- 4 tbsp. olive oil
- 1 med. zucchini, cubed
- 1 potato, cubed
- 2 carrots, cubed
- 1 bulb fennel, cubed
- 1/3 lb. ground lamb
- 1 large onion, diced
- 2 cloves garlic, minced
- 4 tbsp. pomegranate molasses
- 1/2 cup dried yellow split peas, soaked in cold water for 8 - 12 hours
- 4 dried red chillies
- 2 tsp smoked paprika
- 1 tbsp. chilli flakes or powder
- 2 tsp ground cumin
- 1 tsp ground coriander
- 1/2 tsp ground cinnamon
- 1/2 tsp ground nutmeg
- 1/4 tsp ground cardamom
- 1/4 tsp ground cloves 
- 1 tsp freshly ground black pepper

  1. In a colander, mix 2 tbsp. salt into the aubergine cubes. Let the aubergine sit for about 30 minutes until the bitter juices run out. Squeeze the cubes to remove any water that didn't drain out, and pat dry.
  2. Preheat the oven to 375 F / 190 C. Mix the aubergine cubes with 2 tbsp. olive oil and bake for 15 - 20 min. or until tender.
  3. While the aubergine is baking, heat the remaining 2 tbsp. of the olive oil in a large pan on medium heat. Add the dried chillies, onion, and garlic and sauté till the onion is translucent.
  4. Add the lamb and cook for a few min. till the lamb is evenly browned, breaking up large chunks with a spoon. Add the split peas, all the vegetables (except the aubergine, which is still baking!) and the spices and stir to mix well. Turn the heat to high and add 2 cups water. Cook on high for 5 min. Reduce the heat to low, stir in the baked aubergine, pomegranate molasses, and remaining 1/2 tbsp. salt and cook till the vegetables are done, about 20 - 30 min., stirring occasionally.
  5. Turn the heat off and adjust salt if needed. Serve with any Arabic bread or rice.

Friday, August 1, 2014

SPROUTED RICE AND VEGETABLE LAVER (SEAWEED) ROLLS


A gluten-free, quick, and light meal that also makes an excellent snack! I did not photograph anything until after I finished rolling everything, so I drew an illustration - hopefully it helps! - to show the arrangement of rice and vegetables (or fish, if you want) on the laver.


Sprouted Rice and Vegetable Laver (Seaweed) Rolls
makes: 2 rolls, 12 - 16 pieces

- chipotle cashew cream sauce, for dipping
- 1 cup cooked sprouted brown rice (or any cooked white rice, as long as it's sticky)
- 1 tbsp. apple cider vinegar (or rice wine vinegar)
- 1 tsp. sugar
- 1 tsp. salt 

- 1 grated carrot
- 1 julienned cucumber
- 1 julienned jalapeño (deseed if you want no spice)
- 2 leaves of romaine lettuce, middle vein removed (otherwise the laver will break)
- 2 sheets laver (aka nori, easily found in any Japanese or Korean store or Whole Foods)
- 1 tbsp. toasted sesame seeds (raw sesame seeds are ok as well)
- 2 tbsp. water in a small container

  1. In a bowl, mix the rice, vinegar, salt, and sugar. Arrange the prepared vegetables on a plate within easy reach. Toast the laver by quickly passing each sheet over a low flame - you may need to do this a couple of times to cover a maximum area of each sheet, corners and all, but without scorching the laver. So move swiftly and don't let any one area of the laver dwell over the flame for too long.
  2. Place a sheet of laver on a cutting board or other flat surface and spread half of the rice from the bottom edge to about 1 - 1-1/2 in. short of the top edge (see the illustration above), and arrange half of the vegetables on the rice in this order: lettuce, carrot, cucumber, jalapeno. Sprinkle with half of the sesame seeds. 
  3. Lift the bottom edge of the laver and roll everything into a tight roll. When you reach the bare (riceless) end of the laver, dip a finger in water and lightly wet the edge of the laver and finish rolling. The water will help the laver stick so the roll remains closed and doesn't unravel.
  4. Cut each roll into 6 - 8 pieces and serve with this cashew cream sauce, or your favourite sauce. Store leftovers in the fridge for up to one day.

Tuesday, July 15, 2014

GINGER BERRY CHIA PUDDING


I like to have this pudding at room temperature not refrigerated. In Ayurveda, refrigerated foods are considered counter-productive to digestive fire, especially cold breakfast foods since that is the first - and most important - meal of the day after an hours-long fast. Even before I delved into Ayurveda beyond the normal day-to-day that's incorporated into life in India, I was never a fan of ice-cold food and beverages. Instead of cooling me down, they shocked my system and they still do. I have always preferred room temperature water, and even in the summer, I don't care for the chill of the AC. My meals are either warm or at room temperature, never cold. Smoothies and juices included.

This chia pudding is perfectly flavoured with ginger without it being overpowering, and is a refreshing start to the day. Sometimes I have it at dinner and it's equally refreshing and satisfying. As always, use any combination of seasonal fruits you like. Since berries are never as sweet as bananas, mangoes, figs, etc. I like to add maple syrup or raw honey to the oats blend. Because otherwise you'll have a flavourless chia gel that you'll definitely be able to eat, but it won't really be as well-rounded in flavour as when you add a bit of maple syrup or raw honey. I know food should be thy medicine, but it doesn't need to taste like medicine!

Ginger Berry Chia Pudding
makes: 1 serving

- 1/4 cup blueberries
- 1/4 cup raspberries, halved
- 1/2 cup cherries, pitted and quartered
- 1/8 cup oats
- 1 cup water
- 2 tsp. Grade B maple syrup or raw honey
- 3 tbsp. chia seeds
- 1 tsp. grated ginger
- 1 roasted tbsp. pumpkin seeds
  1. Blend the oats and 1/2 cup water into a smooth "milk". Add the maple syrup or honey if using, and the other 1/2 cup water and blend to mix.
  2. Put the chia seeds in a medium bowl and mix in the oat "milk" and grated ginger. Set aside for 10 - 15 minutes, stirring occasionally to break up any chia lumps. If the mixture is too gelatinous, mix in a couple of tbsp. of water.
  3. In a serving container, layer as follows: blueberries, 1/2 of the ginger chia mixture, raspberries, remaining chia mixture, cherries, pumpkin seeds.
  4. Serve immediately or leave overnight (this doesn't need to be refrigerated since there's no milk in it).

Wednesday, July 2, 2014

TACOS: ZUCCHINI FLOWERS AND FIDDLEHEAD FERNS


Zucchini flowers are most commonly served stuffed and fried. They're delicious that way, but the beautiful colours of the flowers are hidden under the batter and for me, food is about taste and looks. Not fake gimmicky presentations but just the natural good looks of fresh seasonal ingredients. Like the pretty zucchini flowers and ferns in these tacos!


Fiddlehead ferns are the unopened tips of Ostrich ferns that would turn into fronds when they open. They have a very short season in the Spring and don't last too long in the fridge so it's best to get some when you see them in the market (or in the wild if you know how to forage for the right kind of fern), and enjoy them right away, in a day or so at most. Fiddleheads upset some peoples' stomachs but they don't bother me at all. I don't like boiling them because that takes away the texture and taste. So I roast them and they're just perfect!


Zucchini flowers and fiddleheads are quite simple to clean. Zucchini flowers: Remove the pistil and stem from each zucchini flower and gently rinse each flower inside and out. Put the washed flowers on a large dry kitchen towel to soak up water.

Fiddlehead ferns: Remove the outer chaff - brown papery skin - from the ferns and rinse thoroughly. During rinsing remove any remaining chaff and put the washed ferns in a large dry kitchen towel to soak up water. 


These tacos are full of spring flavours and colours! And they go with virtually any salsa, including salsa verde with chiles de arbol, avocado and roasted tomatillo salsa, spicy roasted tomato salsa, guacamole, or even just sliced serranos, avocado, onion, and lime juice.


Tacos: Zucchini Flowers and Fiddlehead Ferns
makes: 6 tacos

- 1/2 cup salsa: salsa verde (recipe here and here) or roasted tomato salsa
- 1 cup fiddlehead ferns, cleaned and washed
- 10 - 12 zucchini flowers, pistils removed and wiped cleaned with a damp towel
- 1 small zucchini, cut into small cubes
- 1/2 medium onion, diced
- 2 cloves garlic, minced
- 3 tsp. olive oil
- 2 tsp. salt
- 1 tsp. paprika
- 1 tsp. cumin
- 1 tsp. Mexican oregano (Italian or Greek will do if you don't have Mexican)
- 12 small corn tortillas (ask the store for tortillas for tacos, which are smaller)
- 8-10 sprigs cilantro (1/4 cup coarsely chopped)
- 1/4 cup finely shredded purple cabbage (or red or green cabbage)
- 1 lime, cut into wedges

Optional garnishes: finely shredded carrots, sliced avocado, onions, jalapeno, pickled vegetables "en escabeche"
  1. Preheat the oven to 400 F/200 C. Lightly grease a baking tray or line with parchment paper.
  2. Toss the cleaned fern heads with 1 tsp. olive oil, 1 tsp. salt, and paprika. Transfer to the prepared baking tray and roast for 15 min., turning once midway. Remove from the oven.
  3. In a pan, heat the remaining 2 tsp. olive oil and add the onion and garlic. Sauté until translucent then add the zucchini, cumin, oregano, and salt. Cook till the zucchini is slightly soft and add the zucchini flowers. Stir the flowers in, and sauté for a minute. Turn the heat off.
  4. Prep the tacos: Transfer the roasted fern heads and sautéed zucchini and flowers into serving bowls. Arrange the cabbage, cilantro, and any optional garnishes on a platter. Warm the tortillas.
  5. Assemble the tacos: Divide the tortillas among plates, stacking 2 per taco. Top with the roasted fern heads and sautéed vegetables, cilantro, and cabbage. Drizzle 1 tbsp. each of the chipotle cashew cream sauce and salsa on each taco.
  6. Serve immediately with a wedge of lime, additional salsa, cashew cream sauce, and optional garnishes.

Thursday, June 26, 2014

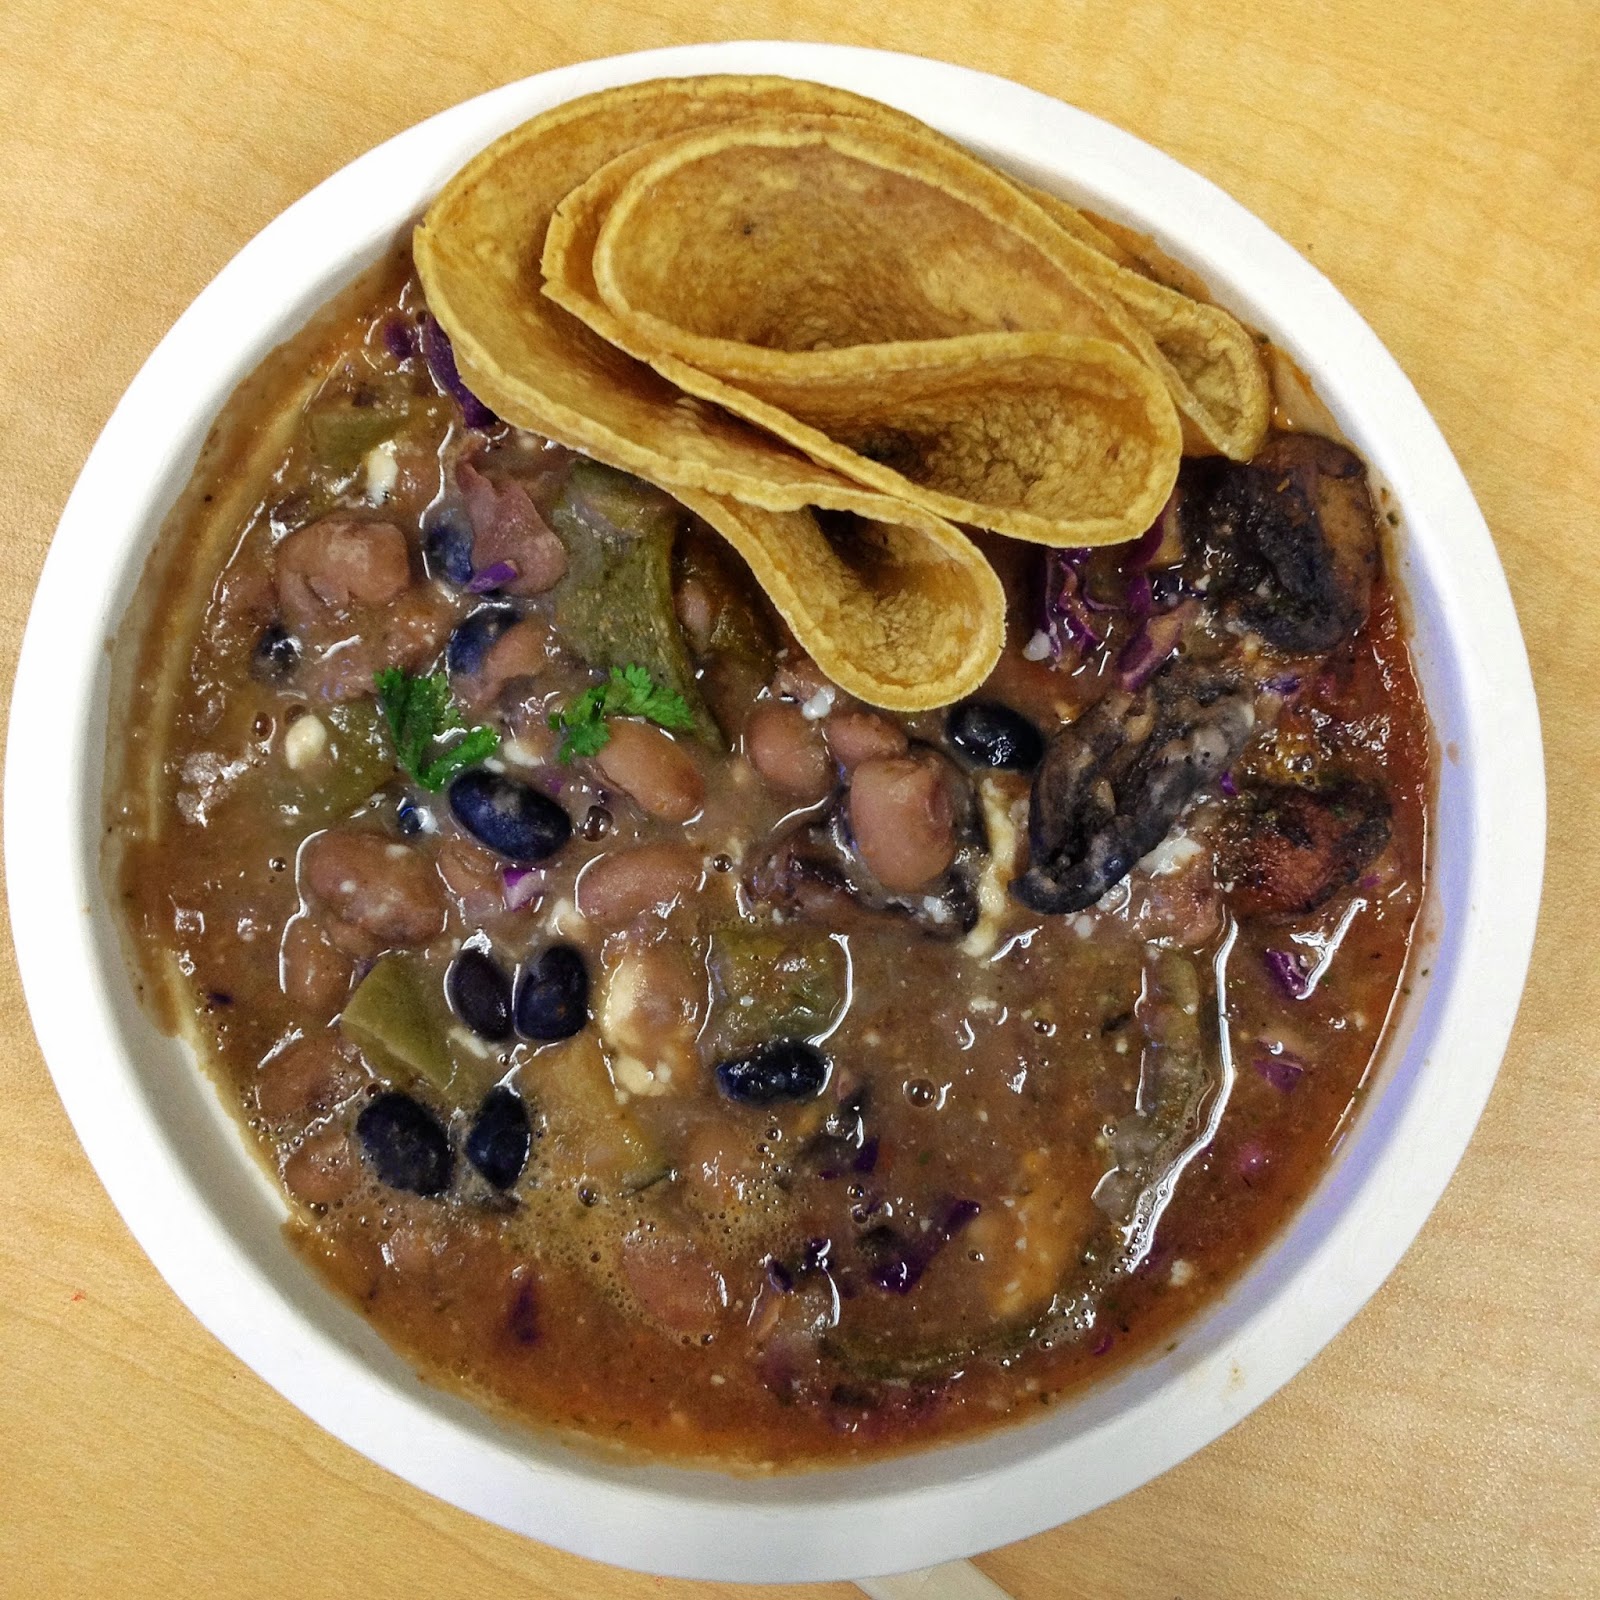
MEXICAN BEANS: FRIJOLES DE OLLA


Frijoles de olla: free-HOLays de Oyya

An olla is a clay pot used for cooking soups, stews, and beans in Mexico. For these beans you can use a regular deep stockpot or Dutch oven or the faster way that I use: a pressure cooker. Traditionally, beans are also cooked with lard but I never have lard at home and I don't want to buy some just for the beans. So I cook them in oil and they're just fine. If I were using bacon for something, I'd render fat from bacon and use that and the beans would have a mind-blowing lard-y flavour. If you have good real lard in your kitchen, definitely use that to cook these beans!


The beans are not only a side dish, but can be used for so many other dishes: enfrijoladas, borracho or "drunken" beans, ranch-style beans, refried beans, bean soup, and on top of rice or nachos.


In the north and central parts of the country, pinto beans are popular, whereas black beans are more commonly served in the south. I had a bit of both, so I mixed them and I love the outcome.


Mexican Beans: Frijoles de Olla

makes: 8 - 10 servings


- 2 cups dried pinto beans, soaked overnight and drained 
- 1 cup black beans, soaked overnight and drained
- 1 medium white onion, peeled and chopped 
- 2 large garlic cloves, peeled and chopped 
- 2 tablespoons olive or vegetable oil
- 2 sprigs epazote (optional) 
- enough water to cover the beans by 1 inch 
- salt to taste

Garnishes: chopped onions, crumbled cotija cheese, sliced jalapeños, serranos, or chiles de arbol, chopped cilantro, lime wedges, chopped cabbage
  1. Place the beans in the pressure cooker with the onion, garlic, oil, epazote and water. Do not add salt until the beans have finished cooking. Cover and pressure cook until done. Add salt to taste.
  2. Transfer the beans to a serving bowl. Set out the garnishes on the table so each person can garnish to taste.

Sunday, June 1, 2014

KOREAN SQUASH PANCAKE: HOBAKJEON


As I've said before, I *love* Korean food. Especially snack-y things like these pancakes which are quick, easy, vegetarian, and so summery with the zucchini squash. 


Korean Squash Pancake: Hobakjeon
makes: 1 12 in. pancake (1 - 2 servings)

Pancake:
- 2 medium zucchini (or other summer squash), shredded
- 1 tbsp. salt 
- 4 tbsp. finely diced onion
- 2 tbsp. minced cilantro
- 1 tbsp. minced Thai green chile (optional)
- 1 tbsp. fish sauce (or 1 tsp. salt)
- 1/2 cup AP flour (or a mix of rice flours, or your favourite gluten-free flour mix)
- 1/2 cup water
- 4 tbsp. oil

Soy Dipping Sauce: here
  1. In a bowl, mix the salt and shredded zucchini and set aside for 15 - 30 minutes.
  2. The zucchini will release a lot of water - drain the zucchini. Squeeze well by the fistful to remove all the water from the zucchini and place in a large bowl.
  3. To the zucchini, add all the other ingredients to make a thick batter. If the batter is too dry, add water 1 tbsp. at a time till you have a thick batter.
  4. Over medium heat, heat the oil in a 12 in. skillet and swirl to evenly coat the skillet. Add the zucchini batter and spread evenly into a large pancake.
  5. After the edges have browned and crisped up, lift an edge to let the oil under the pancake to crisp up the center and cook for 4 - 5 minutes.
  6. Flip the pancake over and cook for 3 - 4 minutes.
  7. Flip the pancake over again and cook for an additional 2 - 3 minutes.
  8. Transfer to a plate or cutting board and cut into 6 wedges. Serve with kimchi or soy dipping sauce.

KOREAN GREEN PEPPER PANCAKE: GOCHUJEON


I love Korean food... all the various types of kimchi, banchan, stews, rice dishes, porridge (jook), dumplings (mandu), pancakes (jeon), and everything else.

Korean pancakes are a favourite snack - there are many varieties, they are a total snap to make, and go with everything including themselves! I love whipping them up when I'm tall on hunger and short on time, especially on those Friday nights at the end of a long week when I don't feel like slaving over dinner and just want a drink or two with a delish snack. There are so many kinds of Korean pancakes - seafood, meat, squash, potatoes, mung beans, and green peppers, like the ones here.


Korean peppers (in the photo above) are mild and fresh tasting with a crisp texture. If you can't find them in your grocery store, use capsicum or a mix of capsicum and deseeded jalapeños. Capsicum and jalapeños have a thicker skin than Korean peppers, but they'll work in this recipe. Korean peppers are not spicy so if you want a spicy pancake, add a minced serrano, Thai chile, or green chile de arbol to the batter.

(Fun fact: Chiles de arbol - dried red or fresh green - are the variety commonly used in Indian cooking!)


Adapted from here.
Korean Green Pepper Pancake: Gochujeon
makes: 1 12 in. pancake (serves 1 - 2 people)

Pancake:
- 1 cup chopped Korean green peppers (~4 - 5 peppers)
- 4 tbsp. finely diced onion
- 2 tbsp. minced cilantro
- 1 tbsp. fish sauce (or 1 tsp. salt)
- 1 tbsp. chopped Thai chile or other spicy green chile (optional)
- 1/2 cup AP flour (or a mix of rice flours, or your favourite all purpose gluten-free flour)
- 1/2 cup water
- 4 tbsp. oil

Soy Dipping Sauce - Mix in a small bowl
- 4 tbsp. soy sauce (or gluten-free soy sauce: tamari)
- 2 tbsp. rice vinegar (unseasoned)
- 1 tsp. sesame oil
- 1/4 tsp. sugar
- 1 small clove garlic, minced
- 2 tbsp. finely minced onion
- 1 tbsp. finely minced red or green Thai chile pepper
- 1 tsp. toasted sesame seeds
  1. Put all the ingredients in a large bowl and mix well into a thick batter. If the batter is dry, add water 1 tbsp. at a time till you have a thick batter, but don't make the batter too watery.
  2. Heat the oil a 12 in. skillet and swirl around to evenly coat the skillet.
  3. Pour the batter into the skillet and use a spoon to flatten into a pancake.
  4. Cook till the edges brown and crisp up, then lift an edge of the pancake to let the oil get under the pancake so the centre can crisp up too.
  5. Once the pancake edges are firm, flip the pancake over and cook for 3 - 4 minutes until the pancake is fully cooked to the centre.
  6. Flip over once more and cook for 2 - 3 min. then transfer to a plate or cutting board.
  7. Cut into 6 wedges and serve with any kind of kimchi, soy dipping sauce, or both.

Wednesday, May 7, 2014

NIMONA: GREEN PEAS AND FRESH GARBANZO CURRY


This recipe is adapted from Banaras ka Khana - a wonderful collection of Banarasi recipes. Nimona is common comfort food throughout North India, but it has variations from region to region. This Banarasi nimona sounds plain but the spices combined with the ghee make a complex and fragrant dish with a really incredible lingering - not spicy - flavour of black pepper. And it's full of Spring with the fresh green peas and green garbanzos! It's also simple enough that you don't need spices that aren't readily available in any grocery store. I like to add a sprinkle of lemon juice just before eating to brighten up the flavours even more.

The photos are a bit rubbish but I was in a hurry...


Nimona: Green Peas and Fresh Garbanzo Curry
makes: 3 generous servings

- 1 cup shelled green peas
- 1 cup shelled fresh garbanzo beans
- 1 green chile de arbol or Thai green chile (or chile Serrano - in a real pinch)
- 1 in. piece ginger
- 2 cloves garlic (optional)
- 1 tbsp. ghee (or butter - don't use oil or you'll be making a different dish!)
- 1 tsp. cumin seeds
- 1 bay leaf
- 1 tsp. cumin powder
- 1 tsp. coriander powder
- 1 tsp. freshly ground black pepper
- 1 tsp. salt
- 1/4 cup coarsely chopped cilantro
- 1-1/2 cups water
  1. In a food processor, coarsely crush the green peas, garbanzo beans, ginger, chile, and garlic (if using).
  2. In a pan, heat the ghee on medium and add the bay leaf and cumin seeds. When the cumin sizzles, add the powdered spices.
  3. Add the coarsely crushed vegetables. Stir to combine and cook for about 2 minutes. Turn the heat to low and cook till very fragrant, about 3-4 minutes, making sure the vegetables don't stick to the pan.
  4. Add water and cook till the peas and garbanzos are fully cooked. Turn off the heat, add the salt and cilantro and stir to combine.
  5. Serve hot with rice or roti.

Friday, May 2, 2014

MILLET WITH DANDELION PESTO AND ROASTED VEGETABLES: GLUTEN-FREE


Millet is an ancient grain high in protein, essential nutrients, and heart-healthy soluble fibre. I really love millet - the whole grain and flour both. In addition to being gluten-free, Ayurvedically, millet is sweet, dry, light, and rajasic/sattvic. I.e. it won't contribute to mucous formation and heaviness in the body that grains like wheat do. Millet is a mild goitrogen though, so if you have thyroid problems, avoid eating it every day. I generally don't eat any grain everyday or for a number of days in a row. I like to vary the grains I eat, and also throw in some grain-free days a couple of times a week. In general, apart from unfermented soy, I don't exclude any bean, grain, or legume from my diet.

I also don't subscribe to food trends - like quinoa. Not that quinoa is bad, but I don't like its taste, texture, appearance, and effect on my body, and although I don't yet know it, there must be a reason why my body doesn't like quinoa. Over the years I've learnt to listen to my body - it tells me things for a reason, and it's always been right. As an aside, quinoa and millet both have high protein content and are nutritionally comparable.

Soaking grains helps neutralise phytic acid which can interfere with the absorption of nutrients in the body. Although millet has among the lowest phytate content, it's still good practice to soak it and neutralise the little phytate content it has. Toasting isn't essential but it brings out a delicious nuttiness in the millet - if you don't have time to toast, just soak the millet and carry on with the recipe.


Rutabagas are a member of the cruciferous family, as evidenced by the slightly sulfuric cabbage-y smell when you cut into one. Also like cruciferous vegetables, rutabaga can be eaten raw but when cooked it develops a wonderful hint of sweetness that I really love! It's a terrific complement to roasted sweet potatoes, potatoes, and carrots.

And dandelions... as I've said before, they're dismissed off as weeds but really are quite an excellent and nutritious green. I really love the mild bitterness of the dandelion and in spring when they're in season, I have them quite regularly in my smoothies and sautéed as a green. The dandelion pesto lasts forever in the freezer - I make a large batch then freeze in a couple of smaller containers and use as a sandwich spread, on eggs, in a rice salad, on salmon, pasta... just like any other pesto. 


Millet with Dandelion Pesto and Roasted Vegetables
makes: 4 - 6 servings (1-1/2 - 1 cups per serving)

Millet:
- 1/2 cup dandelion pesto
- 1 cup millet, toasted in a pan and soaked for 8 - 24 hours
- 2-1/2 cups water
- 1 shallot, sliced (or small red onion)
- 3 cloves garlic
- 1 capsicum, diced (any colour)
- 1 tbsp. caraway seeds
- 1 tbsp. coconut oil
- 1/4 cup chopped cilantro (or parsley)
- salt, to taste
- freshly ground black pepper, to taste

Roasted Vegetables:
- 1 medium sweet potato, cut into chunks
- 2 medium potatoes, cut into chunks
- 2 medium carrots, cut into chunks
- 1 medium rutabaga, peeled and cut into chunks
- 1 cup cherry tomatoes
- 2 cups cauliflower florets
- 1 medium zucchini, cut into chunks
- 1 tbsp. cumin seeds
- salt, to taste
- freshly ground black pepper, to taste
- 2 tbsp. coconut oil

  1. Preheat the oven to 425 F/220 C.
  2. Roast the vegetables: in a large bowl toss the sweet potato, potatoes, carrots, and rutabaga with 1 tbsp. coconut oil, 1/2 tbsp. cumin seeds, salt, and pepper. Grease a baking sheet with 1/2 tbsp. coconut oil and spread the vegetables on it in a single layer. Roast for 20 - 25 minutes or until cooked (the rutabaga won't become soft like potatoes will, but it's fine because rutabaga can even be eaten raw).
  3. In the same bowl used for tossing the root vegetables, toss the cauliflower, tomatoes, and zucchini with the remaining 1/2 tbsp. coconut oil, 1/2 tbsp. cumin seeds, salt, and pepper.
  4. Remove the roasted root vegetables from the oven and transfer to a clean bowl. In the same baking tray, spread the tomatoes, cauliflower and zucchini in a single layer and roast at 400 F/200 C for 15 - 20 minutes or until the cauliflower is just cooked - it should not be mushy. Remove from the oven and add to the bowl with the root vegetables. Turn the oven off.
  5. Cook the millet: While the vegetables are roasting, bring the 2-1/2 cups water to a rolling boil in a saucepan and add the millet. Give it a quick stir and continue to boil for 3-5 minutes. Turn the heat down to low, cover the pan and cook for another 15 minutes or until the millet is soft and fully cooked.
  6. While the millet is cooking, heat the coconut oil in a deep skillet or wide pan on medium, and add the caraway seeds. When the seeds start to sizzle, add the shallot, garlic, and capsicum and stir. Turn the heat to low and sauté till the vegetables are a bit soft, adding 1/4 cup water if needed to keep them from sticking since we're using just 1 tbsp. oil. When the vegetables are sautéed, add in the cooked millet, dandelion pesto, and chopped cilantro, and mix. Add salt and pepper to your taste.
  7. Add the roasted vegetables and mix well before serving. (To reheat in a microwave: sprinkle a bit of water and cover the bowl then heat).