Showing posts with label GF. Show all posts

Sunday, June 1, 2014

KOREAN SQUASH PANCAKE: HOBAKJEON


As I've said before, I *love* Korean food. Especially snack-y things like these pancakes which are quick, easy, vegetarian, and so summery with the zucchini squash. 


Korean Squash Pancake: Hobakjeon
makes: 1 12 in. pancake (1 - 2 servings)

Pancake:
- 2 medium zucchini (or other summer squash), shredded
- 1 tbsp. salt 
- 4 tbsp. finely diced onion
- 2 tbsp. minced cilantro
- 1 tbsp. minced Thai green chile (optional)
- 1 tbsp. fish sauce (or 1 tsp. salt)
- 1/2 cup AP flour (or a mix of rice flours, or your favourite gluten-free flour mix)
- 1/2 cup water
- 4 tbsp. oil

Soy Dipping Sauce: here
  1. In a bowl, mix the salt and shredded zucchini and set aside for 15 - 30 minutes.
  2. The zucchini will release a lot of water - drain the zucchini. Squeeze well by the fistful to remove all the water from the zucchini and place in a large bowl.
  3. To the zucchini, add all the other ingredients to make a thick batter. If the batter is too dry, add water 1 tbsp. at a time till you have a thick batter.
  4. Over medium heat, heat the oil in a 12 in. skillet and swirl to evenly coat the skillet. Add the zucchini batter and spread evenly into a large pancake.
  5. After the edges have browned and crisped up, lift an edge to let the oil under the pancake to crisp up the center and cook for 4 - 5 minutes.
  6. Flip the pancake over and cook for 3 - 4 minutes.
  7. Flip the pancake over again and cook for an additional 2 - 3 minutes.
  8. Transfer to a plate or cutting board and cut into 6 wedges. Serve with kimchi or soy dipping sauce.

KOREAN GREEN PEPPER PANCAKE: GOCHUJEON


I love Korean food... all the various types of kimchi, banchan, stews, rice dishes, porridge (jook), dumplings (mandu), pancakes (jeon), and everything else.

Korean pancakes are a favourite snack - there are many varieties, they are a total snap to make, and go with everything including themselves! I love whipping them up when I'm tall on hunger and short on time, especially on those Friday nights at the end of a long week when I don't feel like slaving over dinner and just want a drink or two with a delish snack. There are so many kinds of Korean pancakes - seafood, meat, squash, potatoes, mung beans, and green peppers, like the ones here.


Korean peppers (in the photo above) are mild and fresh tasting with a crisp texture. If you can't find them in your grocery store, use capsicum or a mix of capsicum and deseeded jalapeños. Capsicum and jalapeños have a thicker skin than Korean peppers, but they'll work in this recipe. Korean peppers are not spicy so if you want a spicy pancake, add a minced serrano, Thai chile, or green chile de arbol to the batter.

(Fun fact: Chiles de arbol - dried red or fresh green - are the variety commonly used in Indian cooking!)


Adapted from here.
Korean Green Pepper Pancake: Gochujeon
makes: 1 12 in. pancake (serves 1 - 2 people)

Pancake:
- 1 cup chopped Korean green peppers (~4 - 5 peppers)
- 4 tbsp. finely diced onion
- 2 tbsp. minced cilantro
- 1 tbsp. fish sauce (or 1 tsp. salt)
- 1 tbsp. chopped Thai chile or other spicy green chile (optional)
- 1/2 cup AP flour (or a mix of rice flours, or your favourite all purpose gluten-free flour)
- 1/2 cup water
- 4 tbsp. oil

Soy Dipping Sauce - Mix in a small bowl
- 4 tbsp. soy sauce (or gluten-free soy sauce: tamari)
- 2 tbsp. rice vinegar (unseasoned)
- 1 tsp. sesame oil
- 1/4 tsp. sugar
- 1 small clove garlic, minced
- 2 tbsp. finely minced onion
- 1 tbsp. finely minced red or green Thai chile pepper
- 1 tsp. toasted sesame seeds
  1. Put all the ingredients in a large bowl and mix well into a thick batter. If the batter is dry, add water 1 tbsp. at a time till you have a thick batter, but don't make the batter too watery.
  2. Heat the oil a 12 in. skillet and swirl around to evenly coat the skillet.
  3. Pour the batter into the skillet and use a spoon to flatten into a pancake.
  4. Cook till the edges brown and crisp up, then lift an edge of the pancake to let the oil get under the pancake so the centre can crisp up too.
  5. Once the pancake edges are firm, flip the pancake over and cook for 3 - 4 minutes until the pancake is fully cooked to the centre.
  6. Flip over once more and cook for 2 - 3 min. then transfer to a plate or cutting board.
  7. Cut into 6 wedges and serve with any kind of kimchi, soy dipping sauce, or both.

Tuesday, May 27, 2014

MENDIANTS AU CHOCOLAT


Just thinking about mendiants au chocolat gets me excited! They're beautiful, smell heavenly, taste delicious, have a romantic side to them, and a plateful presents endless possibilities. Basically like a roomful of ideal men!

Mendiants au chocolat are a traditional southern French Christmas-time confection of chocolate discs topped with nuts and dry fruits. Mendiants - mendicants or beggars in English - refers to the four monastic orders in the Church: Dominican, Franciscan, Carmelite, and Augustinian. Each order is represented by a specific topping based on the colour of their robes: hazelnuts for the Augustinians, raisins for the Dominicans, figs for the Franciscans, and almonds for the Carmelites.

I really love this romantic way of commemorating the orders and thinking about them at an important time of the year for Catholics and others alike. I equally love the elegant simplicity of mendiants au chocolat. And the versatility of toppings that creates a variety of textures and flavours on the tongue. Like a party that lasts all night... and if you know me, you know how much I love a party!

I make them during the holiday season as one of my edible homemade gifts when I go to parties or have friends over, but I also make them throughout the year. I think they make a really lovely gift at any time. Get creative with toppings: nuts, dried fruits, bits of biscuits or pretzel sticks, fleur de sel or other coarse natural salt, candied flowers, candied ginger or other fruits, fruit peels, pumpkin seeds...

While you don't need to stick to the traditional toppings, be mindful to keep the mendiants bite sized and don't crowd the small discs of chocolate. You want the chocolate to come through as much as the toppings. So use the best quality milk or dark chocolate you can find, and a few excellent toppings.

Mendiants au Chocolat
makes: ~ 3 dozen

- 16 oz. Callebaut 60% or other top quality dark chocolate  - not couverture (I use Valrhona or Callebaut, but Scharffenberger or Ghirardelli will do)
- nuts (raw or roasted): cashews, almonds, pistachios, hazelnuts, walnuts, pecans...
- dried fruits
- candied ginger, orange peel, or candied flowers
- dried coconut flakes 
- dried herbs: rosemary, mint
- biscuits
- salt: fleur de sel, pink Himalayan, black Cyprus sea salt flakes
  1. Line a few baking trays or other flat work surface with parchment paper.
  2. Completely melt the chocolate in a double boiler (temper if you wish, but it's not necessary).
  3. Using a 1/2 tsp. measure, drop the molten chocolate onto the prepared parchment paper. It will naturally form a circle - resist the temptation to spread the chocolate into a circle, let it form naturally.
  4. Top with a combination of toppings and allow to cool completely. Refrigerate till the chocolate is hardened.
  5. Store in the fridge for up to 4 days.

Tuesday, January 28, 2014

ROASTED RADISHES

Roasting radishes brings out a mild sweetness that's quite irresistible. When radishes are in season, I like to get a mixed bunch so I can have a few different shapes and colours. Who said you can't play with your food?!

You can definitely roast a bigger batch of these and keep them for a couple of days. They're great warm from the oven but also keep well in the fridge to toss in a salad the next day or to have as a side with a meal. Or on bread with butter. Or on their own with a bit of feta and pepper on top.


Roasted Radishes
Makes: 1-2 servings

- 1 bunch (6-7) radishes
- 2 tsp. olive oil
- 1/2 tsp. salt
- 1/2 tsp. freshly ground pepper

  1. Preheat oven to 350 F/ 180 C.
  2. Wash and trim the radishes.
  3. Cut each radish into half. If you have some long varieties like torpedo radishes, cut them length-wise into half.
  4. Toss with olive oil, salt and pepper.
  5. Put on a baking tray or other oven-safe pan and roast for 15 - 20 minutes, or until fork-tender - 5 or so more minutes.
  6. Serve as a snack, or a side, or on a salad.

Tuesday, October 29, 2013

CAULIFLOWER SOUP: THE ONLY RECIPE YOU'LL EVER NEED

Don't fix it if it isn't broken. And this recipe isn't broken. So let your inner gourmet goddess take the day off while you make this soup the way it's written below. Guys, yeah I assumed women are reading this, but even though you're not a woman, the same instructions apply.

I've adapted this from Paul Bertolli's recipe from Cooking by Hand. I say adapted because I usually add less water since I like my soup slightly thicker. Other than that, I don't change it. It's really important not to over-heat the olive oil, and not to let the onions brown at all. Browned onions are tasty but not right now.

I really think the first time you have this soup keep the garnishes light... a drizzle of olive oil and some freshly ground toasted pepper is really all you need. And perhaps when you're on your second bowl, add in a dash of nutmeg or truffle butter. Because cauliflower loves nutmeg and truffles... sparingly.

I simply love this soup just on its own. But if you want, serve this with a hunk of good bread or a parrano grilled cheese for a party in your mouth!


Cauliflower Soup
Makes: 4 main, 8 first course servings

- 3 tbsp olive oil
- 1 medium white or yellow onion, sliced thin
- 1 head white cauliflower (about 1-2 lbs), broken into florets
- 2 tsp good quality salt
- 4-1/2 cups water, heated

- 1 tsp extra virgin olive oil per serving, for 4 servings. For 8 servings, use 1/2 tsp per serving to garnish the soup before eating.
- Freshly ground regular or toasted black pepper, to taste
- Additional salt, to taste

1. Warm - not over-heat - the olive oil in a heavy-bottomed pan. If the oil starts smoking, it's burnt and you have to start over with a clean pan.
2. Sweat the onion in the olive oil over low heat without letting it brown. At medium low this will take around 15 minutes.
3. Add the cauliflower and 1/2 cup hot water.
4. Raise the heat slightly to medium, cover the pot tightly and cook the cauliflower for 15 minutes, or until tender.
5. Then add the other 3-1/2 cups hot water and salt. Bring to a low simmer and cook an additional 15 - 20 minutes uncovered. Make sure the cauliflower is really tender at this point.
6. In batches, blend the soup to a smooth, creamy consistencyLet the soup stand for 20 minutes to let it thicken slightly.
7. Before serving, thin the soup with 1/2 cup hot water if required.
8. Reheat the soup and serve hot, drizzled with the extra-virgin olive oil and freshly ground black pepper.

Thursday, October 17, 2013

GRAPE ARUGULA MINT SMOOTHIE

I have at least one 32 oz. green smoothie a day - breakfast or dinner. Sometimes I have one at breakfast and one at dinner - a green smoothie with fruit and a savoury smoothie/raw soup with vegetables.

When grapes are in season, this is one I have pretty much everyday for breakfast or dinner. When grapes are in season, I have them everyday at breakfast, as a snack, or at dinner. But not at all three meals - because that would be a bit of a bore.

As I've mentioned before, the key to getting a good chunkless smoothie in a regular blender - the kind of blender that doesn't have a truck motor and doesn't cost as much as a truck - is to layer correctly in the blender: solid fruits or vegetables at the bottom, light leafy things on the top, just enough water to make a smooth puree, then add more leaves and water. The lemon, salt, and other powdered spices can go in whenever. Don't be afraid to let the blender run on High for a good 2-3 minutes to make everything smooth and well blended.


Grape Arugula Mint Smoothie
Makes: approximately 32 oz./2 pints/4 "regular" 8 oz. glasses

- 2 cups red grapes
- 4 cups arugula or greens of your choice
- 1/4 cup fresh mint leaves
- 1 lemon, juiced
- 1/2 in. piece fresh ginger cut into a couple of pieces (~2 tsp grated or minced)
1 tsp. Himalayan pink salt, or any other good quality salt with trace minerals
- 3-4 cups water, or more, depending on how thin you like your smoothies

1. Blend the grapes, 2 cups arugula/greens, ginger, mint leaves, lemon, salt, and 1 cup water until you have a smooth puree.
2. Add the remaining greens and 1 cup water and blend until it's all smooth. You may need to let the blender run for a couple of minutes while everything is evenly blended.
3. If it's too thick to drink, add the remaining 1 cup of water and blend. Adding too much water will dilute the flavour so taste before adding more water. Besides, you don't want a watery thin smoothie anyway so be judicious with water beyond 3 cups...

Thursday, September 5, 2013

RICE, RED LENTILS, AND VEGETABLES WITH RAS EL HANOUT

Ras el hanout meaning 'best of the shop' is a Moroccan spice blend that, much like Indian garam masala or even American barbecue rubs, has endless regional variations. It does have staple ingredients including turmeric, allspice, nutmeg, cinnamon, coriander, cloves, paprika, cardamom, with other things like rose buds, saffron, and various berries or pepper mixed in based on the region and blender's choice.

I'm no expert on ras el hanout but one day when I was shopping at the Rainbow co-op market where I normally shop, and often stare at the countless spices they have in bulk, I saw ras el hanout. I'd heard of it and read about it but never cooked with it... so what? Rome wasn't built in a day, was it?

Rainbow not only allows but encourages shoppers to bring their own containers. In addition to my usual olive and coffee jars, I'd brought along a few spice jars that were running on empty, and I had an extra one so in went a very generous amount of ras el hanout.

FFwd to last night. First day back in office after a few weeks of being at various project sites with 14 hour days starting at 5 AM that involve no sitting but a lot of climbing, squatting, kneeling, and walking in all varieties of the summer sun. And of course, I was eating out at every meal. So when I finally got into the kitchen I was craving something warm, nourishing, and comforting. Something casserole-y, something like risotto, something like khichadi, something aromatic, something easy to make, not too laborious. Enter rice, lentils, ras el hanout... and me.


Rice, Red Lentils, and Vegetables with Ras el Hanout
Servings: 4, as a main dish

- 1/2 cup Jasmine rice or other rice of choice
- 1/2 cup red lentils
- 2 shallots or 1 small yellow onion, sliced
- 2 large cloves garlic, minced
- 1-1/2 tsp. caraway seeds
- 1-1/2 tsp. fennel seeds
- 1 tbsp. or more, ras el hanout
- 1 tsp. turmeric (optional)
- 1 tsp. red pepper powder, or crushed 'flakes'
- 1 tbsp. ghee or expeller-pressed virgin coconut oil (or any other high temperature cooking oil - NOT olive oil)
- vegetables of your choice, diced
- 2 tbsp. flame raisins
- 2 cups water, or enough to completely cover the rice, lentils, and vegetables (see #10 below)
- 3 tbsp. fresh parsley, chopped

1. Put the rice and lentils in a bowl and rinse until the water runs nearly clear. Drain.
2. Add warm/hot water to the bowl enough to cover the rice and lentils and let everything soak while you prep the vegetables. The hottest kitchen faucet water is hot enough for this.
3. Cut the vegetables into chunks that are fairly same-sized, so that they cook uniformly.
4. Heat the coconut oil on medium heat in a large pan, till a fennel seed dropped into it sizzles.
5. Add the fennel and caraway seeds and let them sizzle until you can smell the aroma.
6. Add the shallot and garlic and saute till the shallot is translucent and is just getting a bit brown.
7. Add the cut vegetables and spices and saute everything for 5 minutes. Stir often enough to prevent vegetables from sticking to the pan or burning.
8. Drain the rice and lentil mixture.
9. Add to the pan and saute on medium-low heat for 2-3 minutes along with the vegetables.
10. Add enough water to cover the rice, lentils, and vegetable mixture.
11. Turn the heat to high. When everything starts to bubble a bit, turn the heat to low.
12. Cover and cook on low for 10-15 minutes.
13. Uncover, add the raisins and give it all a quick stir.
14. If the rice isn't cooked yet, cover the pan and let everything cook for another 5 minutes or so.
15. When it's cooked, turn off the heat and add the chopped parsley.
16. Enjoy!


Monday, August 12, 2013

KING SALMON IN FIG LEAVES, ROASTED FETA-STUFFED FIGS

This recipe looks deceptively complicated... from washing the fig leaves to eating, it took all of 20 - 25 minutes! The roasted, feta-stuffed fresh figs are just as quick to whip up, and so addictive! Figs, unlike bananas, peaches, nectarines, and many other fruits, don't ripen off the tree. So if you buy figs in a package, chances are you've got a few less-than-perfectly-ripe ones. And those semi-ripe ones are not the best for eating raw. But they're perfect for roasting because it brings out the sweetness even in slightly unripe figs. And, the saltiness of the feta and peppery arugula leaves complement the honey-like flavour of roasted figs.

Fig leaves are so under-rated and overlooked... the leaves themselves are not the best for eating, but they are perfect for cooking. They look stunning, have a delicious warm coconut-y aroma when they're roasted, and hold up very well so no dealing with a lost sauce. 

I've roasted salmon and monkfish in fig leaves and they're both winners! During fig season, most farmer's markets and specialty grocery stores sell fig leaves. If you're in California, chances are you, a neighbour, or someone-you-know's neighbour has a fig tree or two. So then you have fig leaves whenever you want... or at least, often. Or maybe someone you know works at a project site with fig trees and rosemary hedges and lemon trees and olive trees and apple trees and avocado trees nearby. It can happen.


King Salmon in Fig Leaves, Roasted Feta-Stuffed Figs
Servings: 2

for the salmon:
- 2 4 oz. filets of King Salmon or any other salmon, preferably skin-on
- 2 large fig leaves (or 4 medium)
- 1 lemon, preferably organic
- 1 tbsp. olive oil
- freshly ground black pepper, to taste
- salt, to taste

for the figs:
- 8 or 10 fresh, ripe or slightly unripe figs, washed
- 1 sprig fresh rosemary, or 1 tbsp. dry rosemary, chopped (optional)
- 4 oz. feta or chevre 
- 1/2 lemon, juiced
- 1 tbsp. freshly ground black pepper
- 2 cups arugula (or other greens)


1. Preheat oven to 350 F/180 C.
2. Rinse fig leaves and pat them dry.
3. Slice the ends off the lemon, slice the lemon into approximately 8 thin slices.
4. Lay a fig leaf flat on a cutting board, plate, or directly on the baking tray.
5. Place the salmon lengthwise on the centre of the fig leaf and generously season with salt and pepper.
6. Arrange 4 of the lemon slices on the salmon, overlapping each slice.
7. Drizzle 1/2 tbsp. olive oil over the salmon.
8. Wrap the top of the fig leaf over the salmon, then wrap the sides, and then the stem-end. You should now have a neat salmon packet.
9. Flip so that the seams are facing down to keep the packet closed during cooking.
10. Repeat with the second filet.
11. Now work on the stuffed figs. You can stuff the figs first, then prep the salmon but the cheese stuffing might get runny - it'll still be good.
12. Slice the stem-end off each fig and cut an X into the fig, stopping short of cutting all the way through.
13. Set each fig down, cut side up, and gently squeeze the round base of the fig so the fig 'crowns' or opens up for the filling (check out the photos above for crowned figs)
14. Put the feta, rosemary, pepper, and lemon juice in a bowl. Mash and mix well.
15. Stuff each fig with about 1 tsp. of the feta mixture, taking care not to tear the fig open all the way. Divide any leftover mixture between the figs. 
16. Put both filets and the stuffed figs on the baking tray and into the oven for 15 - 20 minutes. Since the salmon is wrapped, it won't dry out in 20 minutes, but don't cook it for much longer than that.
17. Remove from the oven.
18. Mound 1 cup of arugula on a plate, leaving room for the wrapped salmon.
19. Arrange 4-5 roasted figs on the arugula leaves.
20.  Flip the salmon seam-side up onto the serving plate next to the figs.
21. Unwrap the salmon and enjoy! Discard the fig leaves though... they're not that good.

Sunday, July 28, 2013

GO NUTS: HOMEMADE ALMOND BUTTER

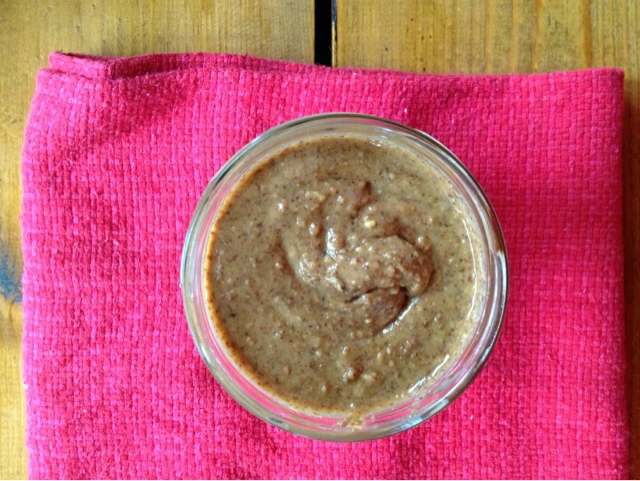
You guys have to make this make itself! Because that's what almond butter does. It makes itself. (Sorry, the photos are a bit rubbish, but I was too eager to make the almond butter so I could have it in my smoothie that evening.)

It's heavenly on toast but get creative... on ice cream, on waffles, as a dip mixed with cinnamon, honey and cocoa powder, as a savoury dip mixed with roasted garlic, lemon, salt, chili powder, cinnamon, and whatever other spices you want, orrrr just by the spoonful!

Just make it, and it'll inspire you to get creative with it.


Almond Butter
Makes: 2 cups

- 2 cups dry-roasted almonds (I use 50% Less Salt dry-roasted almonds from Trader Joe's)
- food processor

1. Put the almonds in the food processor.
2. Start the food processor.
3. Stop-and-go till you get almond butter, loosening the almond meal/paste from the sides as needed.
4. The almonds will go through a few stages - chopped, ground, pasty, smooth (almond butter).
5. If you're adding honey, spices or other things, add them when the almonds are pasty, or just before removing the almond butter from the food processor.
6. Enjoy!

Notes:
1. Raw almonds, like all raw nuts and seeds, are quite heavy on the digestive system and I don't recommend using them for almond butter or for eating.
2. Blanched or sprouted (soak almonds for 12 - 24 hours in water) almonds would work if you dry them completely first.
3. To dry: put the wet almonds on a towel to "surface-dry", transfer to a pan/baking sheet and let them air-dry in a single layer.

Friday, July 12, 2013

SPICY RAW SOUP: CAN'T HAVE ENOUGH OF THIS

Raw soup, smoothie, blended salad, whatever it is, it's delicious!! I drink at least one or two smoothies a day, usually for breakfast and dinner. I love creating seasonal flavour combinations, and this is one of my go-to, no-fail summer ones. Vary the ingredients and proportions to suit your needs, but be judicious with strong flavours such as salt, spice, garlic, or bitter greens. Try your own combos based on seasonal fruits and vegetables!

I won't endlessly extol the virtues of eating wholesome foods, but suffice to say that eating almost no commercially processed foods, less grains and mostly fruits, vegetables, nuts, seeds, and their derivatives such as oils, is the way to live. After you have this or any other smoothie, notice the rush of energy you feel. Food is also related to mental well-being. Eating fresh, seasonal, life-giving foods will make you a more pleasant, balanced person, able to handle the stresses of work and other things with a cooler, more solid demeanour. And your taste buds will be more sensitive to flavours so you'll enjoy all foods much more.

Try it for a week: have a large smoothie for breakfast, and a large one for dinner. At these meals, if you're still hungry after the smoothie you can have a handful of nuts or as many fruits/vegetables as you want. With a vegetable smoothie like the one below, have vegetables if you're still hungry. With a fruit-based green smoothie, have fruit. Don't mix fruit and vegetables. And, you should have no grains, no dairy, no meat 2-3 hours before or after the smoothie.

And definitely don't put things like almond milk, milk, yogurt, kefir, etc. in your smoothie. Just water or coconut water.


Raw Summer Soup/Smoothie
Servings: makes 1 large soup/smoothie, enough as breakfast/dinner/snack

- 2 medium zuchhini
- 1 cup cherry tomatoes
- 1 avocado
- 2-3 cups greens of choice - spinach, arugula, lettuce (any other than Iceberg), kale, chard
- 1 handful of fresh basil leaves
- 1/4 - 1/2 tsp. crushed red pepper (the kind you put on pizza)
- 1 lemon, juiced
3/4 - 1 tsp. good quality salt
- 1 small clove garlic (optional)

1. Wash, cut and prep everything.
2. Add the heavy vegetables first - anything non-leafy.
3. Leafy things go at the top. In this case the avocado was an after-thought so it's on the top!
4. Add 1/2 - 3/4 cup of water and blend.
5. This will create a "creamy" base before you add more water. (Too much water from the very beginning will result in a non-smooth smoothie - a bit contradictory, really. And definitely not tasty.)
7. Add water, 3/4 cup at a time, until you have the consistency you want.
8. Pour into a glass if you're having it immediately. Otherwise pour into a container and refrigerate.