Showing posts with label dairy. Show all posts

Thursday, October 18, 2018

GOUGÈRES: CHEESE PUFFS

Gougères are light and delicious cheese puffs made with pâte à choux, the same pastry dough that's used for profiteroles, eclairs, etc. It's a quick and fairly easy dough to make, somewhat fool-proof since it relies on aerating rather than a rising agent like baking powder or yeast.

Typically, gougères are made with Comté or Gruyère cheese, but really any cheese that melts will be fine if you don't specifically want the flavours of Comté or Gruyère cheese. This time, since I was pairing them with a slew of southern Rhône wines, I used a mix of Comté and Füürtüfel - a terrific spicy Swiss cheese.


GOUGÈRES: CHEESE PUFFS
makes: ~20 medium gougères

- Equipment: hand mixer with two beaters
- 1 cup milk
- 1 cup all-purpose flour
- 3 large eggs
- 4 tablespoons butter
- 1/4 teaspoon salt
- 1-1/2 cups grated Comté, Gruyère or other Swiss cheese
1/2 tsp cayenne pepper (optional)
Optional: Fleur de sel to sprinkle on top before baking
  1. Bring the milk, butter and salt (and cayenne, if using) to a boil in a medium saucepan. Remove from the heat, add the flour all at once, and mix vigorously with a wooden spatula until the mixture forms a ball, taking care to scrape up all the flour/dough from the base and sides of the pan. Return the pan to medium-low heat and cook for about 1 minute to dry the mixture a bit. Stir to make sure the dough doesn't stick to the pan. Remove from the heat and let cool for 5 minutes.
  2. Add the eggs and use the hand mixer to mix thoroughly and aerate for 4-5 minutes. Let the choux pastry dough cool for 7-10 minutes.
  3. Preheat the oven to 400 °F/200 °C. Line 1 large or 2 medium baking trays with parchment paper.
  4. Add the grated cheese to the dough and stir just enough to incorporate. Use 2 spoons - 1 to scoop the gougère dough and 1 to help drop it on to the baking sheet - to place the dough on the baking tray, spaced ~2 inches apart. Sprinkle a few grains of the coarse salt, if using, on each gougère.
  5. Bake for about 30 minutes, until browned. Do *not* open the oven while the gougéres are baking or they might: not puff up, deflate after cooling, remain dense!
  6. Remove from the oven and let cool for 5 minutes. Serve lukewarm or at room temperature with wine - including champagne - or any other beverage.

Sunday, January 3, 2016

CHOCOLATE POTS DE CREME


Chocolate Pots de Creme

makes: 10 servings

- 10 oz. (300 g) bittersweet or semisweet chocolate, chopped
- 1-1/2 cups cream
- 1-1/2 cups whole milk
- 4-1/2 tbsp sugar
- 1 espresso (or 1 tsp instant coffee powder - optional)
- 1 tsp salt
- 7 egg yolks
- 1 tbsp vanilla extract
- to garnish: your choice of fresh raspberries, chopped pistachios, whipped cream, shaved chocolate, etc.
  1. Preheat the oven to 350 F (175 C).  Set 10 4- to 6-ounce ramekins or custard cups in a roasting pan or deep baking dish. Or split between two pans like I did, if you don't have a large enough pan to fit all the containers.
  2. Put the chocolate in a large heatproof bowl. In a medium saucepan, heat the half-and-half, sugar, instant espresso or coffee powder, if using, and salt until quite hot, stirring to dissolve the sugar. Pour the hot half-and-half mixture over the chocolate and whisk until the chocolate is completely melted and smooth. Let cool until tepid, then whisk in the egg yolks and the vanilla. (If the mixture looks at all grainy, whisk well or purée in a blender until smooth.)
  3. Transfer the custard mixture to a large measuring cup or pitcher and divide evenly among the ramekins.
  4. Fill the roasting pan or baking dish with warm water to reach halfway up the sides of the ramekins. Cover the pan tightly with aluminum foil and bake until the perimeters of the custards are just set and the centers are still slightly jiggly, about 35 minutes.
  5. Transfer the custards from the water bath to a wire rack and let cool.
  6. Serve slightly warm or at room temperature, garnished with small mounds of whipped cream, raspberries and chopped pistachios.

Friday, May 2, 2014

BOURBON, MAPLE, ROASTED ALMOND: EGGLESS ICE-CREAM


This is one of my favourite ice cream base recipes. It's easy, mostly fool-proof, and without the bother of making an egg-based custard for the ice cream. And, it's like a blank slate so you can create away to suit the season (because ice cream is always in season!), your mood, your cat's mood, a theme, a cuisine, whatever!

Cornstarch is a neutral stabiliser that absorbs residual water left after cooking the cream. This minimises the formation of ice crystals in the cream mixture and results in a creamier smoother ice cream.

If you're adding any amount of alcohol to ice cream, remember to add it nearly at the very end of the ice cream maker freezing cycle. Because alcohol doesn't freeze... and you can imagine the rest! But if you can't, then here it is in plain words: if you add alcohol early on, your ice cream base will not freeze no matter how hard you pray. And that's no fun.

As always, add-ins like nuts, brownie bits, chocolate chips, etc. should go in just before the alcohol, or near the end of the freezing cycle.


Adapted from Ice Cream Nation.

Bourbon, Maple, Roasted Almond Ice Cream: Eggless
Makes: approximately 1 quart

**Freeze an ice cream maker bowl for at least 8 hours**

- 3 cups half-and-half (or an equal mix of whipping cream and 2% milk)
- 1/2 cup Demerara sugar (or Turbinado)
- 1/4 cup Grade B maple syrup
- 3 tbsp. cornstarch
- 1 tbsp. vanilla extract
- 1/4 tsp. salt (only if using unsalted nuts)
- 1/4 cup coarsely chopped roasted almonds (I use Trader Joe's Lightly Salted Roasted Almonds)
- 1/4 cup coarsely crushed almonds (pulverized but definitely not almond butter!)
- 3 tbsp. bourbon (I like to use Bulleitt)
  1. In a saucepan, stir together 2-1/2 cups half-and-half, sugar, maple syrup, vanilla extract, and salt (if using unsalted nuts). Heat over medium-low heat until mixture begins to steam and barely boil, stirring occasionally to prevent the sugar from settling.
  2. In a bowl, blend cornstarch and remaining 1/2 cup half-and-half till the mixture is smooth and lump-free. Temper the cornstarch: add 3-4 tbsp. of the heated half-and-half to the cornstarch mixture and mix well. Repeat.
  3. Add the tempered cornstarch mixture to the saucepan and cook, stirring until it starts to thicken and reaches a simmer, about 4 - 5 minutes. Reduce heat to the lowest possible and stir for 2 - 3 minutes or so until thick. Don't overcook after adding the cornstarch or the cornstarch will overcook and won't thicken the mixture!
  4. Remove from heat and let the mixture come to room temperature. If there are lumps (although there shouldn't be), strain the mixture into a bowl. Chill for at least 2 hours in the fridge. Remove from the fridge and stir. If there's a skin on the mixture, stir it in. 
  5. Pour into an ice cream machine and freeze according to the manufacturer’s instructions. Just when the ice cream is the consistency of soft serve, add the almonds. Blend for a few minutes and when the ice cream is almost done freezing, add the bourbon and let it mix for 2 - 3 minutes longer to blend it in.
  6. Serve right away for a soft serve, or freeze for a couple of hours till firm.

Wednesday, March 19, 2014

CRÈME FRAÎCHE AND ONION DIP


This dip is so delicious that I cannot stop eating it. With everything. Roasted vegetables are way better than a spoon or fork to deliver food to your mouth anyway, so with those, or with chips, flatbreads, crackers, in a sandwich, over salmon, with boiled new potatoes, over poached eggs... the list is long!


And, it's fresh, herb-y, and takes no time to put together. It's based on a fantastic recipe my friend Kara sent me, but I made some changes based on what I had at home. I used crème fraîche, red onion, lemon, white pepper, less sugar, and added garlic.


Crème Fraîche and Onion Dip
Makes: 1-1/2 cups

- 1 cup crème fraîche, preferably home-made
- 2-1/2 tbsp. dill, finely minced
- 2 tbsp. red onion, finely diced
- 1 small clove garlic, smashed to a paste
- 1-1/2 tsp. freshly ground pepper
- 1 tbsp. lemon zest
- 1/2 lemon, juiced
- 1 tsp. salt, adjust to taste
- 1/2 tsp. sugar

  1. Put the crème fraîche in a medium bowl.
  2. Stir in the rest of the ingredients and stir well to mix.
  3. Refrigerate for up to 3 days, or serve immediately.
Notes:
  1. Although you can serve it right away, the dip will taste better after a few hours or the next day.
  2. The dip will thicken in the fridge but that's ok. Just stir and serve when you're ready.

Monday, March 17, 2014

ENLIGHTENED: HOME-MADE CRÈME FRAÎCHE (OR CREMA MEXICANA)


I find crème fraîche (aka crema mexicana or table cream) much more subtle and delicious than sour cream. Find out more about the difference between crème fraîche and sour cream here. Although it's typically made with heavy cream, half-and-half (half cream, half milk) makes a delicious light crème fraîche with a luscious creamy consistency.

Crème fraîche is delicious in cream sauces, as a dip, or over fruit and savoury dishes, and it's so easy to make at home where you know exactly what goes into it. Commercial varieties in the US have unwarranted ingredients like guar gum, carrageenan, locust bean gum, whey, modified food starch, and potassium sorbate - a totally unnecessary preservative. Why bother with (and pay for) all that when you can have something that's fresh, clean, and healthy for less?!


Home-made Crème Fraîche (or Crema Mexicana)
Makes: 16 oz./2 cups

- 1 pint (16 oz./2 cups) half-and-half or cream, at room temperature
- 1/4 cup yogurt with live cultures (full fat, fat-free, or any fat content in between)
  1. Pour the half-and-half into a clean, dry, glass or plastic container.
  2. Whisk the yogurt till smooth, add to the half-and-half, stir well to mix.
  3. Cover partially and let it stand in a warm place for 12 - 24 hours, or until it's a consistency you like.
  4. Refrigerate for up to 10 days.

Sunday, February 2, 2014

AN EASY CLASSIC: CREME BRULEE


Does the creme really need to be brûlée? No. Because really, once you bake the custard in a bain marie, it's cooked, and perfectly edible. And of course there are plenty of baked custards that aren't made with a burnt sugar topping: flan or creme caramel, for example. But the crunch of the caramelised sugar with the silky custard underneath is just such an enjoyable sensation that the extra step to make the caramelised sugar layer is totally worth it.


Is the bain-marie essential? Yes, because it keeps the hot oven air moist for the top of the custard and also protects the delicate egg custards from curdling or breaking.

Flavour-wise, I find that the classic vanilla custard is best, perhaps with the addition of a complementary addition like citrus, almond, or hazelnut liqueur. If you must, serve berries or other accompaniments separately rather than adding into the custard. If you're adding solid flavourings like a scraped vanilla bean, citrus rind, nutmeg, etc. then certainly strain the custard before pouring into ramekins. Also strain if your egg yolk mixture wasn't properly tempered and has bits of curdled yolk - it happens sometimes, it won't affect the flavour of the custard so keep calm and strain on.

Also resist the temptation to make the caramelised sugar layer more than 5 minutes in advance of serving - the sugar will just melt into the custard and you won't have a crunchy layer anymore. When you caramelise the sugar, the chilled custard underneath quickly cools the caramel and hardens it, creating that crunchiness. But it has to be done *just* before serving.


Creme Brûlée 
Makes: 6 servings

Custard
- 6 large egg yolks
- 7 tablespoons sugar
- 2-1/4 cups whipping cream

2 tsp. vanilla extract
- 2 tbsp. Grand Marnier or other orange liqueur (optional)

- 6-8 ceramic ramekins 
- 2 in. or deeper oven-safe pan large enough to hold the ramekins (if you don't have a pan large enough to hold all ramekins, bake the custard in batches)

Caramelised Sugar Crust

- 3-4 tbsp. sugar (I use turbinado or demerara sugar but white sugar will work)
- a working blow-torch to make the burnt sugar crust
  1. Preheat oven to 325 F / 165 C.
  2. Bring cream to simmer in a small saucepan. Remove from the heat and let it settle for 5 minutes.
  3. Whisk egg yolks and 7 tbsp. sugar in a medium bowl until thick and pale yellow, about 2 minutes.
  4. Temper the yolk mixture so it doesn't curdle and get lumpy:
    1. Mix in 4 tbsp. (1/4 cup) hot cream into the yolk mixture. Repeat.
  5. Whisk in the remaining hot cream into the yolk mixture. Whisk in Grand Marnier and vanilla. 
  6. Divide custard among the ramekins. Arrange the ramekins in the oven-safe pan. Make a bain-marie to protect the custards while baking:
    1. Pour hot water into the pan to be level with the custard inside the ramekins. The water will protect the custard from browning / burning.
  7. Bake custards until gently set in center, 25 - 30 minutes.
  8. Remove the pan from the oven and remove the custards from the bain-marie. 
  9. Cool custards completely and refrigerate uncovered until fully set and chilled, 3 - 24 hrs. 
  10. Just before serving, make the burnt sugar crust:
    1. Remove the custards from the fridge and sprinkle an even layer of 1/2 tbsp. sugar onto each.
    2. Use the blow-torch per instructions to burn the sugar - you will see it melt. Let it sit for a minute or so and serve.

Sunday, January 19, 2014

SNACK ATTACK: CUCUMBER TOMATO SANDWICHES WITH MIMOLETTE AND PERSILLADE

Easy to make but immensely flavourful sandwiches that are easy to customize with ingredients you have at hand. Such as leftover parsley which I often use to make into a persillade - parsley pesto - a condiment that's great on sandwiches, potatoes, eggs, fish, even on crackers with a smear of goat cheese or fromage blanc.

No parsley, no problem. Use cilantro instead. Replace the serrano pepper with freshly ground black pepper. Add a couple of thin slices of onion under the tomatoes. Get creative!

As with all bread-based recipes, you can use gluten-free bread. But please don't use something weird and processed like the travesty that's vegan "cheese". If you don't want dairy, just skip the cheese and add a few thin slices of a boiled potato to add a creamy note between the persillade and vegetables.


Cucumber Tomato Sandwiches with Mimolette Cheese and Persillade
Makes: 2 sandwiches


Persillade (makes ~1/4 cup):
- 3/4 cups fresh parsley, hard stems snapped off
- 1 serrano pepper, cut into large chunks
- 1 clove garlic, peeled
- 1 tsp. salt
- 1 tsp. lemon juice

1. Blend everything together into a smooth paste. Set aside.
2. Preheat oven to 400 F/200 C.

Sandwiches:
- 1/4 cup persillade (recipe above)
- 4 slices bread of your choice
- 4 - 6 oz. demi-vieille mimolette cheese, thinly sliced (or any other hard cheese of choice)
- 1 tomato, thinly sliced
- 1 cucumber, thinly sliced
- coarsely ground pepper, to taste

1. Spread the persillade evenly on each slice of bread. 
2. Divide cheese slices evenly for 4 slices of bread and arrange on top of the persillade on each slice of bread.
3. Place all 4 slices on a baking tray or pizza stone (no need to heat the pizza stone for this recipe) and put in the oven for 5 minutes or till the cheese is melted and starts bubbling.
4. Remove bread from the oven and arrange tomato slices on 2 of the cheesy slices.
5. Put all the bread slices back in the oven for 5 more minutes.
6. Turn the oven off and take the bread out.
7. Arrange cucumber slices on top of the tomatoes and grind pepper onto the slices with the cucumber and tomato slices.
8. With the cheese side down (facing the cucumbers), top with the other cheesy slice of bread and press firmly to make a sandwich.
9. Repeat with the remaining cucumbers and bread.
10. Cut each sandwich in half and serve. Enjoy!

Saturday, November 9, 2013

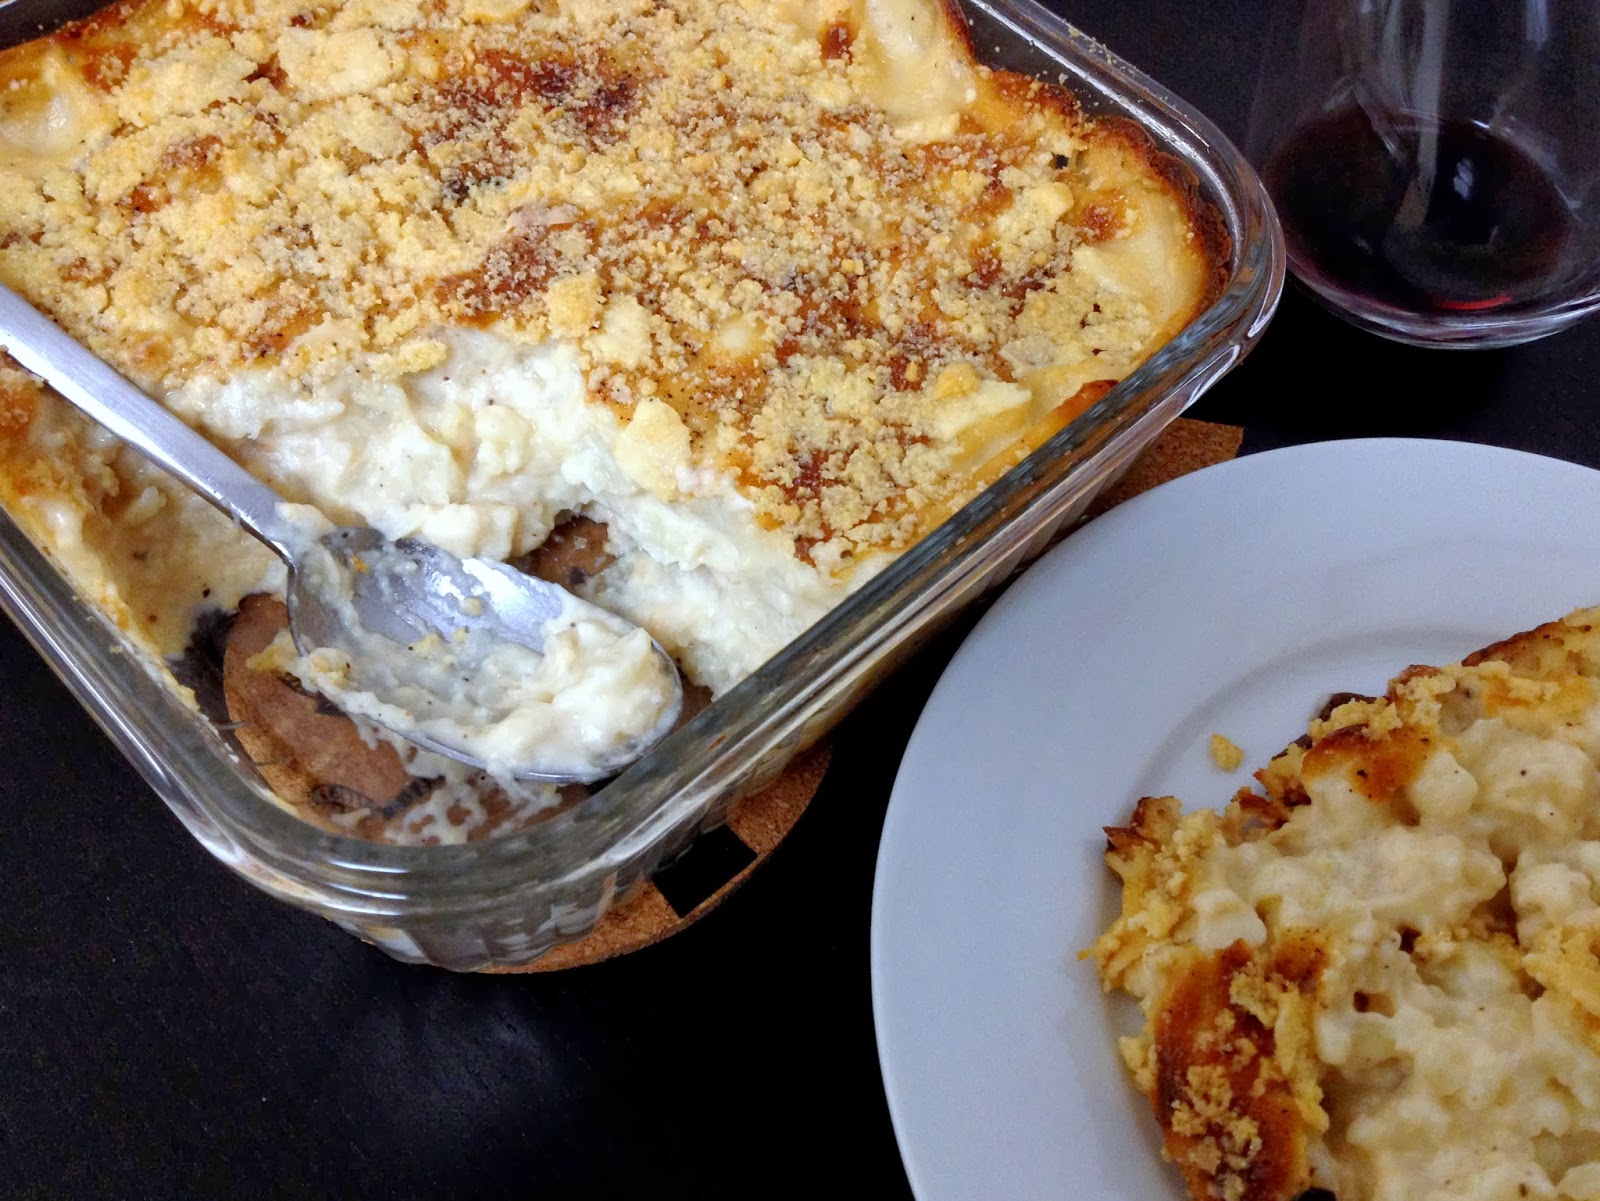
CAULIFLOWER GRATIN OR, HOW TO MAKE BÉCHAMEL SAUCE


Nothing fancy here, just a classic French homey gratin, and as much a comfort food of childhood as now. Gratin refers to the pan in which this is cooked, and so all things cooked in a gratin are gratin. :-) With a salad and perhaps bread, this is an easy dinner. It's a make-ahead kind of dish that can sit in the oven for as long as an hour without drying out thanks to the béchamel sauce.

It's also quite a versatile dish - if you want, add a cubed potato or two to the cauliflower. Traditionally, you rub the gratin pan with garlic but I add minced garlic to the béchamel. Sometimes I add a chopped shallot as well. Contrary to what some recipes say, the classic gratin does not require cream of any kind. Just milk - preferably whole, but at least 2%. Skim milk is a waste of time.

In this gratin the star of the show is the béchamel sauce - one of the mother sauces of French cuisine, best presented in Escoffier's Le Guide Culinaire or his 800 page, 2000 recipe compendium Ma Cuisine. I bought a hardbound old copy of Ma Cuisine for $2 at a used book store in Half Moon Bay years ago. I have no idea why anyone would get rid of this book, but they did, and I scored! Anyway so béchamel is the base of other sauces such as Mornay and soubise. The quality of bechamel however, depends on the quality of the roux. Roux is nothing more than about equal parts of flour and butter - slightly more flour than butter - cooked together to form a binder for the other ingredients. There's brown roux, pale roux, and white roux. The color of the roux, logically, will determine the colour of your sauce.

Gratins such as potatoes dauphinoise, this cauliflower gratin, and other recipes where béchamel sauce is used, require a white roux which is used for white sauces. A brown roux is used for dishes that call for a brown sauce, and a pale roux is used for veloutés - velvety cream sauces.

Béchamel is really easy to make once you can make roux correctly. Cook the roux on a low-medium flame, never medium or high. You want to allow time for the starch cells in the flour to burst so that the butter combines with the starch without burning the starch (which high heat will do, and therefore require more roux in your béchamel which therefore will be really sludgy and overpower the other ingredients). You will see that as the starch and butter combine, the flour-butter mixture goes from the initial large clump to a soft, loose, stir-able mixture. And it will smell nutty. 


It's very important to keep an eye on the roux when it starts to smell nutty because then it will turn colour from white to brown - which we don't want for béchamel. So once it's loose and stir-able, cook for a minute or so and add the milk, salt, pepper, and whatever seasonings and spices you're using.


Cauliflower Gratin: Gratin de Chou-Fleur
Makes: 4 servings

- 1-1/2 lbs florets of white cauliflower
- 5 tbsp unsalted butter
- 6 tbsp all-purpose flour
- 3 cups milk, 2% or whole
- 1-1/2 tsp sea salt or any other good quality salt
- 1 tsp freshly ground black or white pepper
- 1/4 tsp grated nutmeg
- 1 clove garlic, minced or chopped
3 cloves, whole (don't use powdered!)
- 1/4 cup shallot, finely chopped (optional)
- 1/2 cup grated Comté, Gruyere, Emmenthaler, or Pecorino Romano cheese
  1. Preheat the oven to 350 F / 180 C.
  2. Boil a generous amount of water - enough to completely submerge the cauliflower - in a large stainless steel pan and add the cauliflower florets. Bring everything to a boil, and cook, uncovered, for about 5 minutes. Drain and set aside. Or you can steam the cauli for 5 minutes.
  3. Melt the butter in a medium saucepan. Add the flour and cook over low heat for about 2 minutes, stirring with a whisk. Don't let the mixture brown - it should be white, maybe very slightly off-white. 
  4. When the flour-butter mixture feels and looks loose and smells nutty, add the milk and bring to a boil over medium heat, stirring constantly to prevent it from burning or sticking to the pan.
  5. Simmer over low heat for 2 minutes. Add the salt, pepper, nutmeg, garlic, and cloves if using. Bring to a boil. Remove from the heat.
  6. At this point you can remove the whole cloves if you want, but I always leave them in because they don't overpower the flavour and give the gratin a warm fragrance which I love.
  7. Generously butter or oil a gratin dish. Put half of the cauliflower florets in the dish and evenly pour half of the béchamel over the florets.
  8. If using shallots, sprinkle the chopped shallots over the béchamel, add the remaining cauliflower florets and evenly pour the remaining béchamel over the florets.
  9. Sprinkle with the cheeses and bake for about 30 minutes, or until golden brown.
  10. Pull the bubbling gratin out of the oven and let it stand for 10-15 minutes before serving.
  11. Enjoy!

Tuesday, July 9, 2013

PEACH, BASIL, AND RICOTTA CROSTINI

The juicy simplicity of summer!


Peach, Basil, and Ricotta Crostini
Servings: makes about 30 crostini

- 1 sourdough baguette, sliced
- 3-4 medium sized ripe peaches or nectarines, cut into 1/8 in. slices
- 15 oz. (425 g) ricotta cheese (I use whole milk ricotta)
- 1 bunch 
or 30-40 leaves, fresh basil
- 1-1/4 tsp. freshly ground coarse black pepper
- 1 tbsp. lemon rind
- 1 small lemon, juiced
3/4 - 1 tsp. salt
- 1 tbsp. brandy or cognac (optional)

1. Preheat the oven to 350 F/180 C.
2. Toast the sliced bread for 7 - 10 minutes, or until just dry and crisp.
3. In a roomy bowl, mix well the ricotta, salt, pepper, lemon juice, lemon rind, and brandy/cognac if using.
4. Take the bread out of the oven and let ir cool for 1-2 minutes.
5. Assemble the crostini: on each slice, stack a tablespoon of the ricotta mixture, 1-2 leaves of basil, 1-2 peach slices.
6. Finish with freshly ground black pepper and a light sprinkle of salt if needed.

Notes:
1. You could do a few spring and summer fruit/vegetable-herb combinations, really... cherry-mint, strawberry-mint/basil, cucumber-dill/basil/cilantro, mango-mint/basil, thinly sliced kumquats-parsley, fresh figs-basil, chives-lemon-olives...

Thursday, January 31, 2013

PIZZA - BEST DOUGH AND SAUCE EVER!

The sauce sounds strangely plain, but it's not. Try it and you'll know what I mean! I like all of the crust to have sauce so I spread it to the edge.


Pizza Dough
makes: 5 loaves, of 7 oz. each (enough for approximately 4-5 thin crust pizzas)

- 4-1/2 cups unbleached Tipo 00, bread, or unbleached all-purpose flour
- 1-2 tsp. active dry yeast
- 1/4 cup olive oil (optional, but I recommend it - it makes the dough supple and lovely)
- 1-2 tsp. salt
- 1-3/4 cups cold water (ice cold, not room temperature)
- Semolina or cornmeal for dusting the pan (I use cornmeal since I always have some)

1. If your yeast is old, it may not be alive - proof the yeast as described in the Notes below to check if it is alive.
2. Stir together the flour, salt, and yeast in a large bowl. If you are proofing the yeast, mix the flour and salt well, then lightly mix in the yeast mixture, then follow the instructions below.
3. Mix oil and water into the flour with a metal spoon or by hand.
4. Knead the dough for 5-8 minutes or until it is smooth, springy, and elastic. Don't over-knead or you'll get a chewy pizza crust later!
5. The dough should clear the sides of the bowl. If it's sticky, add flour by the tablespoon; if it's dry, add water by the tablespoon, until the flour comes together.
6. Let the dough rest for 10 minutes, knead gently for barely 30 seconds, and put in a large bowl.
7. Cover the bowl and put in a warm place (not hot) for 1 hr. or until the dough has doubled in size.
8. Deflate the dough and shape into a ball.
9. Coat the dough ball lightly with olive oil and refrigerate overnight or for up to 3 days, in a large airtight container.
10. Remove the dough from the fridge at least 1 hr. before using (room temperature dough is easier to work with, and prevents over-working the dough).
11. Preheat oven to 450 F/230 C.
12. Sprinkle semolina or cornmeal on baking trays.
13. Divide the dough according to the number of pizzas you want to make.
14. Stretch the dough with floured hands and place in the baking trays. (Rolling pizza dough will overwork the gluten in the dough and make the crust too chewy/a bit leathery.)
15. Lightly shape the stretched dough in the trays to fit as needed.
16. Top with a thin layer of sauce and add toppings of choice. (Don't over do the sauce and toppings - it's a thin crust pizza so don't weigh the crust down)
17. Use good quality toppings. Skimp on quantity not quality.
18. Bake for 7-8 minutes or until the edges are browned, cheese is melted, and toppings sizzle.

NOTES:
1. Proofing yeast - even the regular non-Rapid Rise kind - is only done to prove that the yeast is alive before preparing a recipe. Proofing is not imperative in baking if you are confident that your yeast is alive.
2. To proof 1-2 tsp. yeast: heat 1/2 cup water to 80 F/26 C, stir in 1 tsp. sugar, sprinkle yeast on the surface, let it sit for 10 minutes. If it is frothy, your yeast is alive and the whole mixture can be added to the mixed dry ingredients. If the yeast does not react, it is dead and cannot be used for baking.

Pizza Sauce
makes: 28 oz. (enough for approximately 4-5 large thin crust pizzas)

- 1 14-oz. can crushed tomatoes
- 1 14-oz. can diced tomatoes (or use all crushed tomatoes, or buy canned Marzano tomatoes and crush them yourself)
- 3-4 tbsp. olive oil
- 2-3 cloves garlic, crushed
- salt

1. Mix the tomatoes, oil, and garlic in a pan.
2. Simmer for 30 minutes.
3. Season with salt.

NOTES:
1. This is a typical sauce used for Italian pizza. Unburdened with forced flavourings. Herbs, anchovies, and other things should be added on the pizza, never in the sauce.

Topping Ideas
makes: varies

- Caramelized onions, olives, anchovies
Crisp bacon, Gorgonzola, arugula
- Roasted sliced fennel, Italian sausage, garlic
- Pears, Fontina cheese, walnuts, grated lemon rind (under cheese or mixed in with pears)
- Burrata, tomatoes, pesto Genoese
- Feta, olives, basil
- Roasted sliced mushrooms, sauteed spinach, onions, prosciutto
- Roasted rosemary potatoes, anchovies, olives
- Roasted cauliflower, chevre, chives, truffle oil (drizzled on after baking)

Other Topping Ideas
makes: varies

- Sauces/spreads: Pestos of all kinds, tapenade, roasted garlic and olive oil.
- Cheese: buffalo milk mozzarella, burrata, asiago, Parmigiano-Reggiano, Grana Padano, fresh or aged goat's/sheep's milk cheese, feta, fontina, ricotta, Romano, or whatever strikes your creative fancy!
- Vegetables: sun-dried tomatoes, thinly sliced zuchhini, roasted corn, thinly sliced fresh chiles - jalapenos, serranos, or chiles de arbol (the thin Indian ones), roasted potatoes or aubergines, sliced mushrooms, roasted cauliflower, artichokes, roasted fennel, capsicum, fresh or caramelized onions, kalamata (or other) olives, capers, spring onions, sauteed leeks, roasted parsnips.
- Herbs (preferably fresh but dried will do): oregano, basil, parsley, tarragon, chives, ramps.
- Meats: anchovies, shrimp, roasted poultry, cooked ground beef, proscuitto, ham, salami, pepperoni, Italian sausage, Spanish chorizo, smoked sausage.