Showing posts with label spices. Show all posts

Tuesday, August 19, 2014

HARISSA


Harissa is a North African condiment that's got one of the most addictive flavour profiles! And, it's just at home on a slice of bread as in a complex stew or sauce. That's what makes it so brilliant! So if you like flavour with a punch, look no further! You can use any combination of dried chile types, and adjust the quantity to suit your taste and spice level. 

I have a general obsession with condiments and dips - a few, even one excellent condiment can elevate the simplest of ingredients to another level. I like having various types of condiments like harissa, pestos, salsas, salad dressings, dipping sauces, nut butters etc. around so I can make a quick meal with pretty much any fresh vegetable or fruit, cooked grains, eggs, leftovers, etc. Like this sandwich I made (photo above) with harissa and some leftover lamb meatballs with spicy tomato sauce I'd made for a dinner party (not-so-great photo below).


Harissa
makes: 1 cup

- 8-9 dried chiles de arbol or cayenne
- 2 chile guajillo
- 3 cloves garlic
- 2 tsp. salt
- 1/2 tsp cinnamon 
- 1 lemon, juiced 
- 1/4 cup sun-dried tomatoes (optional)
- 1/3 cup olive oil
- 1 tsp. coriander
- 1 tsp. cumin
- 1 tsp. smoked paprika (optional)
- 1 tbsp. caraway seeds
  1. On medium-low heat, dry-roast the chiles in a skillet without burning them (or they'll taste bitter). Transfer to a bowl filled with enough hot water to submerge the chiles, and add the sun-dried tomatoes. Set aside for 10-15 minutes. Drain and remove the chile stalks.
  2. In the same skillet, dry-roast the caraway seeds. Let them cool.
  3. In a blender jar, add the drained chiles and all other ingredients and blend to a smooth paste.
  4. Transfer to a container and store in the fridge for up to 2 weeks.

Tuesday, May 6, 2014

PINEAPPLE TURMERIC DETOX SMOOTHIE


This is the colour of happy! How can it not be?! It's bright, it's yellow, it's cheery, it's summery, it's healthy, it's... happy! And insanely delicious!

I talked a bit about the nutritive qualities of turmeric in one of my previous smoothie posts. As I said before, one of the things about turmeric is that it's constituents are fat soluble and therefore not very bioavailable when turmeric is consumed on its own. For this reason, when cooking Indian food, powdered turmeric is added to hot ghee or oil, never eaten raw. In fact, after adding turmeric to the hot ghee (or oil), all the remaining spices to be used are also added to the hot ghee. This is because all spices have a fat soluble component and ghee, considered to be a noble fat and a rasayana in Ayurveda, is the preferred carrier for the spices and their fat soluble compounds to the body through our liquid tissue: the blood (hematic) and lymphatic systems. In my turmeric smoothies, I usually add up to a tbsp. of hemp hearts, flax seeds, flax oil, coconut oil, or ghee (I add ghee to savoury smoothies, not fruit-based ones).

If you don't want to add any fat to your turmeric smoothie, it's quite ok. Fresh turmeric root (not dried and powdered) is very high in Vitamin C, a water-soluble compound, so you will still get plenty of benefit from fresh turmeric root. In fact in India, when fresh turmeric is in season, we make a relish of sliced fresh turmeric root seasoned with salt and lemon... it's so delicious and pretty!

Ok so turmeric is definitely a nutritional heavy-hitter... but pineapple's no shrinking violet when it comes to being virtuous! It's one of the most detoxifying fruits, full of digestive enzymes including the lung-cleansing bromelain, antioxidants, Vitamins C and B Complex, manganese, fibre, among other things. In fact even the core of the pineapple has a lot of bromelain so don't throw it away!

Pineapple can interfere with certain medicines though, so if you're taking any medication, especially blood thinners, check with your doctor before having pineapple.


Despite all the great qualities, pineapple can be a bit like a woman at times: gorgeous but a handful to deal with. However, I'd still recommend a fresh pineapple over precut pineapple that's been exposed to light all day long in the store (or even a few days). To easily cut a fresh pineapple: cut it into 1 in. or 1-1/2 in. slices. With a paring knife or other small knife, use a vertical sawing motion to cut out the flesh from the middle, cutting close to the skin (photo above). For the end pieces: cut them into half and carefully cut out the flesh from the skin.

Don't discard the core - it's chock-full of bromelain and other healthy things!!

Pineapple Turmeric Detox Smoothie
makes: 16 oz.

- 2 cups ripe pineapple chunks
- 1 in. piece of raw turmeric (peeled if not organic)
- 1/2 in. piece of ginger
- 1 cup coconut water
- 1 tbsp. hemp hearts, flax seeds, or coconut oil
  1. Blend well into a smoothie.
  2. Serve immediately or refrigerate up to 8 hours. 

Friday, October 4, 2013

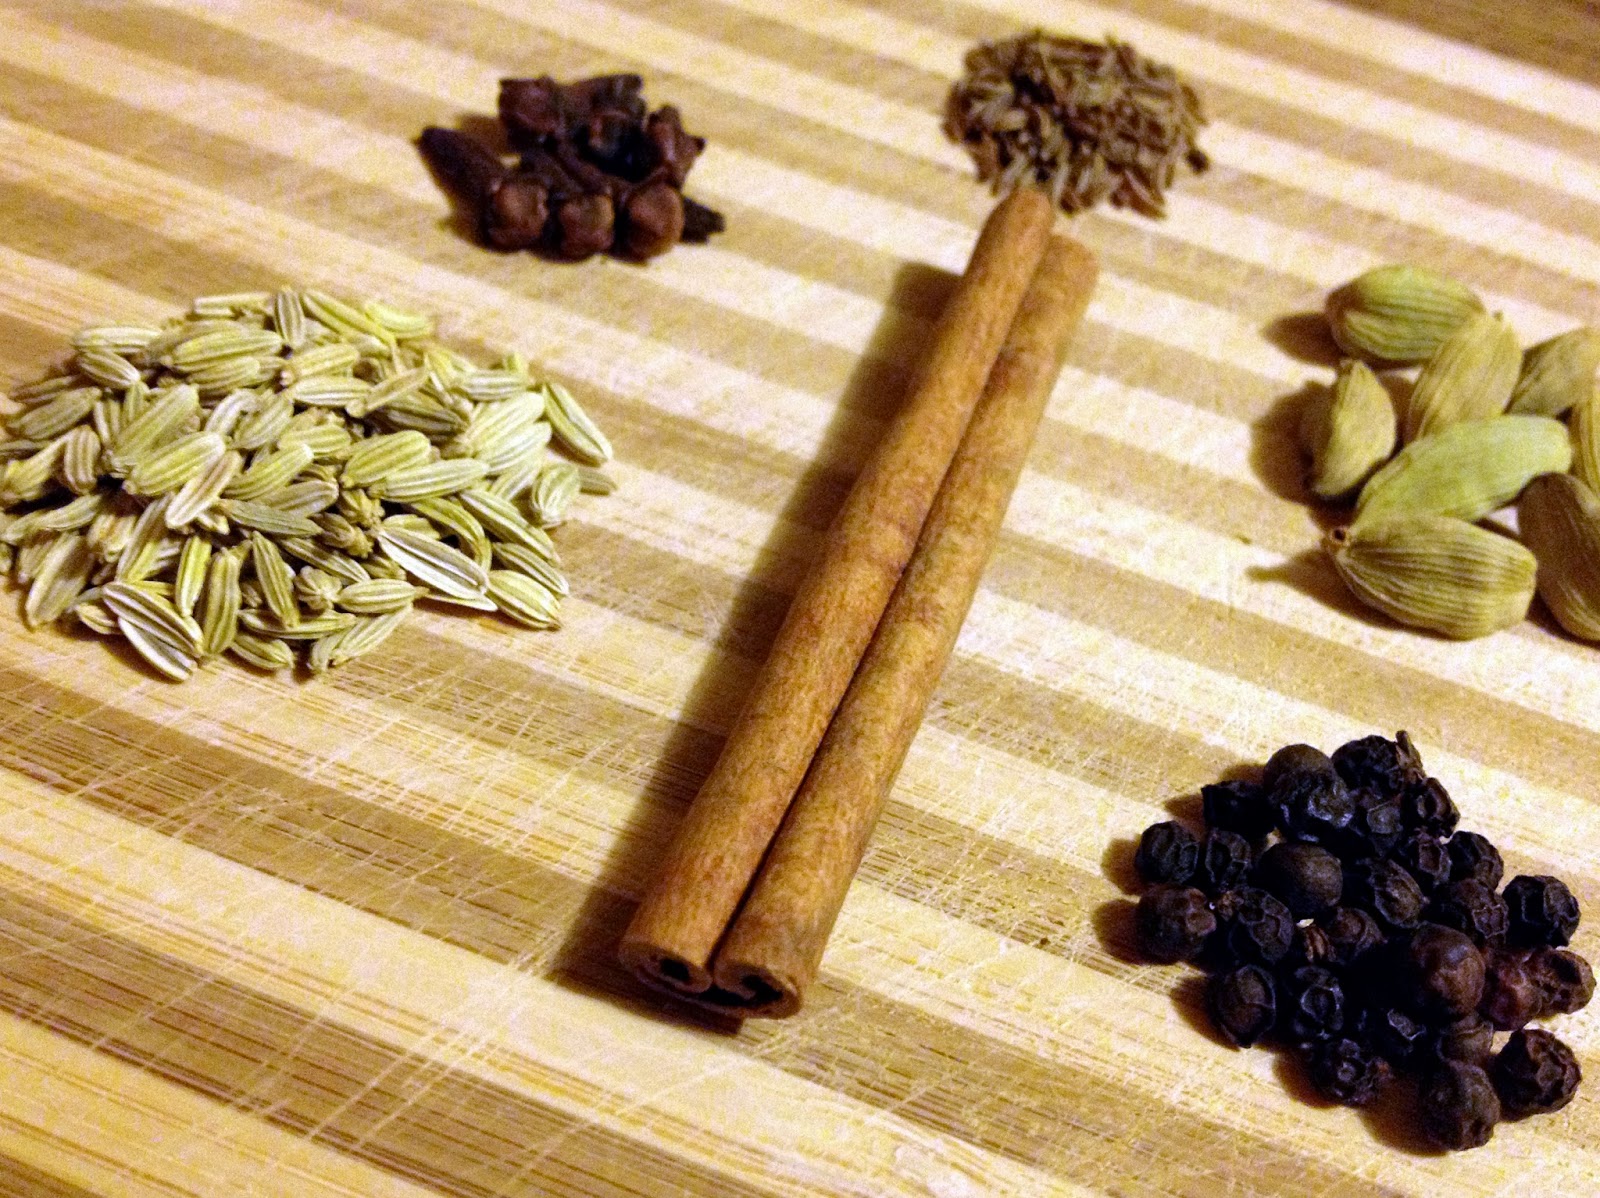
SPICED GHEE

You are what you eat.

The internet is full of information about the importance of ghee in Ayurveda and the many health benefits of ghee so I won't get repetitive about it. But I will say that ghee is one of the best fats your mind and body can have.

This ghee with aromatic spices is wonderful for cooking, in rice dishes, and drizzled over oats or a warm fruit compote. One of my favourite winter breakfasts is rice with ghee, a bit of cayenne pepper, and salt. The spices in the ghee add roundness and warmth to the flavour of food - perfect for the cooler months of the year!

I use 4 cooking fats: ghee, cold expeller-pressed coconut oil, olive oil, and grape-seed oil, in that order. Of the 4, olive oil has the lowest smoke point so I almost never use it for cooking unless I'm sauteeing something at a very low heat or adding it to a soup or stew later in the cooking process and heating everything together.

Ghee and coconut oil have a higher smoke point and don't oxidize easily, and they taste divine in sweet and savoury foods alike.


Spiced Ghee
Makes: approximately 8 oz./1 cup

- 8 oz. organic cow's milk butter, preferably unsalted but salted will do just fine
- 1 tsp cloves, whole 
- 1 tbsp cardamom, whole
- 1 tbsp fennel seeds, whole
- 1 tbsp black Tellicherry peppercorns, whole
- 1 tbsp caraway seeds ("shah jeeru" in Gujarati)
- 1 stick cinnamon, 3-4 in. long

- stainless steel pan (cast-iron and enamel may be ok, but definitely not non-stick or aluminium)
- fine mesh strainer

1. In a mortar and pestle, lightly crush the peppercorns, cardamom, and fennel.
2. In the same pan that you will use to make ghee, add all the spices and turn on the heat to low and gently dry-roast the spices till aromatic. This will happen within a minute so keep an eye on things or you'll have burnt-tasting spiced ghee. If you are distracted or short on time, skip this step and add the spices and butter together to the pan. Unroasted spices will affect the final flavour far less than burnt spices!
3. Add the butter, turn the heat up to medium-low and let the butter melt completely.
4. Turn the heat to very low, for the remainder of the process, 25 - 30 minutes. The butter will start to foam and you will hear the butter crackle and pop - this is water evaporating from the butter.
5. Periodically check the butter without stirring: tilt the pan slightly or use a stainless steel or wood spoon to separate the foam so you can see the butter solids and spices. As the butter cooks, the solids will separate and settle, and the butter will get clearer.
6. As more and more water evaporates, the crackling and popping will reduce and the solids at the bottom of the pan will turn caramel in colour. Around 20 - 25 minutes after you start cooking the butter on low heat, the crackling and popping will almost completely stop. The solids will also turn a deep golden colour (not dark brown!).
7. TURN OFF THE HEAT! Deep golden to burnt takes no time at all and that's most definitely going to make the ghee taste burnt. 
8. Using a fine mesh strainer, strain the ghee into a completely dry container. Let the ghee cool completely before putting a lid on the container.
9. Store in a covered container at room temperature. Ghee at room temperature is straw coloured with a semi-liquid texture. If correctly made, it will be easily spoonable at room temperature, no scraping required. Always use a clean spoon to scoop out ghee for use. Ghee does not need to be refrigerated and if it is not exposed to contaminates, it will keep for over a year, even outside the fridge.

Notes:
1. If you don't have a strainer with very fine mesh, improvise by putting a paper towel inside the strainer and strain the ghee through that.

Thursday, September 5, 2013

RICE, RED LENTILS, AND VEGETABLES WITH RAS EL HANOUT

Ras el hanout meaning 'best of the shop' is a Moroccan spice blend that, much like Indian garam masala or even American barbecue rubs, has endless regional variations. It does have staple ingredients including turmeric, allspice, nutmeg, cinnamon, coriander, cloves, paprika, cardamom, with other things like rose buds, saffron, and various berries or pepper mixed in based on the region and blender's choice.

I'm no expert on ras el hanout but one day when I was shopping at the Rainbow co-op market where I normally shop, and often stare at the countless spices they have in bulk, I saw ras el hanout. I'd heard of it and read about it but never cooked with it... so what? Rome wasn't built in a day, was it?

Rainbow not only allows but encourages shoppers to bring their own containers. In addition to my usual olive and coffee jars, I'd brought along a few spice jars that were running on empty, and I had an extra one so in went a very generous amount of ras el hanout.

FFwd to last night. First day back in office after a few weeks of being at various project sites with 14 hour days starting at 5 AM that involve no sitting but a lot of climbing, squatting, kneeling, and walking in all varieties of the summer sun. And of course, I was eating out at every meal. So when I finally got into the kitchen I was craving something warm, nourishing, and comforting. Something casserole-y, something like risotto, something like khichadi, something aromatic, something easy to make, not too laborious. Enter rice, lentils, ras el hanout... and me.


Rice, Red Lentils, and Vegetables with Ras el Hanout
Servings: 4, as a main dish

- 1/2 cup Jasmine rice or other rice of choice
- 1/2 cup red lentils
- 2 shallots or 1 small yellow onion, sliced
- 2 large cloves garlic, minced
- 1-1/2 tsp. caraway seeds
- 1-1/2 tsp. fennel seeds
- 1 tbsp. or more, ras el hanout
- 1 tsp. turmeric (optional)
- 1 tsp. red pepper powder, or crushed 'flakes'
- 1 tbsp. ghee or expeller-pressed virgin coconut oil (or any other high temperature cooking oil - NOT olive oil)
- vegetables of your choice, diced
- 2 tbsp. flame raisins
- 2 cups water, or enough to completely cover the rice, lentils, and vegetables (see #10 below)
- 3 tbsp. fresh parsley, chopped

1. Put the rice and lentils in a bowl and rinse until the water runs nearly clear. Drain.
2. Add warm/hot water to the bowl enough to cover the rice and lentils and let everything soak while you prep the vegetables. The hottest kitchen faucet water is hot enough for this.
3. Cut the vegetables into chunks that are fairly same-sized, so that they cook uniformly.
4. Heat the coconut oil on medium heat in a large pan, till a fennel seed dropped into it sizzles.
5. Add the fennel and caraway seeds and let them sizzle until you can smell the aroma.
6. Add the shallot and garlic and saute till the shallot is translucent and is just getting a bit brown.
7. Add the cut vegetables and spices and saute everything for 5 minutes. Stir often enough to prevent vegetables from sticking to the pan or burning.
8. Drain the rice and lentil mixture.
9. Add to the pan and saute on medium-low heat for 2-3 minutes along with the vegetables.
10. Add enough water to cover the rice, lentils, and vegetable mixture.
11. Turn the heat to high. When everything starts to bubble a bit, turn the heat to low.
12. Cover and cook on low for 10-15 minutes.
13. Uncover, add the raisins and give it all a quick stir.
14. If the rice isn't cooked yet, cover the pan and let everything cook for another 5 minutes or so.
15. When it's cooked, turn off the heat and add the chopped parsley.
16. Enjoy!


Wednesday, February 20, 2013

CACIO E PEPE, TOASTED PEPPERCORNS

Smoky, toasted peppercorns are the only way I use pepper now! And pasta cacio e pepe... well it's pasta, olive oil, cheese, pepper, what's not to love?!


Toasted Peppercorns
makes: 1/2 cup

- 1/2 cup good quality black peppercorns (Tellicherry or such) 
- pan that can hold the peppercorns in 1 layer (I use a cast-iron skillet)

1. Put the peppercorns in the pan and turn on the heat to medium-low to toast.
2. Toss or stir occasionally until the peppercorns are fragrant.
3. When you smell the aroma, turn off the heat
4. Immediately remove the peppercorns into a bowl - they will continue to toast and then burn if you leave them in the hot pan.
5. Let the peppercorns cool completely and store in a jar.


Cacio e Pepe
makes: 2 servings

- 1/4 lb. pasta of choice (I used spaghetti this time; I don't use whole wheat pasta) 
- 1 tbsp. olive oil
- 1/3 cup good Parmigiano Reggiano or Pecorino Romano, finely grated
- 1 tsp. toasted pepper, coarsely ground

1. Bring a medium sized pot of salted water to a boil.
2. Add the pasta and boil until al dente, turn off the heat.
3. Heat olive oil in a pan, add a generous 1/2 tsp. coarsely ground toasted pepper.
4. Using tongs, remove the pasta from the water and add to the pan.
5. Swirl the pasta to coat with olive oil and pepper.
6. Turn off the heat.
7. Add the grated cheese immediately and swirl until the cheese coats the pasta.
8. Serve with additional cheese and pepper to taste. Here I've served it with roasted mushrooms, green beans, and brussels sprouts.

Notes:
1. 1/4 lb. pasta (long shapes like spaghetti, naturally you can't measure short pasta this way!) is a bunch approximately 1 inch in diameter.
2. Make an approximately 1 inch circle with your index finger and thumb. Whatever fits in the circle is roughly 2 servings.