Showing posts with label cheese. Show all posts

Thursday, October 18, 2018

GOUGÈRES: CHEESE PUFFS

Gougères are light and delicious cheese puffs made with pâte à choux, the same pastry dough that's used for profiteroles, eclairs, etc. It's a quick and fairly easy dough to make, somewhat fool-proof since it relies on aerating rather than a rising agent like baking powder or yeast.

Typically, gougères are made with Comté or Gruyère cheese, but really any cheese that melts will be fine if you don't specifically want the flavours of Comté or Gruyère cheese. This time, since I was pairing them with a slew of southern Rhône wines, I used a mix of Comté and Füürtüfel - a terrific spicy Swiss cheese.


GOUGÈRES: CHEESE PUFFS
makes: ~20 medium gougères

- Equipment: hand mixer with two beaters
- 1 cup milk
- 1 cup all-purpose flour
- 3 large eggs
- 4 tablespoons butter
- 1/4 teaspoon salt
- 1-1/2 cups grated Comté, Gruyère or other Swiss cheese
- 1/2 tsp cayenne pepper (optional)
Optional: Fleur de sel to sprinkle on top before baking
  1. Bring the milk, butter and salt (and cayenne, if using) to a boil in a medium saucepan. Remove from the heat, add the flour all at once, and mix vigorously with a wooden spatula until the mixture forms a ball, taking care to scrape up all the flour/dough from the base and sides of the pan. Return the pan to medium-low heat and cook for about 1 minute to dry the mixture a bit. Stir to make sure the dough doesn't stick to the pan. Remove from the heat and let cool for 5 minutes.
  2. Add the eggs and use the hand mixer to mix thoroughly and aerate for 4-5 minutes. Let the choux pastry dough cool for 7-10 minutes.
  3. Preheat the oven to 400 °F/200 °C. Line 1 large or 2 medium baking trays with parchment paper.
  4. Add the grated cheese to the dough and stir just enough to incorporate. Use 2 spoons - 1 to scoop the gougère dough and 1 to help drop it on to the baking sheet - to place the dough on the baking tray, spaced ~2 inches apart. Sprinkle a few grains of the coarse salt, if using, on each gougère.
  5. Bake for about 30 minutes, until browned. Do *not* open the oven while the gougéres are baking or they might: not puff up, deflate after cooling, remain dense!
  6. Remove from the oven and let cool for 5 minutes. Serve lukewarm or at room temperature with wine - including champagne - or any other beverage.

Saturday, September 15, 2018

WHITE WINE, RED WINE, BLACK WINE, CAHORS!

The title is a riff on the old nursery rhyme Round and Round the Garden which ends with "One step, two step, three step, bear!". Definitely unrelated to Cahors or any other wine, really. But it was on my mind and so here we are.

"France vs. Argentina" is what this blog post *should* be titled because that's the gist of malbec.

As usual, we can thank the Romans for planting grape vines literally everywhere in the Middle Ages including present day southwest France. Malbec, the intense grape that yields wine so opaque that it has earned the nickname of Black Wine, was prolific in the area around the river Lot, that is now Cahors. But because of shipping regulations that favoured Bordeaux wines, malbec never enjoyed the fame and glory that Bordeaux did even back then. The phylloxera blight in the late 19th century that wiped out nearly all of the Cahors malbec vines certainly did not help things.

While Cahors - and much of France - was dealing with that, malbec vines brought to Argentina in the mid-1800s, were thriving. And have continued to thrive to the extent that for wine, Argentina has become synonymous  with malbec, and French malbec isn't at the forefront of most malbec enthusiasts. But that is changing as more and more vintners are making wine in Cahors and making excellent cool climate malbec from grapes grown in limestone soil, quite different from the fruity ripe malbecs from Argentina.

It can take years to find limestone soil in Argentina, but it takes a few minutes in Cahors. Especially around the terraces above the river Lot, which have a thin gravel and topsoil layer with solid limestone underneath. This soil combined with the cooler climate of Cahors results in tannic wine with a delicious savoury streak. Wine that's distinctly different from the Argentine malbecs which are more supple, fruit-forward, and overall less nuanced than Cahors malbecs. 

This month with the French #winophiles we were tasting Cahors wines, and we had...

2015 CHATEAU LAGRÉZETTE SEIGNEUR DE GRÉZETTE
87% malbec, 13% merlot

Soil: limestone base, gravel topsoil, second terrace above the river Lot

Colour: Deep purple, almost opaque
Nose: Savoury, peppery, some violet, earth

Taste: Smoky, blackerries, pepper, graphite, and leather. Balanced tannins, very delicious everyday wine!

Pairing: We had this with fromage fort and figs. The fromage fort had a mix of several cheeses including blue cheese and quark. It made an excellent match for the savoury wine!

Price: $13


85% malbec, balance merlot and tannat

Soil: limestone base, gravel topsoil, second and third terraces above the river Lot

Colour: Deep purple, almost opaque
Nose: Blackberries, some violet, earth

Taste: Blackberries, pepper, and dusty tannins. Overall more fruit forward and jammy than the Lagrézette, which we preferred over this wine.

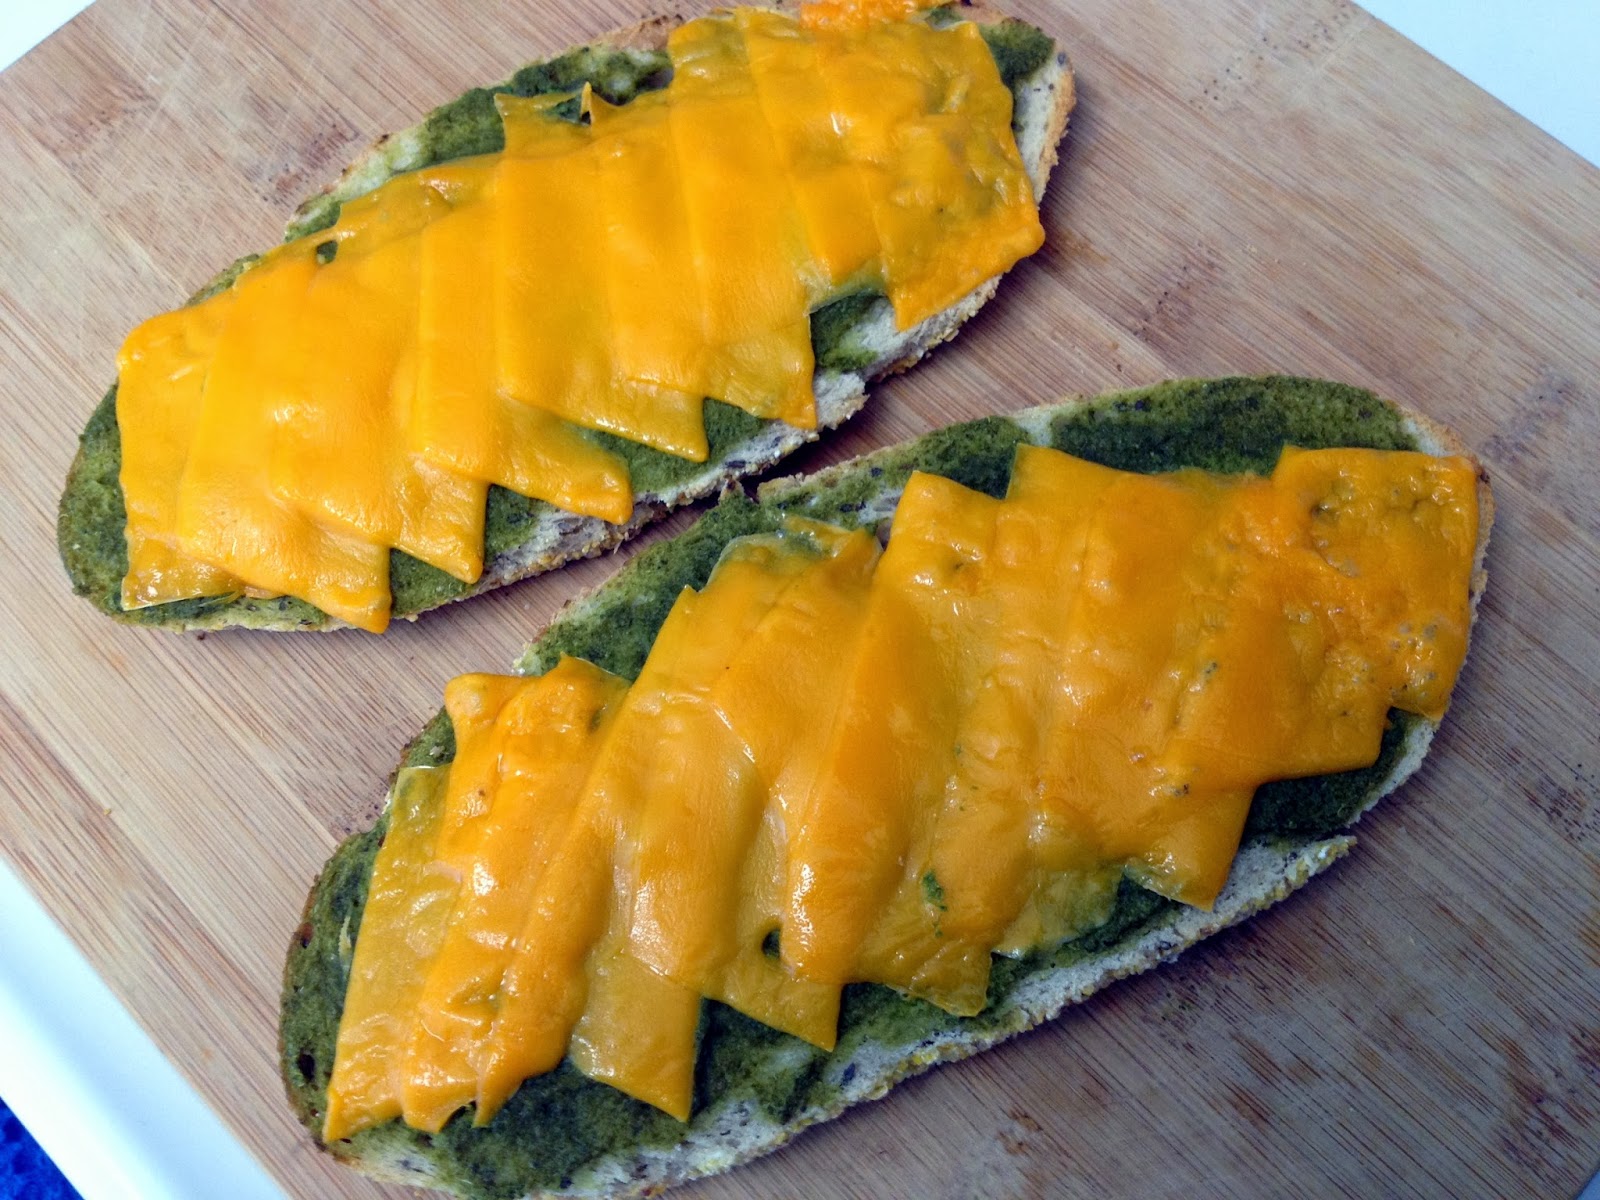
Pairing: We had this with broiled bread, fromage fort and green olive tapenade. Terrific match for this wine!

Price: $12


See what the rest of the #winophiles are saying about Cahors..

Friday, June 15, 2018

MUSHROOM + GRUYERE QUICHE


Mushroom + Gruyere Quiche
Makes: 6 servings

- 1 recipe shortcrust pastry 
- 6 eggs 
- 2/3 cup crème fraîche (or heavy cream) 
- 1 cup whole milk
- 8 ounces gruyère cheese, grated 
- 8 oz mushrooms, sliced (white, crimini, baby portabellas, or shiitake are excellent)
- 1/4 teaspoon freshly ground nutmeg 
- 1 tsp freshly ground pepper
- 1 tbsp butter
  1. Preheat the oven to 425 F / 220 C. 
  2. Roll out the pastry to fit a 10-1/2 inch pie plate or a cake pan with removable bottom. Press the edges against the pie plate or cake pan, poke the bottom with a fork, and place the pastry in the freezer for 30 minutes. 
  3. In the meantime, heat the butter in a pan and sauté the mushrooms until they're cooked and somewhat crisped at the edges. Turn the heat off and set aside. 
  4. Remove the pastry from the freezer and line with parchment paper. Add pie weights (I use dried beans that are solely for use as pie weights) and bake in the middle rack of the oven until the pastry is just browned at the edges, about 15 minutes. 
  5. Remove from the oven, remove the parchment paper and pie weights. Return the pastry to the oven to bake until the bottom is lighty browned, an additional 5-7 minutes. Remove from the oven and set aside. 
  6. In a blender, process together the eggs, cream, milk, and all the spices and seasonings. 
  7. In the par baked pastry, spread the grated cheese in a layer, then add the egg mixture and the mushrooms. 
  8. Bake in the center of the oven until the filling is golden and puffed, and is completely baked through, about 30 - 40 minutes. The quiche is done if it's not shaking in the center, or if a sharp knife inserted into the center comes out clean. 
  9. Remove the quiche from the oven and serve immediately.

Sunday, April 6, 2014

CACIO E PEPE CON ASPARAGI: PASTA IN A CHEESE AND PEPPER SAUCE, WITH ASPARAGUS


As I've said before about cacio e pepe, its pasta, cheese, salt, pepper. What's not to love?! As simple a dish as it is, the flavours of all ingredients really matter, so use the best you can get.

Toasted peppercorns are the perfect smoky spice for anything. Here they complement the cheese exceptionally well to make a cheesy sauce that covers the pasta and asparagus. 

Cacio e pepe is a Roman dish, and traditionally only has cheese, pepper, and pasta tossed together with a little bit of the starchy pasta cooking water added to bind the sauce together. This recipe has sautéed asparagus added because I had some fresh perky asparagus waiting, and I wanted a vegetable with the pasta so I could make it a meal. 


Cacio e Pepe Con Asparagi
Makes: 4 servings

- 1/2 box bucatini or spaghetti 
- 1 lb. asparagus, cut into 2 in. long pieces
- 1 tsp. salt
- 1-1/2 tbsp. coarsely ground toasted black pepper
- 2 tbsp. olive oil
- 3/4 cup Pecorino Romano, grated (in a pinch use Parmigiano Reggiano, Grana Padano, or other hard cheese (or a combination of hard cheeses))
  1. Bring a large pot of salted water to a boil. Add the pasta and boil until al dente.
  2. While the pasta is cooking, heat the olive oil in a large pan.
  3. Add the pepper and asparagus and sauté till the asparagus is tender, about 5 minutes.
  4. When the pasta is done, remove from the heat. Using tongs, lift the pasta from the water, add to the pan with the cooked asparagus and mix in with the asparagus.
  5. Remove the pan from heat. Immediately add the grated cheese and about 1/2 cup of the starchy pasta cooking water and mix so the cheese coats the pasta and asparagus.
  6. Serve hot with additional cheese and pepper to taste.

Sunday, January 19, 2014

SNACK ATTACK: CUCUMBER TOMATO SANDWICHES WITH MIMOLETTE AND PERSILLADE

Easy to make but immensely flavourful sandwiches that are easy to customize with ingredients you have at hand. Such as leftover parsley which I often use to make into a persillade - parsley pesto - a condiment that's great on sandwiches, potatoes, eggs, fish, even on crackers with a smear of goat cheese or fromage blanc.

No parsley, no problem. Use cilantro instead. Replace the serrano pepper with freshly ground black pepper. Add a couple of thin slices of onion under the tomatoes. Get creative!

As with all bread-based recipes, you can use gluten-free bread. But please don't use something weird and processed like the travesty that's vegan "cheese". If you don't want dairy, just skip the cheese and add a few thin slices of a boiled potato to add a creamy note between the persillade and vegetables.


Cucumber Tomato Sandwiches with Mimolette Cheese and Persillade
Makes: 2 sandwiches


Persillade (makes ~1/4 cup):
- 3/4 cups fresh parsley, hard stems snapped off
- 1 serrano pepper, cut into large chunks
- 1 clove garlic, peeled
- 1 tsp. salt
- 1 tsp. lemon juice

1. Blend everything together into a smooth paste. Set aside.
2. Preheat oven to 400 F/200 C.

Sandwiches:
- 1/4 cup persillade (recipe above)
- 4 slices bread of your choice
- 4 - 6 oz. demi-vieille mimolette cheese, thinly sliced (or any other hard cheese of choice)
- 1 tomato, thinly sliced
- 1 cucumber, thinly sliced
- coarsely ground pepper, to taste

1. Spread the persillade evenly on each slice of bread. 
2. Divide cheese slices evenly for 4 slices of bread and arrange on top of the persillade on each slice of bread.
3. Place all 4 slices on a baking tray or pizza stone (no need to heat the pizza stone for this recipe) and put in the oven for 5 minutes or till the cheese is melted and starts bubbling.
4. Remove bread from the oven and arrange tomato slices on 2 of the cheesy slices.
5. Put all the bread slices back in the oven for 5 more minutes.
6. Turn the oven off and take the bread out.
7. Arrange cucumber slices on top of the tomatoes and grind pepper onto the slices with the cucumber and tomato slices.
8. With the cheese side down (facing the cucumbers), top with the other cheesy slice of bread and press firmly to make a sandwich.
9. Repeat with the remaining cucumbers and bread.
10. Cut each sandwich in half and serve. Enjoy!

Sunday, November 10, 2013

GOUGÈRES: BAKED CHEESE PUFFS


The French have done it again. They may have been fashionably late in nearly every one of the America's Cup races here in San Francisco, but they've been trailblazers when it comes to revolutions. I'm referring to revolutions of our taste buds, of course. Not any that were the consequence of inappropriately timed discussions on whether the members of the public ought to eat cake.

So back to the French and their food alchemy... take the gougère for example. Flour, eggs, cheese, salt, pepper. And sometimes herbs or other seasonings. All spooned onto a tray and baked for a bit. Et voila! Un amuse-bouche, comme il faut! Make them a bit large, make them quite small and bite-sized, serve as an amuse-bouche, or hors d'oeuvre. However you serve them, they're delicious. They're perfect even if you don't have company. On evenings when you're feeling peckish and want just wine, olives, nuts, crudités, and something just a bit more.

This is quite a versatile recipe. Usually I use Gruyère or Comté (the French version of Gruyère, and also called Gruyère de Comté) cheese and don't add much other than salt and pepper. But this time around I had the last bit of parsley and a serrano pepper that needed to be used, a lovely hunk of salty, grainy Pecorino Romano and a small bit of aged Gouda so I used those. The important thing is to use good quality cheese since you will definitely taste it. Also be careful when using soft wet cheeses like blue cheese or goat cheese because they can make the dough too wet, causing the gougères to deflate. They'll still taste fine, so if this happens, no need to panic.

Gougères will keep their shape even after cooled, so make them a few hours or even a day ahead of when you want to serve them. Rewarm in a 350 F / 180 C oven for 5-7 minutes or until warmed, and enjoy!


Gougères: Baked Cheese Puffs
Makes: approximately 30 gougères

- 1/2 cup + 2 tbsp water
- 3 tbsp butter, salted or unsalted, cut into cubes
- 1/2 cup all-purpose flour
- 2 large eggs
- 1/4 cup minced parsley
- 1 serrano pepper, finely chopped 
- 3 ounces (approx. 3/4 cup) grated cheese, Pecorino Romano, Gruyère, Comté, or a combination of cheeses
- 1/4 teaspoon salt (optional) - You won't need salt if you use salty cheese like Pecorino Romano, Grana Padano, or Parmigiano Reggiano.

  1. Preheat the oven to 425F / 220 C. Line a baking sheet with parchment paper.
  2. Heat the water, butter, and salt, if using, in a saucepan until the butter is melted.
  3. Dump in the flour all at once and stir vigorously until the mixture pulls away from the sides into a smooth ball.
  4. Remove from heat and let the dough rest for a couple of minutes - this is important!
  5. Add the eggs, one at a time, stirring quickly to make sure the eggs don’t ‘cook’. The batter will look a bit lumpy, but after a minute or so, as you stir it will smooth out. (You can do this step of mixing in the eggs in a food processor or electric mixer, but I've never needed to do that.)
  6. Add the grated cheese, parsley, and chopped serrano, and stir everything until well-mixed.
  7. Make small 1 in. balls from the dough and put on the baking tray. If your dough is wetter and can't be rolled into balls - sometimes mine is, depending on what cheese I use of how large the eggs are - use two spoons to mound the mixture on to the baking tray.
  8. Bake for 10 minutes, then turn the oven down to 375 F / 190 C and bake for an additional 15 minutes, until the gougères are completely golden brown.
  9. Serve warm.

Saturday, November 9, 2013

CAULIFLOWER GRATIN OR, HOW TO MAKE BÉCHAMEL SAUCE


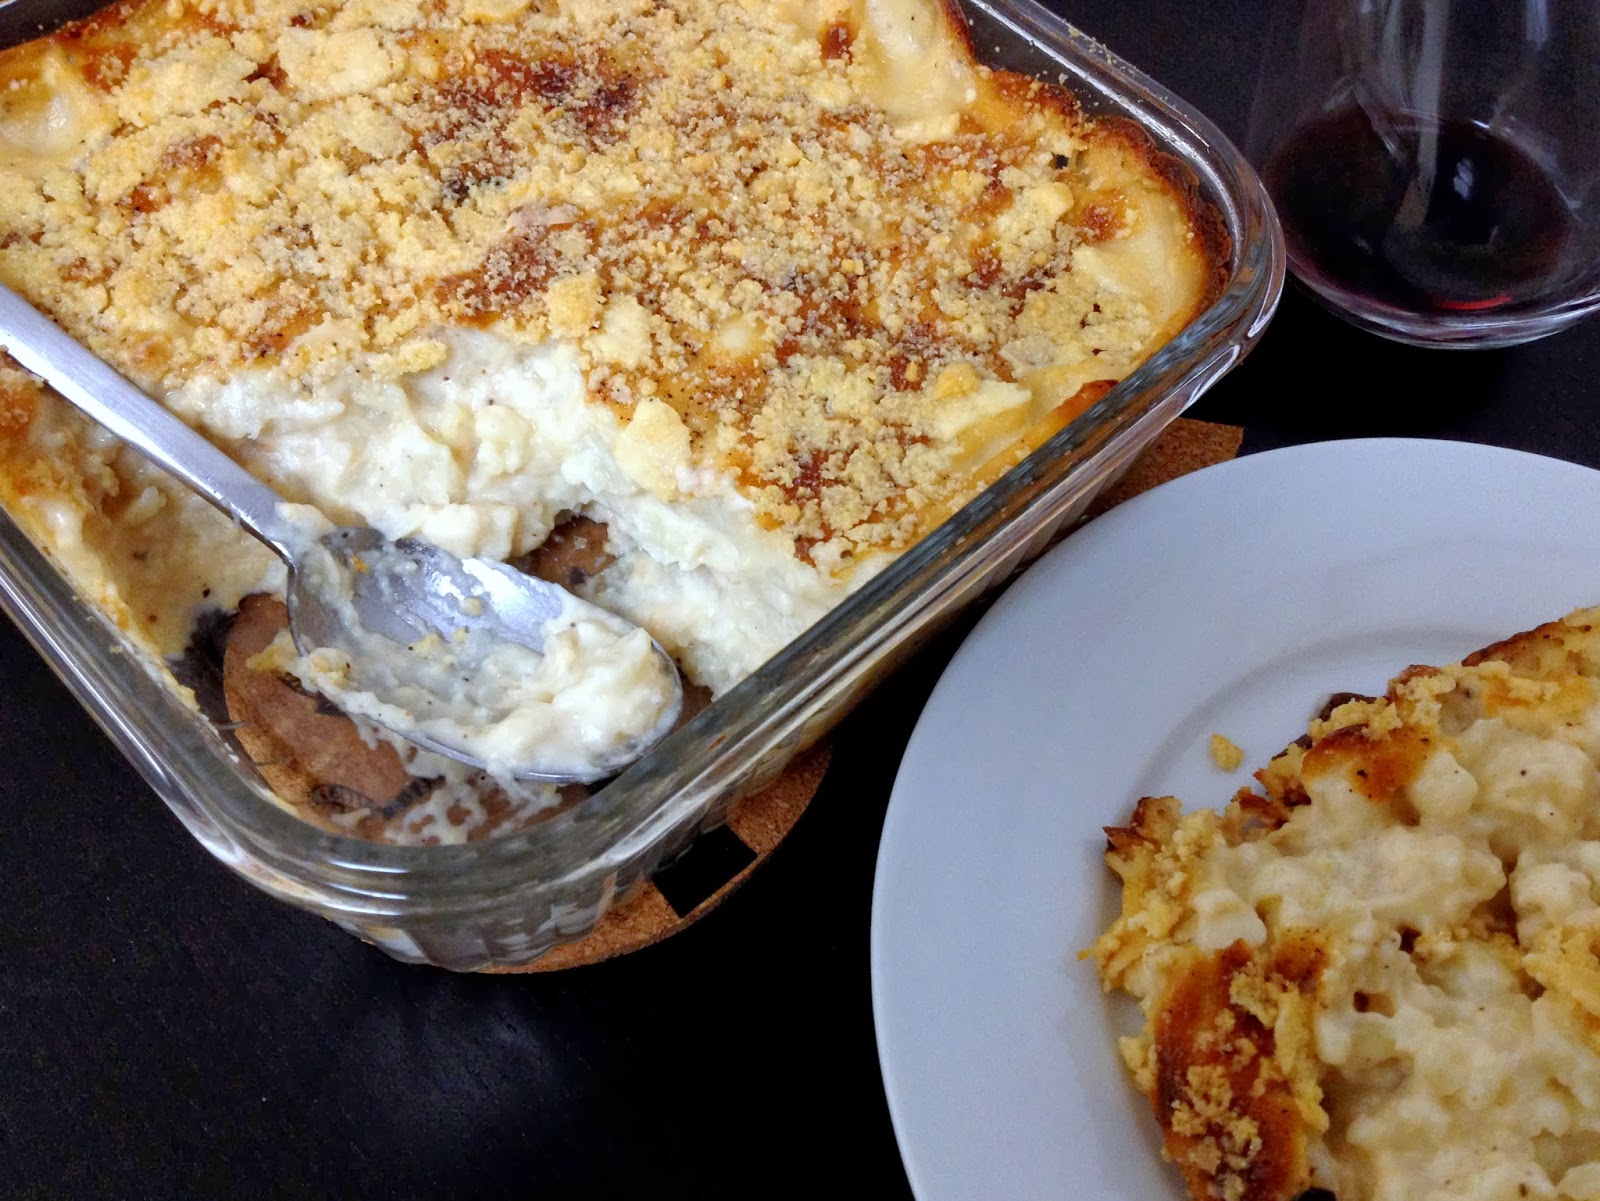
Nothing fancy here, just a classic French homey gratin, and as much a comfort food of childhood as now. Gratin refers to the pan in which this is cooked, and so all things cooked in a gratin are gratin. :-) With a salad and perhaps bread, this is an easy dinner. It's a make-ahead kind of dish that can sit in the oven for as long as an hour without drying out thanks to the béchamel sauce.

It's also quite a versatile dish - if you want, add a cubed potato or two to the cauliflower. Traditionally, you rub the gratin pan with garlic but I add minced garlic to the béchamel. Sometimes I add a chopped shallot as well. Contrary to what some recipes say, the classic gratin does not require cream of any kind. Just milk - preferably whole, but at least 2%. Skim milk is a waste of time.

In this gratin the star of the show is the béchamel sauce - one of the mother sauces of French cuisine, best presented in Escoffier's Le Guide Culinaire or his 800 page, 2000 recipe compendium Ma Cuisine. I bought a hardbound old copy of Ma Cuisine for $2 at a used book store in Half Moon Bay years ago. I have no idea why anyone would get rid of this book, but they did, and I scored! Anyway so béchamel is the base of other sauces such as Mornay and soubise. The quality of bechamel however, depends on the quality of the roux. Roux is nothing more than about equal parts of flour and butter - slightly more flour than butter - cooked together to form a binder for the other ingredients. There's brown roux, pale roux, and white roux. The color of the roux, logically, will determine the colour of your sauce.

Gratins such as potatoes dauphinoise, this cauliflower gratin, and other recipes where béchamel sauce is used, require a white roux which is used for white sauces. A brown roux is used for dishes that call for a brown sauce, and a pale roux is used for veloutés - velvety cream sauces.

Béchamel is really easy to make once you can make roux correctly. Cook the roux on a low-medium flame, never medium or high. You want to allow time for the starch cells in the flour to burst so that the butter combines with the starch without burning the starch (which high heat will do, and therefore require more roux in your béchamel which therefore will be really sludgy and overpower the other ingredients). You will see that as the starch and butter combine, the flour-butter mixture goes from the initial large clump to a soft, loose, stir-able mixture. And it will smell nutty. 


It's very important to keep an eye on the roux when it starts to smell nutty because then it will turn colour from white to brown - which we don't want for béchamel. So once it's loose and stir-able, cook for a minute or so and add the milk, salt, pepper, and whatever seasonings and spices you're using.


Cauliflower Gratin: Gratin de Chou-Fleur
Makes: 4 servings

- 1-1/2 lbs florets of white cauliflower
- 5 tbsp unsalted butter
- 6 tbsp all-purpose flour
- 3 cups milk, 2% or whole
- 1-1/2 tsp sea salt or any other good quality salt
- 1 tsp freshly ground black or white pepper
- 1/4 tsp grated nutmeg
- 1 clove garlic, minced or chopped
- 3 cloves, whole (don't use powdered!)
- 1/4 cup shallot, finely chopped (optional)
- 1/2 cup grated Comté, Gruyere, Emmenthaler, or Pecorino Romano cheese
  1. Preheat the oven to 350 F / 180 C.
  2. Boil a generous amount of water - enough to completely submerge the cauliflower - in a large stainless steel pan and add the cauliflower florets. Bring everything to a boil, and cook, uncovered, for about 5 minutes. Drain and set aside. Or you can steam the cauli for 5 minutes.
  3. Melt the butter in a medium saucepan. Add the flour and cook over low heat for about 2 minutes, stirring with a whisk. Don't let the mixture brown - it should be white, maybe very slightly off-white. 
  4. When the flour-butter mixture feels and looks loose and smells nutty, add the milk and bring to a boil over medium heat, stirring constantly to prevent it from burning or sticking to the pan.
  5. Simmer over low heat for 2 minutes. Add the salt, pepper, nutmeg, garlic, and cloves if using. Bring to a boil. Remove from the heat.
  6. At this point you can remove the whole cloves if you want, but I always leave them in because they don't overpower the flavour and give the gratin a warm fragrance which I love.
  7. Generously butter or oil a gratin dish. Put half of the cauliflower florets in the dish and evenly pour half of the béchamel over the florets.
  8. If using shallots, sprinkle the chopped shallots over the béchamel, add the remaining cauliflower florets and evenly pour the remaining béchamel over the florets.
  9. Sprinkle with the cheeses and bake for about 30 minutes, or until golden brown.
  10. Pull the bubbling gratin out of the oven and let it stand for 10-15 minutes before serving.
  11. Enjoy!

Tuesday, July 9, 2013

PEACH, BASIL, AND RICOTTA CROSTINI

The juicy simplicity of summer!


Peach, Basil, and Ricotta Crostini
Servings: makes about 30 crostini

- 1 sourdough baguette, sliced
- 3-4 medium sized ripe peaches or nectarines, cut into 1/8 in. slices
- 15 oz. (425 g) ricotta cheese (I use whole milk ricotta)
- 1 bunch 
or 30-40 leaves, fresh basil
- 1-1/4 tsp. freshly ground coarse black pepper
- 1 tbsp. lemon rind
- 1 small lemon, juiced
- 3/4 - 1 tsp. salt
- 1 tbsp. brandy or cognac (optional)

1. Preheat the oven to 350 F/180 C.
2. Toast the sliced bread for 7 - 10 minutes, or until just dry and crisp.
3. In a roomy bowl, mix well the ricotta, salt, pepper, lemon juice, lemon rind, and brandy/cognac if using.
4. Take the bread out of the oven and let ir cool for 1-2 minutes.
5. Assemble the crostini: on each slice, stack a tablespoon of the ricotta mixture, 1-2 leaves of basil, 1-2 peach slices.
6. Finish with freshly ground black pepper and a light sprinkle of salt if needed.

Notes:
1. You could do a few spring and summer fruit/vegetable-herb combinations, really... cherry-mint, strawberry-mint/basil, cucumber-dill/basil/cilantro, mango-mint/basil, thinly sliced kumquats-parsley, fresh figs-basil, chives-lemon-olives...

Wednesday, February 20, 2013

CACIO E PEPE, TOASTED PEPPERCORNS

Smoky, toasted peppercorns are the only way I use pepper now! And pasta cacio e pepe... well it's pasta, olive oil, cheese, pepper, what's not to love?!


Toasted Peppercorns
makes: 1/2 cup

- 1/2 cup good quality black peppercorns (Tellicherry or such) 
- pan that can hold the peppercorns in 1 layer (I use a cast-iron skillet)

1. Put the peppercorns in the pan and turn on the heat to medium-low to toast.
2. Toss or stir occasionally until the peppercorns are fragrant.
3. When you smell the aroma, turn off the heat
4. Immediately remove the peppercorns into a bowl - they will continue to toast and then burn if you leave them in the hot pan.
5. Let the peppercorns cool completely and store in a jar.


Cacio e Pepe
makes: 2 servings

- 1/4 lb. pasta of choice (I used spaghetti this time; I don't use whole wheat pasta) 
- 1 tbsp. olive oil
- 1/3 cup good Parmigiano Reggiano or Pecorino Romano, finely grated
- 1 tsp. toasted pepper, coarsely ground

1. Bring a medium sized pot of salted water to a boil.
2. Add the pasta and boil until al dente, turn off the heat.
3. Heat olive oil in a pan, add a generous 1/2 tsp. coarsely ground toasted pepper.
4. Using tongs, remove the pasta from the water and add to the pan.
5. Swirl the pasta to coat with olive oil and pepper.
6. Turn off the heat.
7. Add the grated cheese immediately and swirl until the cheese coats the pasta.
8. Serve with additional cheese and pepper to taste. Here I've served it with roasted mushrooms, green beans, and brussels sprouts.

Notes:
1. 1/4 lb. pasta (long shapes like spaghetti, naturally you can't measure short pasta this way!) is a bunch approximately 1 inch in diameter.
2. Make an approximately 1 inch circle with your index finger and thumb. Whatever fits in the circle is roughly 2 servings.

Thursday, January 31, 2013

PIZZA - BEST DOUGH AND SAUCE EVER!

The sauce sounds strangely plain, but it's not. Try it and you'll know what I mean! I like all of the crust to have sauce so I spread it to the edge.


Pizza Dough
makes: 5 loaves, of 7 oz. each (enough for approximately 4-5 thin crust pizzas)

- 4-1/2 cups unbleached Tipo 00, bread, or unbleached all-purpose flour
- 1-2 tsp. active dry yeast
- 1/4 cup olive oil (optional, but I recommend it - it makes the dough supple and lovely)
- 1-2 tsp. salt
- 1-3/4 cups cold water (ice cold, not room temperature)
- Semolina or cornmeal for dusting the pan (I use cornmeal since I always have some)

1. If your yeast is old, it may not be alive - proof the yeast as described in the Notes below to check if it is alive.
2. Stir together the flour, salt, and yeast in a large bowl. If you are proofing the yeast, mix the flour and salt well, then lightly mix in the yeast mixture, then follow the instructions below.
3. Mix oil and water into the flour with a metal spoon or by hand.
4. Knead the dough for 5-8 minutes or until it is smooth, springy, and elastic. Don't over-knead or you'll get a chewy pizza crust later!
5. The dough should clear the sides of the bowl. If it's sticky, add flour by the tablespoon; if it's dry, add water by the tablespoon, until the flour comes together.
6. Let the dough rest for 10 minutes, knead gently for barely 30 seconds, and put in a large bowl.
7. Cover the bowl and put in a warm place (not hot) for 1 hr. or until the dough has doubled in size.
8. Deflate the dough and shape into a ball.
9. Coat the dough ball lightly with olive oil and refrigerate overnight or for up to 3 days, in a large airtight container.
10. Remove the dough from the fridge at least 1 hr. before using (room temperature dough is easier to work with, and prevents over-working the dough).
11. Preheat oven to 450 F/230 C.
12. Sprinkle semolina or cornmeal on baking trays.
13. Divide the dough according to the number of pizzas you want to make.
14. Stretch the dough with floured hands and place in the baking trays. (Rolling pizza dough will overwork the gluten in the dough and make the crust too chewy/a bit leathery.)
15. Lightly shape the stretched dough in the trays to fit as needed.
16. Top with a thin layer of sauce and add toppings of choice. (Don't over do the sauce and toppings - it's a thin crust pizza so don't weigh the crust down)
17. Use good quality toppings. Skimp on quantity not quality.
18. Bake for 7-8 minutes or until the edges are browned, cheese is melted, and toppings sizzle.

NOTES:
1. Proofing yeast - even the regular non-Rapid Rise kind - is only done to prove that the yeast is alive before preparing a recipe. Proofing is not imperative in baking if you are confident that your yeast is alive.
2. To proof 1-2 tsp. yeast: heat 1/2 cup water to 80 F/26 C, stir in 1 tsp. sugar, sprinkle yeast on the surface, let it sit for 10 minutes. If it is frothy, your yeast is alive and the whole mixture can be added to the mixed dry ingredients. If the yeast does not react, it is dead and cannot be used for baking.

Pizza Sauce
makes: 28 oz. (enough for approximately 4-5 large thin crust pizzas)

- 1 14-oz. can crushed tomatoes
- 1 14-oz. can diced tomatoes (or use all crushed tomatoes, or buy canned Marzano tomatoes and crush them yourself)
- 3-4 tbsp. olive oil
- 2-3 cloves garlic, crushed
- salt

1. Mix the tomatoes, oil, and garlic in a pan.
2. Simmer for 30 minutes.
3. Season with salt.

NOTES:
1. This is a typical sauce used for Italian pizza. Unburdened with forced flavourings. Herbs, anchovies, and other things should be added on the pizza, never in the sauce.

Topping Ideas
makes: varies

- Caramelized onions, olives, anchovies
- Crisp bacon, Gorgonzola, arugula
- Roasted sliced fennel, Italian sausage, garlic
- Pears, Fontina cheese, walnuts, grated lemon rind (under cheese or mixed in with pears)
- Burrata, tomatoes, pesto Genoese
- Feta, olives, basil
- Roasted sliced mushrooms, sauteed spinach, onions, prosciutto
- Roasted rosemary potatoes, anchovies, olives
- Roasted cauliflower, chevre, chives, truffle oil (drizzled on after baking)

Other Topping Ideas
makes: varies

- Sauces/spreads: Pestos of all kinds, tapenade, roasted garlic and olive oil.
- Cheese: buffalo milk mozzarella, burrata, asiago, Parmigiano-Reggiano, Grana Padano, fresh or aged goat's/sheep's milk cheese, feta, fontina, ricotta, Romano, or whatever strikes your creative fancy!
- Vegetables: sun-dried tomatoes, thinly sliced zuchhini, roasted corn, thinly sliced fresh chiles - jalapenos, serranos, or chiles de arbol (the thin Indian ones), roasted potatoes or aubergines, sliced mushrooms, roasted cauliflower, artichokes, roasted fennel, capsicum, fresh or caramelized onions, kalamata (or other) olives, capers, spring onions, sauteed leeks, roasted parsnips.
- Herbs (preferably fresh but dried will do): oregano, basil, parsley, tarragon, chives, ramps.
- Meats: anchovies, shrimp, roasted poultry, cooked ground beef, proscuitto, ham, salami, pepperoni, Italian sausage, Spanish chorizo, smoked sausage.