Saturday, November 16, 2013

SKINNY DIPPING: FETA, TANGERINE, AND HERB DIP


I'm not quite Marcel Duchamp, but this recipe is a bit like art with found objects. Objects you find in your fridge or pantry, that want to be seen in a new perspective. Objets trouvés, of a different kind.

It takes all of 5 minutes to put together, not counting the time to dig through the fridge and cupboards for the ingredients. I had some feta in the fridge that I didn't really like on its own with anything, so I figured I'll dress it up a bit with parsley, tangerine juice, and seasonings. Then I also saw a grapefruit and I thought, hmmm...

You can use cilantro if you want, or dill, as long as you're using fresh herbs because the herb-y flavour should really come through. Vary the proportions to what you have on hand. The important thing is to combine flavours that work well together.


Feta, Orange, and Herb Dip
Makes: approx. 1 cup


- 3/4 cups feta cheese
- 1/4 cup fresh parsley
- 1 tbsp dried or fresh rosemary
- 1 clove garlic, peeled
- 2 tsp. red or black pepper
- 1/3 cup tangerine and/or grapefruit juice (juice from 1 tangerine, 1/2 grapefruit)
  1. In this order put the: feta, parsley, garlic, pepper, and juice in a blender. Blend till smooth. 
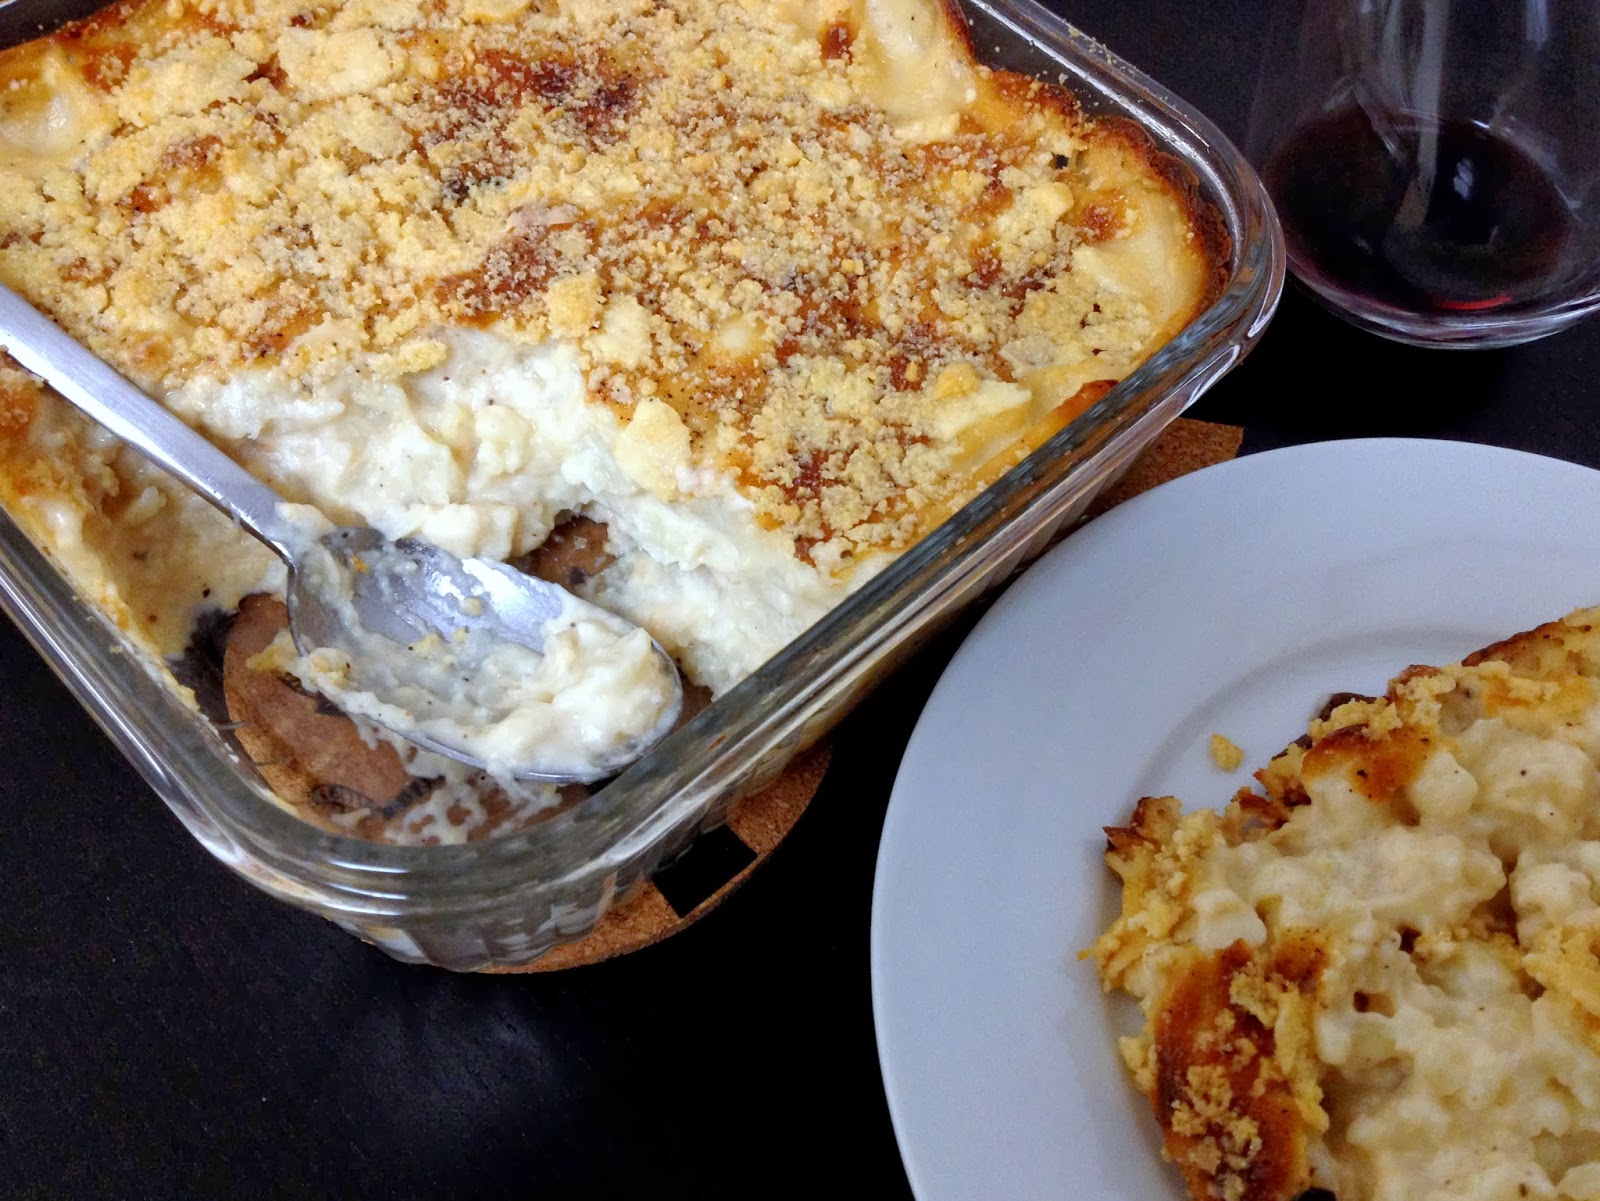
  2. Serve with crackers, pita, crostini, crudités, roasted vegetables, as a sandwich spread, or tossed with pasta.

Tuesday, November 12, 2013

HOW TO ROAST A WHOLE PUMPKIN, AND PUMPKIN SOUP


The pumpkin roasts itself, and the soup nearly makes itself! Can't get much easier - and more autumn - than this. You can roast, peel, and cut the pumpkin a day or two before and store it in the fridge to save on prep time.

Serve with grilled cheese or baked polenta with vegetables for an easy weeknight dinner.

Any winter squash - butternut, acorn, delicata, spaghetti squash - can be roasted like this. Smaller squashes will take less time so keep an eye on the oven, checking the squash periodically after the initial 30 minutes of cooking.


Roasted Pumpkin and Pumpkin Soup
Makes: 6 generous servings

- 1 6 lb sugar pumpkin or any other cooking pumpkin
- 32 oz. vegetable broth
- 1 medium yellow onion, cut into large chunks
- 3 cloves garlic, cut into a few large pieces
- 1 tbsp. coconut oil (or any other cooking fat of choice)
- 2 tsp. salt
- 1-1/2 tsp. curry powder
- 1 tsp. cumin powder
- 1/2 tsp. cayenne pepper
- 1 tsp. sugar

Optional, for garnish:
- 6 tbsp. roasted pumpkin seeds
- Or any one of the following: cream, yogurt, pumpkin oil, shaved Parmigiano Reggiano cheese

Roasted Pumpkin:
  1. Preheat the oven to 375 F / 190 C.
  2. Remove any stickers from the pumpkin, wash, and put the whole pumpkin on a rimmed baking pan and into the oven.
  3. Let it roast for 1 hour or until a knife can be easily inserted into the pumpkin. (If you're making pumpkin soup, now's the time to saute the onions and garlic - see recipe below).
  4. Remove the pan from the oven, and make a couple of cuts in the pumpkin to let steam out.
  5. After 20 minutes or so, cut the pumpkin in half and let the halves cool on the pan.
  6. When it's cool enough to handle, use a spoon to remove the seeds and strings from the seed pocket. Make sure to remove all the stringy bits.
  7. Cut each pumpkin half into 3 wedges and pull the skin off. The skin will be papery and separate already from roasting so it'll come right off without a knife.
  8. Make pumpkin soup (recipe below).
  9. Or, mash or blend the pulp and use within 2 days or freeze immediately up to a month.
Roasted Pumpkin Soup:
  1. While the pumpkin is roasting, heat the coconut oil (or whatever cooking fat you're using) on medium heat and sautee the onion and garlic. Let it all cool.
  2. Break the roasted pumpkin wedges (see step 7 above) into pieces and put in a blender.
  3. Add the sautéed onions and garlic, salt, sugar, and all the spices.
  4. Add 2 cups broth or enough to be able to blend everything into a thick purée until no stringy bits or chunks remain. Add the rest of the broth.
  5. If it's too thick, add water (or milk/cream) to get a consistency you like.
  6. Before taking it out of the blender, taste and adjust seasonings, blend it all one last time.
  7. Transfer to a pan and reheat the soup to a simmer.
  8. Ladle into bowls.
  9. Garnish each bowl with a tbsp. of the roasted pumpkin seeds before serving.

Sunday, November 10, 2013

GOUGÈRES: BAKED CHEESE PUFFS


The French have done it again. They may have been fashionably late in nearly every one of the America's Cup races here in San Francisco, but they've been trailblazers when it comes to revolutions. I'm referring to revolutions of our taste buds, of course. Not any that were the consequence of inappropriately timed discussions on whether the members of the public ought to eat cake.

So back to the French and their food alchemy... take the gougère for example. Flour, eggs, cheese, salt, pepper. And sometimes herbs or other seasonings. All spooned onto a tray and baked for a bit. Et voila! Un amuse-bouche, comme il faut! Make them a bit large, make them quite small and bite-sized, serve as an amuse-bouche, or hors d'oeuvre. However you serve them, they're delicious. They're perfect even if you don't have company. On evenings when you're feeling peckish and want just wine, olives, nuts, crudités, and something just a bit more.

This is quite a versatile recipe. Usually I use Gruyère or Comté (the French version of Gruyère, and also called Gruyère de Comté) cheese and don't add much other than salt and pepper. But this time around I had the last bit of parsley and a serrano pepper that needed to be used, a lovely hunk of salty, grainy Pecorino Romano and a small bit of aged Gouda so I used those. The important thing is to use good quality cheese since you will definitely taste it. Also be careful when using soft wet cheeses like blue cheese or goat cheese because they can make the dough too wet, causing the gougères to deflate. They'll still taste fine, so if this happens, no need to panic.

Gougères will keep their shape even after cooled, so make them a few hours or even a day ahead of when you want to serve them. Rewarm in a 350 F / 180 C oven for 5-7 minutes or until warmed, and enjoy!


Gougères: Baked Cheese Puffs
Makes: approximately 30 gougères

- 1/2 cup + 2 tbsp water
- 3 tbsp butter, salted or unsalted, cut into cubes
- 1/2 cup all-purpose flour
- 2 large eggs
- 1/4 cup minced parsley
- 1 serrano pepper, finely chopped 
- 3 ounces (approx. 3/4 cup) grated cheese, Pecorino Romano, Gruyère, Comté, or a combination of cheeses
- 1/4 teaspoon salt (optional) - You won't need salt if you use salty cheese like Pecorino Romano, Grana Padano, or Parmigiano Reggiano.

  1. Preheat the oven to 425F / 220 C. Line a baking sheet with parchment paper.
  2. Heat the water, butter, and salt, if using, in a saucepan until the butter is melted.
  3. Dump in the flour all at once and stir vigorously until the mixture pulls away from the sides into a smooth ball.
  4. Remove from heat and let the dough rest for a couple of minutes - this is important!
  5. Add the eggs, one at a time, stirring quickly to make sure the eggs don’t ‘cook’. The batter will look a bit lumpy, but after a minute or so, as you stir it will smooth out. (You can do this step of mixing in the eggs in a food processor or electric mixer, but I've never needed to do that.)
  6. Add the grated cheese, parsley, and chopped serrano, and stir everything until well-mixed.
  7. Make small 1 in. balls from the dough and put on the baking tray. If your dough is wetter and can't be rolled into balls - sometimes mine is, depending on what cheese I use of how large the eggs are - use two spoons to mound the mixture on to the baking tray.
  8. Bake for 10 minutes, then turn the oven down to 375 F / 190 C and bake for an additional 15 minutes, until the gougères are completely golden brown.
  9. Serve warm.

Saturday, November 9, 2013

CAULIFLOWER GRATIN OR, HOW TO MAKE BÉCHAMEL SAUCE


Nothing fancy here, just a classic French homey gratin, and as much a comfort food of childhood as now. Gratin refers to the pan in which this is cooked, and so all things cooked in a gratin are gratin. :-) With a salad and perhaps bread, this is an easy dinner. It's a make-ahead kind of dish that can sit in the oven for as long as an hour without drying out thanks to the béchamel sauce.

It's also quite a versatile dish - if you want, add a cubed potato or two to the cauliflower. Traditionally, you rub the gratin pan with garlic but I add minced garlic to the béchamel. Sometimes I add a chopped shallot as well. Contrary to what some recipes say, the classic gratin does not require cream of any kind. Just milk - preferably whole, but at least 2%. Skim milk is a waste of time.

In this gratin the star of the show is the béchamel sauce - one of the mother sauces of French cuisine, best presented in Escoffier's Le Guide Culinaire or his 800 page, 2000 recipe compendium Ma Cuisine. I bought a hardbound old copy of Ma Cuisine for $2 at a used book store in Half Moon Bay years ago. I have no idea why anyone would get rid of this book, but they did, and I scored! Anyway so béchamel is the base of other sauces such as Mornay and soubise. The quality of bechamel however, depends on the quality of the roux. Roux is nothing more than about equal parts of flour and butter - slightly more flour than butter - cooked together to form a binder for the other ingredients. There's brown roux, pale roux, and white roux. The color of the roux, logically, will determine the colour of your sauce.

Gratins such as potatoes dauphinoise, this cauliflower gratin, and other recipes where béchamel sauce is used, require a white roux which is used for white sauces. A brown roux is used for dishes that call for a brown sauce, and a pale roux is used for veloutés - velvety cream sauces.

Béchamel is really easy to make once you can make roux correctly. Cook the roux on a low-medium flame, never medium or high. You want to allow time for the starch cells in the flour to burst so that the butter combines with the starch without burning the starch (which high heat will do, and therefore require more roux in your béchamel which therefore will be really sludgy and overpower the other ingredients). You will see that as the starch and butter combine, the flour-butter mixture goes from the initial large clump to a soft, loose, stir-able mixture. And it will smell nutty. 


It's very important to keep an eye on the roux when it starts to smell nutty because then it will turn colour from white to brown - which we don't want for béchamel. So once it's loose and stir-able, cook for a minute or so and add the milk, salt, pepper, and whatever seasonings and spices you're using.


Cauliflower Gratin: Gratin de Chou-Fleur
Makes: 4 servings

- 1-1/2 lbs florets of white cauliflower
- 5 tbsp unsalted butter
- 6 tbsp all-purpose flour
- 3 cups milk, 2% or whole
- 1-1/2 tsp sea salt or any other good quality salt
- 1 tsp freshly ground black or white pepper
- 1/4 tsp grated nutmeg
- 1 clove garlic, minced or chopped
3 cloves, whole (don't use powdered!)
- 1/4 cup shallot, finely chopped (optional)
- 1/2 cup grated Comté, Gruyere, Emmenthaler, or Pecorino Romano cheese
  1. Preheat the oven to 350 F / 180 C.
  2. Boil a generous amount of water - enough to completely submerge the cauliflower - in a large stainless steel pan and add the cauliflower florets. Bring everything to a boil, and cook, uncovered, for about 5 minutes. Drain and set aside. Or you can steam the cauli for 5 minutes.
  3. Melt the butter in a medium saucepan. Add the flour and cook over low heat for about 2 minutes, stirring with a whisk. Don't let the mixture brown - it should be white, maybe very slightly off-white. 
  4. When the flour-butter mixture feels and looks loose and smells nutty, add the milk and bring to a boil over medium heat, stirring constantly to prevent it from burning or sticking to the pan.
  5. Simmer over low heat for 2 minutes. Add the salt, pepper, nutmeg, garlic, and cloves if using. Bring to a boil. Remove from the heat.
  6. At this point you can remove the whole cloves if you want, but I always leave them in because they don't overpower the flavour and give the gratin a warm fragrance which I love.
  7. Generously butter or oil a gratin dish. Put half of the cauliflower florets in the dish and evenly pour half of the béchamel over the florets.
  8. If using shallots, sprinkle the chopped shallots over the béchamel, add the remaining cauliflower florets and evenly pour the remaining béchamel over the florets.
  9. Sprinkle with the cheeses and bake for about 30 minutes, or until golden brown.
  10. Pull the bubbling gratin out of the oven and let it stand for 10-15 minutes before serving.
  11. Enjoy!

Wednesday, October 30, 2013

HERBED HONEY LIME SALAD DRESSING, GRILLED CORN CHOPPED SALAD

This is easily the best salad dressing I have ever made! And I've always made salad dressing myself, I never buy it. This dressing truly dresses up a salad, with clean ingredients and bright flavours! Best of all, it's quite a forgiving recipe so you can vary the quantities of ingredients however you prefer.

Although, I wouldn't do anything insane like adding parsley instead of mint or - heaven forbid - herbs like rosemary, sage, tarragon and all that. That would be nothing short of a travesty of this dressing!

If you're making the salad too: roasted corn is important in the salad. It rounds everything out with its smokiness. In corn season I buy a bunch of corn, roast it on my gas burner stove top, shave off the kernels, and freeze for use later. That is of course better than frozen store-bought roasted corn, but really, Trader Joe's frozen roasted corn is quite up to par. So definitely use that if you want or have to.


Herbed Honey-Lime Salad Dressing
Makes: approximately 12 oz.

- 1/4 cup fresh lime juice
- 1/8 cup fresh juice from navel, tangerine, or mandarin oranges
- 1/8 cup olive oil
- 2 tbsp honey
- 1 cup fresh cilantro, roughly torn and including tender stems
- 1 cup fresh mint, roughly torn and including tender stems
- 1/2 jalapeño pepper
- 1 garlic clove, peeled
- 1 tsp good quality salt
- 1/4 cup or more water as needed to blend to a smooth, easily pourable, liquid consistency

1. Put everything in a blender or smoothie mixer and blend to a smooth consistency.
2. While still in the blender, taste the dressing and adjust flavours to your taste. Blend again to make sure it's all smooth.
3. Enjoy over salad leaves, roasted vegetables, raw vegetables, rice and raw vegetable salad, or a mixed chopped salad like below...

Grilled Corn Chopped Salad
Makes: a lot, or approximately 10 cups

1. Mix in a bowl small-medium sized dice of:

- 1 cup yellow or red onion
- 1 cup jicama
- 3 Persian cucumbers
1 cup capsicum of any colour
- 1 cup carrots

2. Add
- 1 cup celery, sliced not diced
- 1 pint grape tomatoes, halved
- 1 cup kernels from grilled corn (or use Trader Joe's frozen grilled corn)

3. Toss with three quarters of the salad dressing, adding more if required.

4. Enjoy on its own or as a salsa with tortilla chips! Or stuffed in a pita, as a soft taco with corn tortillas, with a bit of rice on the side, or filled in endive spears.

Tuesday, October 29, 2013

CAULIFLOWER SOUP: THE ONLY RECIPE YOU'LL EVER NEED

Don't fix it if it isn't broken. And this recipe isn't broken. So let your inner gourmet goddess take the day off while you make this soup the way it's written below. Guys, yeah I assumed women are reading this, but even though you're not a woman, the same instructions apply.

I've adapted this from Paul Bertolli's recipe from Cooking by Hand. I say adapted because I usually add less water since I like my soup slightly thicker. Other than that, I don't change it. It's really important not to over-heat the olive oil, and not to let the onions brown at all. Browned onions are tasty but not right now.

I really think the first time you have this soup keep the garnishes light... a drizzle of olive oil and some freshly ground toasted pepper is really all you need. And perhaps when you're on your second bowl, add in a dash of nutmeg or truffle butter. Because cauliflower loves nutmeg and truffles... sparingly.

I simply love this soup just on its own. But if you want, serve this with a hunk of good bread or a parrano grilled cheese for a party in your mouth!


Cauliflower Soup
Makes: 4 main, 8 first course servings

- 3 tbsp olive oil
- 1 medium white or yellow onion, sliced thin
- 1 head white cauliflower (about 1-2 lbs), broken into florets
- 2 tsp good quality salt
- 4-1/2 cups water, heated

- 1 tsp extra virgin olive oil per serving, for 4 servings. For 8 servings, use 1/2 tsp per serving to garnish the soup before eating.
- Freshly ground regular or toasted black pepper, to taste
- Additional salt, to taste

1. Warm - not over-heat - the olive oil in a heavy-bottomed pan. If the oil starts smoking, it's burnt and you have to start over with a clean pan.
2. Sweat the onion in the olive oil over low heat without letting it brown. At medium low this will take around 15 minutes.
3. Add the cauliflower and 1/2 cup hot water.
4. Raise the heat slightly to medium, cover the pot tightly and cook the cauliflower for 15 minutes, or until tender.
5. Then add the other 3-1/2 cups hot water and salt. Bring to a low simmer and cook an additional 15 - 20 minutes uncovered. Make sure the cauliflower is really tender at this point.
6. In batches, blend the soup to a smooth, creamy consistencyLet the soup stand for 20 minutes to let it thicken slightly.
7. Before serving, thin the soup with 1/2 cup hot water if required.
8. Reheat the soup and serve hot, drizzled with the extra-virgin olive oil and freshly ground black pepper.

Sunday, October 27, 2013

MACADAMIA COCONUT BUTTER

My sister brought me some - a lot of - beautiful macadamias from Australia where they grow abundantly. Macadamias are the only native Australian food crop to be commercialized. A couple of years ago, while driving around the Nightcap National Park area, we passed dozens of macadamia orchards where folks had baskets of tree-fresh macadamia nuts set out on tables, to be paid for on an honor system. Most people, particularly in North America and around associate Hawai'i with macadamia nuts but in fact they were introduced to Hawai'i in the late 1800s as a wind shield for sugar cane crops. They were, however, commercialized in Hawai'i well before Australia, which is why they're associated with Hawai'i more than Australia.

So anyway I had all these macadamias sitting around and I thought why not do a butter with these beauties - and add in coconut and sweeten the whole lot with plump Halawi dates I had in the fridge. I happened to have 6 dates left so I put them all in, but if you want a sweeter butter, add more! Medjool dates which are most commonly available would probably work well, although I think Halawi is a more fragrant and soft date and any similar date if you can get it, would be just as good.

Macadamias are quite soft and unctuous compared to, say, almonds or pistachios, and will turn into butter more easily. I add salt to my nut butters if I am using unsalted nuts because salt enhances the flavour of the nut butter. You can certainly omit the salt if you wish.

I like this butter with pear and apple wedges but I sometimes have it on a cracker or in my breakfast rolled oats which I always soak overnight with fruits and nuts or nut butter.


Macadamia Coconut Butter
Makes: approximately 1-1/2 cup

- 2 cups (250 grams) macadamia nuts, toasted or raw
- 6 pitted Halawi dates, or any soft date variety of your choice
- 3 tbsp unsweetened dried coconut, shredded or flaked
- 1/2 tsp good quality salt, I use Himalayan pink salt

1. Put everything in a food processor and pulse until you have a nearly smooth butter, with some date flecks. You will need to occasionally push the ground mix of dates, nuts, and coconut back into the bowl of the food processor, as shown in my almond butter post.
2. Enjoy!

DANDELION PESTO

I love dandelions - the delicate wispy flowers and the delicious leaves! If I had a garden and if dandelions grew in it, I'd never consider them a weed. I usually whip up a dandelion green smoothie - one of my favourites! But this time around I had an exceptionally large bunch of dandelion greens, so I decided to do something different with half of the bunch: pesto. The lemon juice enhances the distinct flavour of the fresh dandelion greens and the earthiness of toasted walnuts. And parsley as always, just livens everything up!

Not only are dandelion greens delicious, but like all delicious things they're high in the feel-good factor: you know, the one you need everyday to feel like you're not slowly degenerating thanks to many weekends - and some weekdays - of long nights and lots of adult bevvies! Anyway, while we're on the subject, dandelion is excellent for liver detox. Not that I need it, but just letting everyone know. It is also rich in iron, calcium, and protein. And it's a leafy green so: antioxidants. Basically, you need some of this weed.

The pesto is fantastic in a grilled cheddar sandwich, as a pizza/pasta sauce, on a burger, with roasted vegetables and some homemade pita, or just with crackers. Or, let your imagination run wild like a dandelion and use it in any way you like!


Dandelion Pesto
Makes: approximately 2 cups

- 3 cups dandelion leaves, cleaned
- 1/2 cup parsley, cleaned
- 3 tbsp extra-virgin olive oil
- 3 cloves garlic, peeled
- 1/2 cup walnuts, toasted just until aromatic
- 1 teaspoon good quality salt, I use Himalayan pink salt
- 1 Meyer or regular lemon, juiced

  1. Put the walnuts, garlic, salt, lemon juice, olive oil, and greens - in that order - into a blender jar and blend until smooth.
  2. Refrigerate or freeze if not using within 2 hours. As all pestos and condiments, this one also tastes best after 6 hours or longer.

Notes:

  1. Use all organic ingredients if possible, especially greens.

Friday, October 18, 2013

KHOUBZ aka PITA: IN AN INSTANT

Khoubz in Arabic, pita in the West via Greece. Whatever you call it, it's easy to make at home! And don't give up even if the first couple of times your loaves aren't the best or the roundest because... well because you can't make an omelette without breaking some eggs. So get to it!

I wanted to try making bread with instant yeast which I never use because it just sounds soul-less. And I am glad I tried it, because now I know why I never use instant yeast. Can't make an omelette without you-know-what!

Of course, it's better to use instant yeast and have bread rather than having none at all, but I missed the flavour of the yeast and delicious yeast-y smell of bread in the oven. If you have time, use the yeast dough method in my pizza dough post. Or make both a couple of times and see if you prefer one over the other.


Khoubz, or Pita
Makes: 8 - 10 loaves

- 3 cups flour
- 1-1/2 tsp salt
- 1 tsp sugar, I use demerara
- 2-1/4 tsp instant yeast (1 packet)
- 1-1/2 cups warm water
- 1/2 cup milk

- 2 tbs olive oil
  1. In a large bowl, mix the yeast, flour, salt, and sugar. Add the olive oil and 1 cup water and mix to form a ball of dough. If the dough is not holding together and is crumbly, add more water 1 - 2 tbsp. at a time. Mix the water really well into the dough each time - don't let the water just remain on the surface of the dough otherwise all you'll get is a sticky mess!
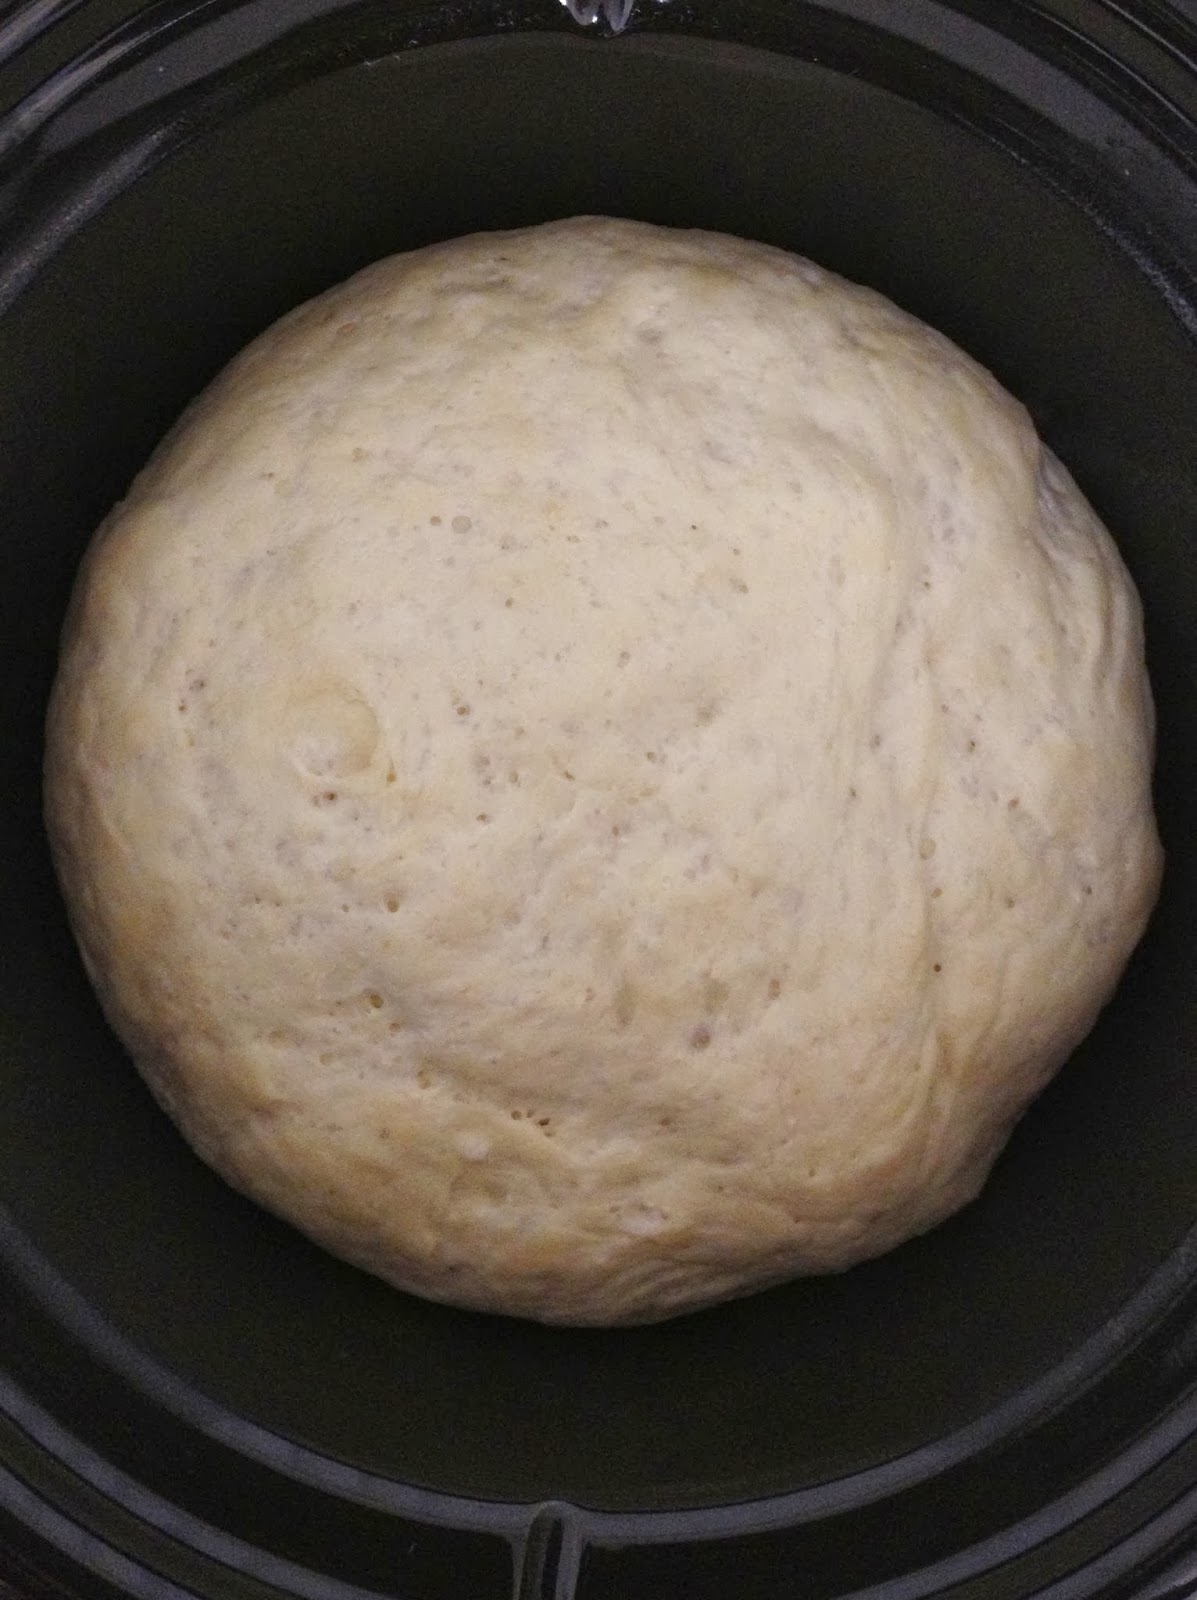
  2. Once you have a ball of dough, put it on the counter-top, baking tray, or cutting board and knead for approximately 5 minutes or until the dough feels smooth and supple. A simple hand kneading technique is to firmly press down on the dough with the palm of your hand, fold the dough in half toward you like you are closing an envelope, rotate the dough 90 degrees and then repeat these steps. But really, knead however you want and do whatever it takes to make that dough smooth like a baby's bum.
  3. Oil your palms with a tsp of olive oil and shape the dough into a ball. Let it rest in a covered bowl in a draft-free, warm place such as an unheated oven. After 60 - 90 minutes when the dough has risen and doubled in size, push it down gently to release some of the yeasty gases and divide the dough into 8 - 10 pieces.
  4. Preheat the oven to 425 F/220 C with or without a pizza stone.
  5. Roll each piece of dough into a ball, cover the balls with a damp kitchen towel, and let them rest for 15 - 20 minutes. Or, roll each ball of dough into a circle, and let it rest in baking trays or any other flat surface for 15 - 20 minutes.
  6. Put 2-3 or however many uncooked pita loaves fit without being crowded on your baking surface and bake for 5-6 minutes. When the bread puffs up and takes on a slight brown colour, remove from the oven. The bread *will* brown and eventually burn if you leave it in the oven for even a minute longer than 5-6 minutes. 425 F/220 C is hot!
  7. If you're not eating these immediately, take them out of the oven, put them in a large container and cover with a damp towel until you're ready to use them. Reheat as needed.

Thursday, October 17, 2013

GRAPE ARUGULA MINT SMOOTHIE

I have at least one 32 oz. green smoothie a day - breakfast or dinner. Sometimes I have one at breakfast and one at dinner - a green smoothie with fruit and a savoury smoothie/raw soup with vegetables.

When grapes are in season, this is one I have pretty much everyday for breakfast or dinner. When grapes are in season, I have them everyday at breakfast, as a snack, or at dinner. But not at all three meals - because that would be a bit of a bore.

As I've mentioned before, the key to getting a good chunkless smoothie in a regular blender - the kind of blender that doesn't have a truck motor and doesn't cost as much as a truck - is to layer correctly in the blender: solid fruits or vegetables at the bottom, light leafy things on the top, just enough water to make a smooth puree, then add more leaves and water. The lemon, salt, and other powdered spices can go in whenever. Don't be afraid to let the blender run on High for a good 2-3 minutes to make everything smooth and well blended.


Grape Arugula Mint Smoothie
Makes: approximately 32 oz./2 pints/4 "regular" 8 oz. glasses

- 2 cups red grapes
- 4 cups arugula or greens of your choice
- 1/4 cup fresh mint leaves
- 1 lemon, juiced
- 1/2 in. piece fresh ginger cut into a couple of pieces (~2 tsp grated or minced)
1 tsp. Himalayan pink salt, or any other good quality salt with trace minerals
- 3-4 cups water, or more, depending on how thin you like your smoothies

1. Blend the grapes, 2 cups arugula/greens, ginger, mint leaves, lemon, salt, and 1 cup water until you have a smooth puree.
2. Add the remaining greens and 1 cup water and blend until it's all smooth. You may need to let the blender run for a couple of minutes while everything is evenly blended.
3. If it's too thick to drink, add the remaining 1 cup of water and blend. Adding too much water will dilute the flavour so taste before adding more water. Besides, you don't want a watery thin smoothie anyway so be judicious with water beyond 3 cups...

Tuesday, October 15, 2013

CHICKPEA, MINT, AND CITRUS DIP (WITH TOASTED PEPPERCORNS)

I seldom write effusive blog posts, but sometimes things just fall into place. Sometimes you have exactly the amount of things you need to fall into place. Or into your blender! Like this delicious dip that will take an unexpected turn in your mouth thanks to the smoky toasted peppercorns and fresh grapefruit.

I pulled a shoulder muscle and was in pain all day at work but I reeeeally wanted to workout like I normally do in the evening. It's the thing I look forward to every single day, because it's fun! And lively. Well anyway a workout was just a preposterous idea because my "trial" moves in the work bathroom left me unable to move much for a good 15 minutes. So I took the hint and came home, certainly not up to cooking or eating.

But - I had cooked chickpeas, a beautiful bunch of fresh mint, which is one of my favourite herbs, and over half a bunch of equally beautiful fresh parsley. And an aging grapefruit.

And - I absolutely hate wasting food and always feel dreadful about having to throw away food, especially if it's because of my own neglectfulness. 

So - I decided that the chickpeas would have to become my usual hummus that I could take to work as a snack, and the herbs would become a persillade but with mint and parsley. And the grapefruit - especially great with toasted pepper and a light sprinkle of salt - would be a snack. That, I reckoned, was the way to dispense with things expeditiously so I could mope about having to stay in all evening.

But as I was laying everything out, the smell of the torn mint and parsley leaves, the lemon, peppercorns, and grapefruit halves was just so heady together that I figured I'd have a go at putting it all together in a dip. And it turned out to be phenomenal - gorgeous light green, with a garlic-ey, herbal scent and the smokiness of toasted peppercorns. Love it!

Chickpea, Mint, and Citrus Dip (with Toasted Peppercorns)
Makes: approximately 1-3/4 cups

- 1-1/2 cups chickpeas, cooked
- 1/4 cup fresh mint leaves
- 1/8 cup parsley
- 1/2 cup grapefruit juice (from 1 medium grapefruit)
- 1 Meyer lemon or a regular lemon, juiced
- 2 large cloves garlic
- 1 tsp minced ginger
- 1 tbsp olive oil
- 2 tsp freshly ground toasted black pepper, or regular black pepper
- 1 tsp salt, or to taste

1. Blend everything until it is smooth. Adjust seasonings to taste - add more lemon juice, salt, pepper, and olive oil to taste.
2. Garnish with minced parsley or a drizzle of olive oil, or both.
3. Let it sit for a few hours/overnight to let the flavours meld and let the dip thicken a bit as the chickpeas absorb some of the liquid before serving. Or, serve immediately as an appetizer with bread/pita, pita chips, crostini, lavash, roasted vegetables, crudites, or as a main with roasted salmon.