Thursday, June 26, 2014

SPICY ROASTED TOMATO AND CHILE SALSA: SALSA QUEMADA


Burnt (roasted) salsa. Or salsa quemada (kay-maada), in Spanish.

If you know me, you know my vast love for Mexican food. It's endless and untiring. Combined with my equally endless and untiring love for spicy sauces and condiments it means you're sure to find a slew of dips, sauces, salsas, and pestos in my fridge at any time! I love making salsas because they're so flavourful and versatile - they go with everything. I usually have a couple of different types in the fridge - they're great when I want to put together a quick rice and bean bowl with roasted vegetables for lunch or a couple of tacos for dinner when I'm famished. 


This salsa, like most salsas, is very easy to make and tastes better the longer it sits. It's great with chips, tacos, on a bowl of beans and rice, roasted vegetables, eggs, steak, chicken, with hot fresh corn tortillas, empanadas, pretty much anything... so dig in!


Spicy Roasted Tomato and Chile Salsa: Salsa Quemada
makes: ~ 2 cups

- 8 chiles de arbol
- 2 chiles guajillos
- 4 - 5 ripe Roma tomatoes
- 1/2 white onion
- 3 cloves garlic, unpeeled
- 1/4 bunch cilantro
- 1/2 lime, juiced
- salt, to taste
- 3/4 cup hot water
  1. Toast the chiles briefly in a a cast-iron or other skillet over medium-low heat until they're aromatic and slightly change colour. This should only take a minute or less... try not to blacken them — burnt chiles add an unpleasant bitterness to the salsa. Transfer the toasted chiles into a bowl and cover them with hot water. Let them sit while you roast the rest of the vegetables.
  2. Turn the heat to medium and put the tomatoes, garlic, and onion (cut side down) into the skillet. Turn the vegetables every few minutes to roast them evenly.
  3. Remove the garlic when it has a few brown spots. Remove the onion when it's nicely charred on the cut side, and slightly softened. Let the tomatoes roast until they're soft and blackened in spots. The skin will start to peel and the tomatoes may crack slightly and release some juices. It's ok.
  4. Turn off the heat and let the tomatoes cool. Remove any loose or blackened skin - it should come off easily. Peel the garlic, cut the onion into 2 - 3 chunks. Drain the water from the chiles.
  5. Add the chiles, tomatoes, garlic, onion, cilantro, salt, and lime juice to a blender and pulse until smooth. Adjust salt to taste before serving.
  6. Serve at room temperature or store in the fridge for a week. If it lasts that long!

MEXICAN BEANS: FRIJOLES DE OLLA


Frijoles de olla: free-HOLays de Oyya

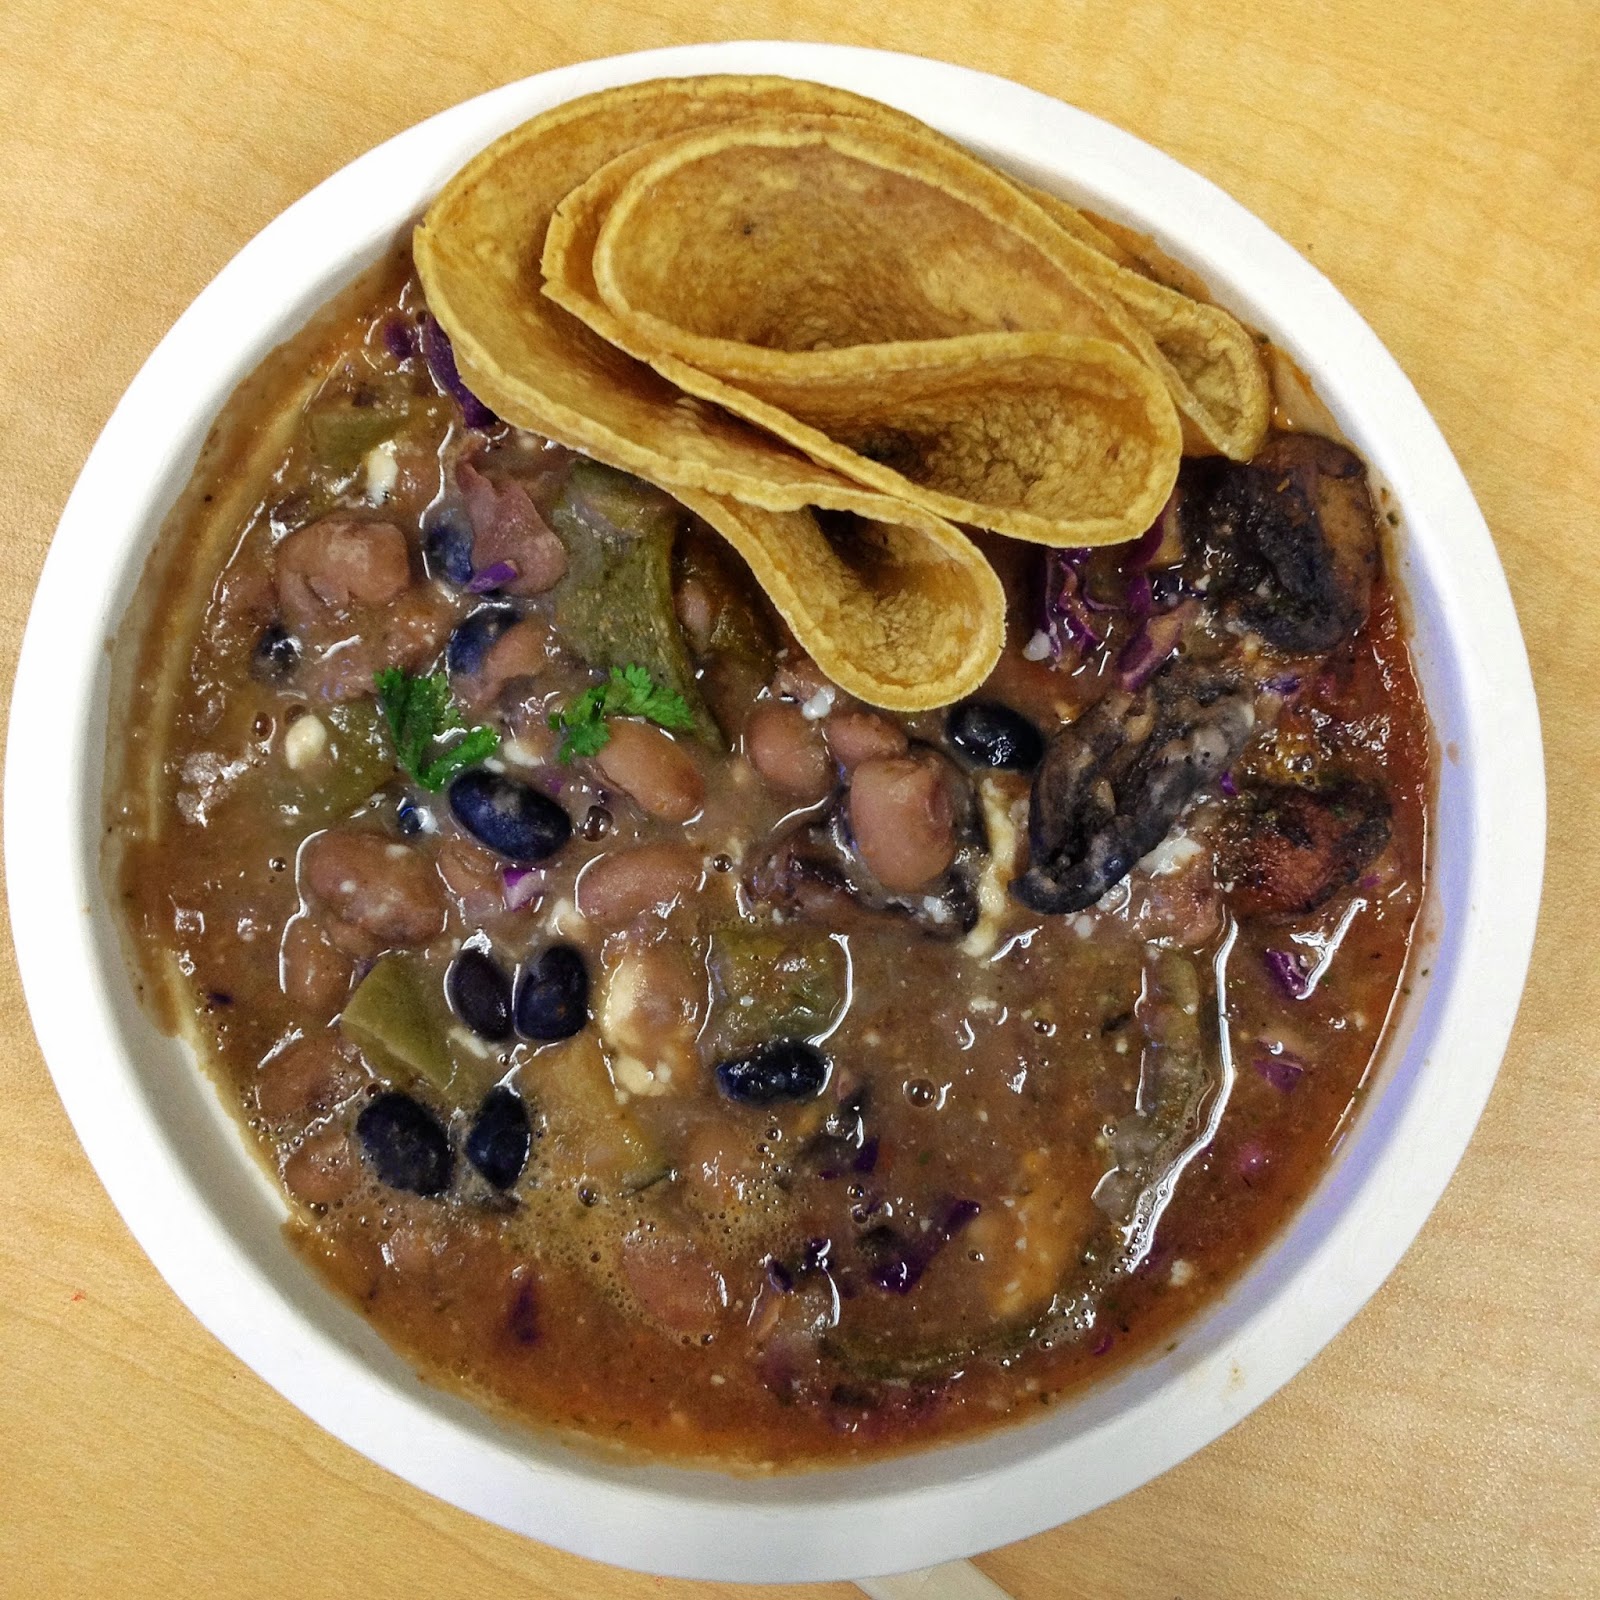
An olla is a clay pot used for cooking soups, stews, and beans in Mexico. For these beans you can use a regular deep stockpot or Dutch oven or the faster way that I use: a pressure cooker. Traditionally, beans are also cooked with lard but I never have lard at home and I don't want to buy some just for the beans. So I cook them in oil and they're just fine. If I were using bacon for something, I'd render fat from bacon and use that and the beans would have a mind-blowing lard-y flavour. If you have good real lard in your kitchen, definitely use that to cook these beans!


The beans are not only a side dish, but can be used for so many other dishes: enfrijoladas, borracho or "drunken" beans, ranch-style beans, refried beans, bean soup, and on top of rice or nachos.


In the north and central parts of the country, pinto beans are popular, whereas black beans are more commonly served in the south. I had a bit of both, so I mixed them and I love the outcome.


Mexican Beans: Frijoles de Olla

makes: 8 - 10 servings


- 2 cups dried pinto beans, soaked overnight and drained 
- 1 cup black beans, soaked overnight and drained
- 1 medium white onion, peeled and chopped 
- 2 large garlic cloves, peeled and chopped 
- 2 tablespoons olive or vegetable oil
- 2 sprigs epazote (optional) 
- enough water to cover the beans by 1 inch 
- salt to taste

Garnishes: chopped onions, crumbled cotija cheese, sliced jalapeños, serranos, or chiles de arbol, chopped cilantro, lime wedges, chopped cabbage
  1. Place the beans in the pressure cooker with the onion, garlic, oil, epazote and water. Do not add salt until the beans have finished cooking. Cover and pressure cook until done. Add salt to taste.
  2. Transfer the beans to a serving bowl. Set out the garnishes on the table so each person can garnish to taste.

Saturday, June 14, 2014

SPANISH OMELETTE: TORTILLA DE PATATAS (TORTILLA ESPANOLA)


Eggs, potatoes, onions: what's not to love?! I love this easy-to-make and easy-to-eat Spanish omelette. It's a classic tapas dish, served at room temperature and cut into batons, bite-sized pieces, or wedges. It's also terrific for brunch, breakfast, or a snack. Or any time you want, really.

If you look online, you'll find a ton of information on the nuances of this omelette, including the use of mad amounts of oil to crisp up the potatoes and etc. etc. Well, it's really unnecessary to glorify what is really just simple pub grub made with simple ingredients. I had a boyfriend from Zamora, Spain, and he made this often for us - minus any fuss or needless snoot.


This omelette or potato "cake" is not related at all to the Mexican corn tortilla. And why not? Well, the explanation is quite simple really. Torta in Spanish means cake. Tortilla is the diminutive of that, and means small cake. So anything that sort of resembles a small cake is a tortilla. Although they're all called tortillas, handmade corn tortillas are considerably thicker than the thin machine-made ones we buy in stores, and can easily be thought of as small cakes.


I made this with purple potatoes because I love the colour, but any potato that's not too starchy will do. I like adding a bit of garlic and some kind of pepper to this omelette: toasted black pepper, paprika, smoked paprika, crushed red pepper, finely chopped jalapeños or other green chiles. They all work really well with the other ingredients. Sometimes I stir in a couple of tablespoons of finely minced parsley as well. You can add a bit of chopped ham or sausage too.

Two things I do to develop a nice texture and flavour, and to keep the eggs from sticking  to the pan are:

  • Add the cooled potatoes and onions to the eggs and let everything soak for 15 min. or so before adding to the hot pan. This is optional, but it develops the texture and flavour really nicely.
  • Add the egg, potato, onion mixture to a hot pan, then turn the heat down after a minute or so of cooking. This prevents the eggs from getting stuck to the pan.


Spanish Omelette: Tortilla de patatas (Tortilla española)
Makes: 1 12 in. omelette

- 6 eggs
- 3 potatoes, sliced or cubed (any waxy kind, not starchy like Russet)
- 1/2 large onion, sliced
- 3 cloves garlic, minced
- 2 chiles de arbol or 1 jalapeño, finely chopped (optional)
- 2 tsp. salt
- 1 tbsp. freshly ground pepper
- 3 tbsp. olive oil
  1. Heat 1 tbsp. of oil on medium heat and sauté the onion until translucent. Add the potatoes and sauté for a few minutes, add 3-4 tbsp. water and cover. Cook for 7-10 minutes or until the potatoes are cooked. Cool.
  2. In a large bowl, whisk the eggs. Add the salt, pepper, garlic, chiles, and cooled potatoes and onions. Add the chopped herbs if using. Gently fold everything together to mix and let it soak for 15 minutes.
  3. Heat the remaining 2 tbsp. oil on high heat in an omelette pan or skillet that has 1 - 2 in. tall sides. Pour in the egg mixture and quickly even it out if the potatoes are mounding in the centre. Cook for 1 - 2 minutes and turn the heat down to medium-low. Cook until the omelette is almost set and the sides somewhat shrink away from the pan. Shake the pan to loosen the omelette - if the omelette doesn't move freely in the pan, slide a spatula under the omelette and loosen it. 
  4. Put a plate, eating side down, over the pan. Invert the pan so the tortilla flips on to the plate. Slide the tortilla back into the pan and top off with any uncooked egg mixture in the plate. Cook for about 5 minutes but not much longer or it will overcook.
  5. In the same way as step 4 above, flip the omelette back on to a serving plate or cutting board.
  6. Serve warm or at room temperature by itself, over a salad, with bread, a bit of ham or Spanish chorizo.

Thursday, June 12, 2014

SALSA VERDE WITH CHILES DE ARBOL


Chiles de arbol - fresh and dried - are very similar in appearance to cayenne chiles, which are typically used in Indian cooking, although the flavours of both chiles are somewhat different. Chiles de arbol are a bit woodsy and smokier than cayennes.

As a side note, in Gujarati, dried cayenne chiles are referred to as "vaghaar na marcha" - chiles used for tempering. We also pickle fresh cayenne chiles with mustard or lime, or eat them raw with a meal, sometimes dipped in salt before each bite. If you cannot find chiles de arbol in a store near you, you can use cayenne chiles for this salsa.


This spicy salsa is really easy to make and will no doubt become a regular in your fridge! It's great with chips, on tacos and enchiladas, as a simmer sauce, over baked/grilled meat or fish, with poached eggs, and - as shown above - even as a poaching sauce for eggs (thin it a bit with water first).

You can make it as spicy or mild as you want. To make it spicy, leave the seeds in the chile pods. To make it mild, break the chiles in half and shake out the seeds before roasting. Either way, it's a really delicious sauce!


Salsa Verde with Chiles de Arbol
makes: ~2 cups

- 8 - 10 chiles de arbol
- 5 medium tomatillos, husks removed, and washed well
- 1/2 medium onion (don't chop it)
- 2 cloves garlic, unpeeled
- 1/2 ripe avocado
- 1/4 bunch cilantro (15 - 20 stalks)
- 2 tsp. salt
- 1 lime, juiced
- 2 cups water

  1. Heat a cast-iron or other heavy skillet. Fill a bowl or lidded container with 1 cup of the water.
  2. Remove the stems of the chiles and toast on the skillet, stirring frequently to keep them from burning. Once the chiles smell fragrant and are lightly browned, remove from the heat and transfer to the container of water. Cover and let the chiles soak while you prepare the other ingredients.
  3. Put the tomatillos, garlic, and onion (cut side down) in the hot skillet and roast, turning once or twice. Once the tomatillos are charred in spots and soft, the garlic is charred in spots, and the cut side of the onion is somewhat blackened, turn off the heat and leave to cool.
  4. Peel the garlic, cut the onion and avocado into 2-3 large pieces, and drain the chiles.
  5. Add the chiles, tomatillos, peeled garlic, onion, avocado, cilantro, salt, lime juice, and 1/2 cup water to a blender jar. Blend till you have a thick salsa (if you want a thinner salsa, add the other 1/2 cup water). Taste and adjust salt and lime.
  6. Store in the fridge up to 3-4 days.

Sunday, June 8, 2014

LYCHEE CUCUMBER SMOOTHIE


Not that we need much convincing to eat this silky juicy fruit by the bagful, but lychees are very high in Vitamin C! Just 10-12 lychees provide 100% of the US Recommended Dietary Allowance (RDA) of Vitamin C. Even if you don't consider the US RDA as sound nutritional advice, lychees are an exceptional little fruit. In addition to Vitamin C, lychees are rich in minerals - potassium, phosphorous, copper, to name a few.


Lychees are very sweet and juicy, but not intensely flavoured. So I like to eat them plain or with a few other fruits. I also like them in smoothies with complementary mild ingredients like mint, ginger, and cucumber. This smoothies is so light and refreshing, you'll want to make it often!


Lychee Cucumber Smoothie
makes: 20 oz.

- 2 cups lychee flesh (~20 lychees, skin and pits removed)
- 1 Persian cucumber, cut into chunks
- 7-10 mint leaves (from 2 sprigs)
- 1/2 in. piece of ginger (peeled if not organic)
- 1 cup water
  1. Put everything in a blender jar in this order: lychees, cucumber, ginger, mint leaves, water.
  2. Blend on High into a smoothie.
  3. Pour into a glass and enjoy! Or refrigerate for up to 12 hrs.

Thursday, June 5, 2014

GREEN GOLD SMOOTHIE


This is one of the most refreshing smoothies ever! The colour is a beautiful bright green thanks to the golden pineapple and mango that soften the deep green from spinach, and the flavour is crisp and refreshing. I'll be making this a lot more.

Flax seeds, like hemp hearts, are a nutritional bazooka. Flax seeds are a complete protein - i.e. they contain all 9 essential amino acids. Most proteins have to be combined with others to make complete protein, but not flax seeds. They can hold their own!

Flax seeds are also one of the best sources of omega-3 fatty acids (omega-6 and omega-9 are the other two types of omega fats - more on those later). Omega-3 fatty acids are the parent molecule for anti-inflammatory hormones in the body and, as with most things, food is the best source rather than supplements.

Ironically, the high omega-3 content of flax seeds makes them highly volatile when pulverised. Flax powder or oil is sold in dark containers to prevent oxidation from exposure to light. Similarly, heat also destroys omega-3 fats and flax seed oil should never be heated. If you're buying flax seed oil, buy organic, cold-pressed oil sold in dark containers.

Flax seeds are also called linseeds. The same linseeds that are pressed to make the linseed oil we all used to mix with paints in art class! In art, linseed oil is used because it dries fast... back to the whole volatility of linseeds thing. Don't go to the nearest Flax or other art store for linseed oil to put in your smoothie though - get food-grade linseed or flax seed oil from the grocery store!

Green Gold Smoothie
makes: 32 oz.

- 1 small cucumber, peeled and quartered
- 1 fresh mango, peeled and cut into chunks (~ 1 cup)
- 1/2 cup pineapple chunks
- 1 Key lime, juiced (or 1 tsp. lime juice)
- 1 lemon, juiced
- 1 in. knob ginger (peeled if not organic)
- 1 tbsp. flax seeds, aka linseeds (or 1 tsp. food-grade flax oil)
- 5 oz. baby spinach
- 1 cup water (or coconut water)
  1. In this order put the ingredients in a blender jar: mango, ginger, cucumber, flax seeds, pineapple, lime and lemon juice, ginger, and water. Blend until very smooth.
  2. Add more water and pineapple to adjust consistency and sweetness if needed.

Sunday, June 1, 2014

KOREAN SQUASH PANCAKE: HOBAKJEON


As I've said before, I *love* Korean food. Especially snack-y things like these pancakes which are quick, easy, vegetarian, and so summery with the zucchini squash. 


Korean Squash Pancake: Hobakjeon
makes: 1 12 in. pancake (1 - 2 servings)

Pancake:
- 2 medium zucchini (or other summer squash), shredded
- 1 tbsp. salt 
- 4 tbsp. finely diced onion
- 2 tbsp. minced cilantro
- 1 tbsp. minced Thai green chile (optional)
- 1 tbsp. fish sauce (or 1 tsp. salt)
- 1/2 cup AP flour (or a mix of rice flours, or your favourite gluten-free flour mix)
- 1/2 cup water
- 4 tbsp. oil

Soy Dipping Sauce: here
  1. In a bowl, mix the salt and shredded zucchini and set aside for 15 - 30 minutes.
  2. The zucchini will release a lot of water - drain the zucchini. Squeeze well by the fistful to remove all the water from the zucchini and place in a large bowl.
  3. To the zucchini, add all the other ingredients to make a thick batter. If the batter is too dry, add water 1 tbsp. at a time till you have a thick batter.
  4. Over medium heat, heat the oil in a 12 in. skillet and swirl to evenly coat the skillet. Add the zucchini batter and spread evenly into a large pancake.
  5. After the edges have browned and crisped up, lift an edge to let the oil under the pancake to crisp up the center and cook for 4 - 5 minutes.
  6. Flip the pancake over and cook for 3 - 4 minutes.
  7. Flip the pancake over again and cook for an additional 2 - 3 minutes.
  8. Transfer to a plate or cutting board and cut into 6 wedges. Serve with kimchi or soy dipping sauce.

KOREAN GREEN PEPPER PANCAKE: GOCHUJEON


I love Korean food... all the various types of kimchi, banchan, stews, rice dishes, porridge (jook), dumplings (mandu), pancakes (jeon), and everything else.

Korean pancakes are a favourite snack - there are many varieties, they are a total snap to make, and go with everything including themselves! I love whipping them up when I'm tall on hunger and short on time, especially on those Friday nights at the end of a long week when I don't feel like slaving over dinner and just want a drink or two with a delish snack. There are so many kinds of Korean pancakes - seafood, meat, squash, potatoes, mung beans, and green peppers, like the ones here.


Korean peppers (in the photo above) are mild and fresh tasting with a crisp texture. If you can't find them in your grocery store, use capsicum or a mix of capsicum and deseeded jalapeños. Capsicum and jalapeños have a thicker skin than Korean peppers, but they'll work in this recipe. Korean peppers are not spicy so if you want a spicy pancake, add a minced serrano, Thai chile, or green chile de arbol to the batter.

(Fun fact: Chiles de arbol - dried red or fresh green - are the variety commonly used in Indian cooking!)


Adapted from here.
Korean Green Pepper Pancake: Gochujeon
makes: 1 12 in. pancake (serves 1 - 2 people)

Pancake:
- 1 cup chopped Korean green peppers (~4 - 5 peppers)
- 4 tbsp. finely diced onion
- 2 tbsp. minced cilantro
- 1 tbsp. fish sauce (or 1 tsp. salt)
- 1 tbsp. chopped Thai chile or other spicy green chile (optional)
- 1/2 cup AP flour (or a mix of rice flours, or your favourite all purpose gluten-free flour)
- 1/2 cup water
- 4 tbsp. oil

Soy Dipping Sauce - Mix in a small bowl
- 4 tbsp. soy sauce (or gluten-free soy sauce: tamari)
- 2 tbsp. rice vinegar (unseasoned)
- 1 tsp. sesame oil
- 1/4 tsp. sugar
- 1 small clove garlic, minced
- 2 tbsp. finely minced onion
- 1 tbsp. finely minced red or green Thai chile pepper
- 1 tsp. toasted sesame seeds
  1. Put all the ingredients in a large bowl and mix well into a thick batter. If the batter is dry, add water 1 tbsp. at a time till you have a thick batter, but don't make the batter too watery.
  2. Heat the oil a 12 in. skillet and swirl around to evenly coat the skillet.
  3. Pour the batter into the skillet and use a spoon to flatten into a pancake.
  4. Cook till the edges brown and crisp up, then lift an edge of the pancake to let the oil get under the pancake so the centre can crisp up too.
  5. Once the pancake edges are firm, flip the pancake over and cook for 3 - 4 minutes until the pancake is fully cooked to the centre.
  6. Flip over once more and cook for 2 - 3 min. then transfer to a plate or cutting board.
  7. Cut into 6 wedges and serve with any kind of kimchi, soy dipping sauce, or both.

Tuesday, May 27, 2014

MENDIANTS AU CHOCOLAT


Just thinking about mendiants au chocolat gets me excited! They're beautiful, smell heavenly, taste delicious, have a romantic side to them, and a plateful presents endless possibilities. Basically like a roomful of ideal men!

Mendiants au chocolat are a traditional southern French Christmas-time confection of chocolate discs topped with nuts and dry fruits. Mendiants - mendicants or beggars in English - refers to the four monastic orders in the Church: Dominican, Franciscan, Carmelite, and Augustinian. Each order is represented by a specific topping based on the colour of their robes: hazelnuts for the Augustinians, raisins for the Dominicans, figs for the Franciscans, and almonds for the Carmelites.

I really love this romantic way of commemorating the orders and thinking about them at an important time of the year for Catholics and others alike. I equally love the elegant simplicity of mendiants au chocolat. And the versatility of toppings that creates a variety of textures and flavours on the tongue. Like a party that lasts all night... and if you know me, you know how much I love a party!

I make them during the holiday season as one of my edible homemade gifts when I go to parties or have friends over, but I also make them throughout the year. I think they make a really lovely gift at any time. Get creative with toppings: nuts, dried fruits, bits of biscuits or pretzel sticks, fleur de sel or other coarse natural salt, candied flowers, candied ginger or other fruits, fruit peels, pumpkin seeds...

While you don't need to stick to the traditional toppings, be mindful to keep the mendiants bite sized and don't crowd the small discs of chocolate. You want the chocolate to come through as much as the toppings. So use the best quality milk or dark chocolate you can find, and a few excellent toppings.

Mendiants au Chocolat
makes: ~ 3 dozen

- 16 oz. Callebaut 60% or other top quality dark chocolate  - not couverture (I use Valrhona or Callebaut, but Scharffenberger or Ghirardelli will do)
- nuts (raw or roasted): cashews, almonds, pistachios, hazelnuts, walnuts, pecans...
- dried fruits
- candied ginger, orange peel, or candied flowers
- dried coconut flakes 
- dried herbs: rosemary, mint
- biscuits
- salt: fleur de sel, pink Himalayan, black Cyprus sea salt flakes
  1. Line a few baking trays or other flat work surface with parchment paper.
  2. Completely melt the chocolate in a double boiler (temper if you wish, but it's not necessary).
  3. Using a 1/2 tsp. measure, drop the molten chocolate onto the prepared parchment paper. It will naturally form a circle - resist the temptation to spread the chocolate into a circle, let it form naturally.
  4. Top with a combination of toppings and allow to cool completely. Refrigerate till the chocolate is hardened.
  5. Store in the fridge for up to 4 days.

Friday, May 16, 2014

SKINNY DIPPING: NO-OIL SPROUTED LENTIL DIP


I *love* this dip! I love all dips - I make hummus, other chickpea/bean dips, and vegetable dips every week. Blending things together in a dip makes the flavours meld together into savoury heaven for the taste buds that just gets more heavenly in a few hours! And, you can get creative with seasonal produce to make a huge variety of dips that are tasty, healthy, and nourishing.

I like having dips with pita or other breads, roasted or raw vegetables, or sometimes just on their own by the spoonful! This dip freezes really well, in case you make extra or have leftovers (which you won't).


Skinny Dipping: No-Oil Sprouted Lentil Dip
Makes: 1-1/2 cups

- 1-1/4 cups water
- 2 cups sprouted lentils
- 1 bay leaf
- 1 large clove garlic
- 3 tbsp. tahini
- 1 lemon, juiced
- 1 tsp. garam masala (or any Indian curry powder)
- 1/2 - 1 tsp. crushed red pepper
- 1 tsp. salt, or to taste
- 1 tsp. cayenne pepper or paprika for garnish (optional)
  1. Bring 1 cup of water to a boil and add the sprouted lentils, bay leaf, and garlic. If needed, add the 1/4 cup water to keep the lentils from burning and sticking to the pan. When the lentils are cooked (soft but not mushy), remove the pan from heat and cool to room temperature. Remove the bay leaf and discard.
  2. Blend in a blender (or process in a food processor) the lentils, garlic, tahini, lemon juice, garam masala, crushed red pepper, and salt. If needed add water, 1 tbsp. at a time, to help blend the lentils to your desired consistency. If the lentils stick to the sides of the blender jar or food processor bowl, scrape them off the sides and continue blending.
  3. Serve at room temperature garnished with a dusting of cayenne pepper or paprika.

CILANTRO, BRAZIL NUT, AND SEED PESTO


Cilantro is known as a heavy metal chelator and can purportedly help remove lead, mercury, and other toxins from the body. However, I'm not a medical practitioner of any kind so I recommend enjoying this pesto for its delicious flavour and gorgeous colour!

For years I've been making this pesto from this website, and I barely make any changes to the recipe other than adding mint and sometimes using olive oil instead of flaxseed oil.


Cilantro, Brazil Nut, and Seed Pesto
makes: about 2 cups

- 1/3 cup Brazil nuts (selenium)
- 1/3 cup sunflower seeds (cysteine)
- 1/3 cup pumpkin seeds (zinc, magnesium)
- 4 cloves garlic, peeled
- 2 cups packed fresh cilantro (vitamin A)
- 1/2 cup fresh mint
- 2/3 cup flaxseed oil
- 2 lemons, juiced
- 2 tsp dulse flakes
- 1 tsp sea salt, or to taste
- 1 tsp. coarsely ground black pepper (optional)
  1. Put the nuts and seeds, garlic, lemon juice, dulse, flaxseed oil, mint, cilantro, salt, and pepper, if using, (in that order) in a blender or food processor and process to a desired consistency.
  2. Taste and add more salt if needed. Store in the fridge in dark glass jars if possible. It freezes very well, so make more when cilantro is in season and freeze it.
  3. Enjoy this as you would any pesto.

Wednesday, May 7, 2014

CLEAN UP: IT'S NOT JUST FOR YOUR ROOM!

Please do not follow this meal plan without consulting your doctor, if you have any medical conditions, chronic illnesses, allergies, are pregnant, or recovering from a major medical event.


I'm not a dietician, so please use these guidelines at your own will. I cannot be responsible for any undesirable side effects or reactions to my suggestions below.

A number of people have asked me to give them dietary guidelines or a kick-starter daily meal plan that incorporates the Indian diet. So this is a sample meal plan for the day generally based on how I have been eating for years, but tailored to those who enjoy Indian meals on a regular basis.


NOTES:
  • Following these guidelines may leave you feeling hungry or unsatisfied for the first 3 days or so, but that is just your body adjusting to lighter foods.
  • Also be prepared for a change in your taste buds. You will notice that you enjoy fresher, lightly cooked foods much more than heavy, "cooked to death for hours" type of foods.
  • You likely will not be starving at the end of the day with these meal ideas. Suggested quantities are the maximum allowed. You can certainly reduce quantities as needed.  
  • At any point if you get really really hungry, have a snack of fruit or vegetables. No grains or nuts as snacks other than what I have noted below.
  • No boxed cereals of any kind, no matter how healthy they claim to be.
  • No dairy products after 6 PM.
  • No meat, no fried food, no greasy restaurant stuff. 
  • No commercially made desserts, cakes, pies, or other sweets.
  • Homemade sweets, ice cream, and desserts count as a cheat snack (see below).
  • Optional: Allow yourself 1 cheat meal and 1 cheat snack per week, not on the same day, not on the day you have eggs for breakfast (see below).

Breakfast (pick 1):
  • smoothie, however large you want, blended with 1/4 cup rolled oats, and 20-23 raw almonds soaked overnight. (I'd recommend having no more than 500 ml. smoothie in 2 hrs.) After that you can have another smoothie (no oats and almonds this time) or a bowl of fruits.
  • 3/4 - 1 cup rolled oats (not instant), soaked overnight in milk or 50-50 water-fresh orange juice, just enough quantity to submerge the oats, around 1 - 1-1/4 cup total. Add 20-23 raw almonds soaked overnight (chopped or whole), and 1 banana, apple, mango, whatever is in season, or 1 cup berries. Or 1 cup mixed fresh fruits.
  • 2 eggs any style: omelette, poached, scrambled, baked, frittata. With 2 slices whole grain bread or 2 regular rotis or 1 potato (or sweet potato), cubed and roasted with spices and 1 tsp. oil. And any amount of fresh vegetables you'd like, plain or tossed with lemon juice, salt, and any other spices (no oil): carrots, cucumbers, tomatoes, shredded cabbage, radishes, any others.
  • eggs baked in avocado. And any amount of fresh vegetables you'd like, plain or tossed with lemon juice, salt, and any other spices (no oil): carrots, cucumbers, tomatoes, shredded cabbage, radishes, any others. Or 1 - 2 cups fresh fruits.
  • 1 egg any style: omelette, poached, scrambled, baked, frittata. With 1/2 avocado, 2 slices whole grain bread or 2 regular rotis or 1 potato (or sweet potato), cubed and roasted with spices and 1 tsp. oil. And any amount of fresh vegetables you'd like, plain or tossed with lemon juice, salt, and any other spices (no oil): carrots, cucumbers, tomatoes, shredded cabbage, radishes, any others.

Lunch:
  • normal vegetarian lunch, without fried food.
    • 2 rotis with 1 tsp. ghee on each, 2 more dry if you're super hungry. 1 cup of cooked rice, max. With lunch: a medium bowl of any sort of salad/kachumber, dressed with any non-oil ingredients... lemon, salt, chile powder, other spices you want. Max 1 roasted papad and 1 tsp. achaar. Any amount of oil-free chutney is ok.

Dinner:
  • salad - all raw or with roasted vegetables, however much you want. No more than 1 tbsp olive oil total or 2 tbsp. home-made salad dressing or 2 tbsp. salad toppers (see below). All greens and vegetables are ok. No potatoes, nuts, grains, dairy products at dinner (and anytime after 6 PM).
  • soup - all vegetables are ok to have. Made with max 1 tbsp. oil for a 4 serving pot of soup.

Snacks before 6 PM (pick 1 at any time you snack):
  • 1 cup plain yogurt (full fat or made with 2% milk, not fat-free), with salt or any spices you want.
  • 2 slices whole grain bread or 6-8 whole grain crackers with pesto, chutney, dip, or 1 tbsp. nut butter
  • smoothie (no nuts)

Snacks after 6 PM/after dinner (pick 1 at any time you snack):
*No potatoes, nuts, grains, dairy products at dinner (and anytime after 6 PM)*
  • vegetables
  • fruits
  • smoothie (no nuts)
  • 2 cucumbers or tomatoes with salt and pepper
  • 1 - 2 cups warm soup

Alcohol (pick 1 per day max):
*No mixed drinks.*
*You can't double up one day because you didn't drink anything the previous day.*
  • 1 glass of wine
  • 1 Scotch
  • 1 regular martini - not flavoured with fruits, juice, etc.

NIMONA: GREEN PEAS AND FRESH GARBANZO CURRY


This recipe is adapted from Banaras ka Khana - a wonderful collection of Banarasi recipes. Nimona is common comfort food throughout North India, but it has variations from region to region. This Banarasi nimona sounds plain but the spices combined with the ghee make a complex and fragrant dish with a really incredible lingering - not spicy - flavour of black pepper. And it's full of Spring with the fresh green peas and green garbanzos! It's also simple enough that you don't need spices that aren't readily available in any grocery store. I like to add a sprinkle of lemon juice just before eating to brighten up the flavours even more.

The photos are a bit rubbish but I was in a hurry...


Nimona: Green Peas and Fresh Garbanzo Curry
makes: 3 generous servings

- 1 cup shelled green peas
- 1 cup shelled fresh garbanzo beans
- 1 green chile de arbol or Thai green chile (or chile Serrano - in a real pinch)
- 1 in. piece ginger
- 2 cloves garlic (optional)
- 1 tbsp. ghee (or butter - don't use oil or you'll be making a different dish!)
- 1 tsp. cumin seeds
- 1 bay leaf
- 1 tsp. cumin powder
- 1 tsp. coriander powder
- 1 tsp. freshly ground black pepper
- 1 tsp. salt
- 1/4 cup coarsely chopped cilantro
- 1-1/2 cups water
  1. In a food processor, coarsely crush the green peas, garbanzo beans, ginger, chile, and garlic (if using).
  2. In a pan, heat the ghee on medium and add the bay leaf and cumin seeds. When the cumin sizzles, add the powdered spices.
  3. Add the coarsely crushed vegetables. Stir to combine and cook for about 2 minutes. Turn the heat to low and cook till very fragrant, about 3-4 minutes, making sure the vegetables don't stick to the pan.
  4. Add water and cook till the peas and garbanzos are fully cooked. Turn off the heat, add the salt and cilantro and stir to combine.
  5. Serve hot with rice or roti.