Showing posts with label almonds. Show all posts

Monday, February 13, 2017

CHOCOLATE ALMOND CANTUCCI (BISCOTTI)


Adapted from Alice Waters' The Art of Simple Food, one of my favourite American cookery books.

Cantucci are made to last a long time so the dough has no perishable fats that could go rancid (oil, butter, etc.), so if anyone is trying to pass off cantucci containing any fat other than eggs, they're not cantucci! These are also known as biscotti (biscuits) outside Italy/Europe. But really, they're a specific biscotti from Prato. Regardless, they come together in no time and are very versatile... delicious with pine nuts or any other nut, raisins, chocolate shavings, etc.

They're supposed to be very dry, and are usually enjoyed dipped into coffee or a sweet dessert wine - traditionally Vin Santo -  when they soften a bit, making them bite-able.

Chocolate Almond Cantucci (Biscotti)
Makes 2-3 dozen biscuits, depending on the size of the loaf and thickness of slices


- 2 cups sliced almonds
- 1-3/4 cups unbleached all-purpose flour
- 1/2 cup cocoa powder (unsweetened)
- 1 tsp baking powder
- 1 tsp salt
- 1 tbsp almond or vanilla extract
- 3 eggs, room temperature
- 1 cup sugar
- 2 tsp citrus zest (lemon or any type of orange)

  1. Preheat the oven to 350 F/175 C. Spread the sliced almonds on a baking sheet and toast in the oven until just fragrant, about 7 min.
  2. In a large bowl beat the eggs, sugar, vanilla (or almond) extract, and zest until the mixture falls in a nice ribbon (3-4 min.).
  3. Mix in the flour, cocoa powder, baking powder, and salt, and fold the almonds into the dough (it will be a very stiff batter rather than a dough).
  4. On a baking sheet lined with parchment paper, divide the dough into two portions. Shape into 3-4 in. wide logs using moistened hands so it doesn't stick. The dough will spread a bit so space logs at least 3-4 in. apart. Re-moisten hands as needed and smoothen out any lumps or unevenness in the logs.
  5. Bake until just firm, 25-30 min. Remove from the oven and cool for 10-15 min. (If baked or cooled for too long the logs might harden, making it difficult to slice them so do keep and eye on the time).
  6. Reduce the oven temperature to 300 F/150 C.
  7. Remove each cooled log from the parchment and set on a cutting board. Using a serrated knife, cut log into diagonal slices, about 1/2 in. thick  Lay the slices on the baking sheet - they can be quite close together, don't need to be spaced (use two baking sheets if needed, although I have never needed to do that).
  8. Bake cut cantucci for 10 min., then flip onto the other side and bake another 10-15 minutes until crisp.
  9. Enjoy with a coffee, espresso, or a dessert wine. The crumbs from cutting the biscuits are terrific on ice-cream! 


Friday, May 2, 2014

BOURBON, MAPLE, ROASTED ALMOND: EGGLESS ICE-CREAM


This is one of my favourite ice cream base recipes. It's easy, mostly fool-proof, and without the bother of making an egg-based custard for the ice cream. And, it's like a blank slate so you can create away to suit the season (because ice cream is always in season!), your mood, your cat's mood, a theme, a cuisine, whatever!

Cornstarch is a neutral stabiliser that absorbs residual water left after cooking the cream. This minimises the formation of ice crystals in the cream mixture and results in a creamier smoother ice cream.

If you're adding any amount of alcohol to ice cream, remember to add it nearly at the very end of the ice cream maker freezing cycle. Because alcohol doesn't freeze... and you can imagine the rest! But if you can't, then here it is in plain words: if you add alcohol early on, your ice cream base will not freeze no matter how hard you pray. And that's no fun.

As always, add-ins like nuts, brownie bits, chocolate chips, etc. should go in just before the alcohol, or near the end of the freezing cycle.


Adapted from Ice Cream Nation.

Bourbon, Maple, Roasted Almond Ice Cream: Eggless
Makes: approximately 1 quart

**Freeze an ice cream maker bowl for at least 8 hours**

- 3 cups half-and-half (or an equal mix of whipping cream and 2% milk)
- 1/2 cup Demerara sugar (or Turbinado)
- 1/4 cup Grade B maple syrup
- 3 tbsp. cornstarch
- 1 tbsp. vanilla extract
- 1/4 tsp. salt (only if using unsalted nuts)
- 1/4 cup coarsely chopped roasted almonds (I use Trader Joe's Lightly Salted Roasted Almonds)
- 1/4 cup coarsely crushed almonds (pulverized but definitely not almond butter!)
- 3 tbsp. bourbon (I like to use Bulleitt)
  1. In a saucepan, stir together 2-1/2 cups half-and-half, sugar, maple syrup, vanilla extract, and salt (if using unsalted nuts). Heat over medium-low heat until mixture begins to steam and barely boil, stirring occasionally to prevent the sugar from settling.
  2. In a bowl, blend cornstarch and remaining 1/2 cup half-and-half till the mixture is smooth and lump-free. Temper the cornstarch: add 3-4 tbsp. of the heated half-and-half to the cornstarch mixture and mix well. Repeat.
  3. Add the tempered cornstarch mixture to the saucepan and cook, stirring until it starts to thicken and reaches a simmer, about 4 - 5 minutes. Reduce heat to the lowest possible and stir for 2 - 3 minutes or so until thick. Don't overcook after adding the cornstarch or the cornstarch will overcook and won't thicken the mixture!
  4. Remove from heat and let the mixture come to room temperature. If there are lumps (although there shouldn't be), strain the mixture into a bowl. Chill for at least 2 hours in the fridge. Remove from the fridge and stir. If there's a skin on the mixture, stir it in. 
  5. Pour into an ice cream machine and freeze according to the manufacturer’s instructions. Just when the ice cream is the consistency of soft serve, add the almonds. Blend for a few minutes and when the ice cream is almost done freezing, add the bourbon and let it mix for 2 - 3 minutes longer to blend it in.
  6. Serve right away for a soft serve, or freeze for a couple of hours till firm.

Friday, September 6, 2013

ZUCCHINI BANANA NUT BREAD

I love baking with olive oil. It has natural emulsifiers that result in very moist and delicious cakes and quick-breads like this one... 

Sometimes I have a toasted, generously buttered slice of this bread for breakfast, or sometimes I make an open-faced sandwich with sliced apples or kiwi fruit. Irresistible!


Zucchini Banana Nut Bread
Makes: 1 9 in. x 4 in. loaf

- 1 cup unbleached all-purpose flour
- 1 cup cake flour
- 1 tsp. cinnamon powder
- 1 tsp. baking soda
- 1/2 tsp. baking powder
1 tsp. salt
- 1/2 cup olive oil (or grapeseed oil or melted coconut oil)
3/4 cup demerara sugar (or regular white granulated sugar)
- 2 eggs
- 2 medium over-ripe bananas
- 2 small zucchini, shredded
- generous splash of vanilla extract

- 1/2 cup almonds (or walnuts/any other nuts) - optional
- 2 tbsp. unsweetened shredded dessicated coconut - optional

1. Preheat the oven to 350 F/180 C.
2. Grease and flour a 9 in. x 5 in. loaf pan.
3. In a bowl, mix together the flours and other dry ingredients except the sugar and reserve for later.
4. In a large bowl, using a spoon mix the oil and sugar till the mixture is creamed - it will feel thickened.
5. Add the vanilla extract and break the eggs directly into the bowl.
6. Mix well till the eggs are completely mixed-in.
7. Peel and dice the bananas - I dice them directly into the mixing bowl.
8. Mix well and mash up the bananas coarsely against the wall of the bowl. Over-ripe bananas should easily mash up.
9. Add in the shredded zucchini and the dry ingredients. Also add in the nuts and coconut if using.
10. Mix well into a batter.
11. Pour into the greased, floured loaf pan.
12. Bake at 350 F/180 C for 1 hour.
13. Remove from the oven and insert a skewer or thin knife into the center of the loaf to check doneness. When the skewer or knife comes out dry, the loaf is done.
14. Let it rest and cool for 15 minutes in the loaf pan.
15. Loosen the sides with a knife and invert the loaf pan over a plate to remove the loaf. 
16. Put the loaf right side up on a cooling rack and let it cool completely, about an hour.
17. Enjoy!

Notes:
1. If you don't have cake flour, you can make it! Here's how: Measure out the all-purpose flour that you’ll need for your recipe. For every cup of flour you measured out, take out two tbsp. of flour and return it to the flour bin. Replace the two tbsp. of flour that you removed with two tbsp. of cornstarch. Sift the cornstarch and flour 4-5 times so that the cornstarch is well mixed with the flour. Et voila! Cake flour!

Sunday, July 28, 2013

GO NUTS: HOMEMADE ALMOND BUTTER

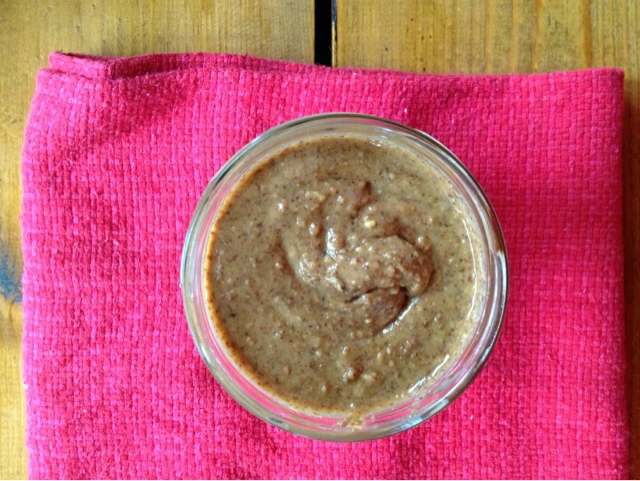
You guys have to make this make itself! Because that's what almond butter does. It makes itself. (Sorry, the photos are a bit rubbish, but I was too eager to make the almond butter so I could have it in my smoothie that evening.)

It's heavenly on toast but get creative... on ice cream, on waffles, as a dip mixed with cinnamon, honey and cocoa powder, as a savoury dip mixed with roasted garlic, lemon, salt, chili powder, cinnamon, and whatever other spices you want, orrrr just by the spoonful!

Just make it, and it'll inspire you to get creative with it.


Almond Butter
Makes: 2 cups

- 2 cups dry-roasted almonds (I use 50% Less Salt dry-roasted almonds from Trader Joe's)
- food processor

1. Put the almonds in the food processor.
2. Start the food processor.
3. Stop-and-go till you get almond butter, loosening the almond meal/paste from the sides as needed.
4. The almonds will go through a few stages - chopped, ground, pasty, smooth (almond butter).
5. If you're adding honey, spices or other things, add them when the almonds are pasty, or just before removing the almond butter from the food processor.
6. Enjoy!

Notes:
1. Raw almonds, like all raw nuts and seeds, are quite heavy on the digestive system and I don't recommend using them for almond butter or for eating.
2. Blanched or sprouted (soak almonds for 12 - 24 hours in water) almonds would work if you dry them completely first.
3. To dry: put the wet almonds on a towel to "surface-dry", transfer to a pan/baking sheet and let them air-dry in a single layer.

Tuesday, June 25, 2013

HOW TO EAT FRESH GREEN ALMONDS

A springtime favourite, these won't cost you an almond a leg!

Almonds are a seed, not a true nut. In fact almonds are related to stone fruit - peaches, cherries, apricots, and more! That's why some people with nut allergies can have almonds with no allergic reactions. Fresh green almonds are simply young almonds that haven't matured into the hardened almond pulp - the almond as we know it. With a short season in spring, they are a mild, refreshing treat on a warm afternoon!

People often like to have recipes for everything but I think young almonds are best eaten as just themselves. The whole fruit is edible - including the outer shell with a peach-like fuzz, but sometimes usually I crack it open and just eat the delicate almond inside.