Showing posts with label baked. Show all posts

Monday, July 13, 2020

A RIFF ON ROBERTA'S PIZZA DOUGH + A SAUCE


I've been making pizza from scratch for a number of years and I've never found a dough recipe that wowed me. But I recently I came across Roberta's Pizza Dough recipe on the New York Times website and decided to give it a go based on the comments. I agree with everyone who raved about it, I love it too, and I suspect this is my new go-to dough recipe. However, I did a few things differently than the NYT recipe and loved the results so decided to write it up here in case I forget what I did. I hope you try it!

The sauce is a classic pizza sauce of crushed, reduced tomatoes and a bit of garlic. It's the way I've made sauce ever since I'd casually dabbled in cooking as a teenager, so I really couldn't tell you where I found the recipe - probably one of my mum's Italian cookbooks. But I can tell you that it is perfect in its simplicity and really lets the tomatoes come through.

Notes:
  • If you haven't got 00 flour, use all-purpose
  • You can use the dough after a 4 hour rise but it will be lighter and more flavourful with the longer rise. I highly recommend it!
  • I let the dough rise in the stand mixer bowl but if you don't have room in the fridge, transfer to another bowl
  • I use a stand mixer now but I've mixed plenty of doughs by hand, it's just fine
  • Use a good quality low-moisture whole milk mozzarella (Trader Joe's has one)
  • Don't overload the pizza with toppings

A RIFF ON ROBERTA'S PIZZA DOUGH + A SAUCE
makes: 2 12 in. pizzas, plenty of sauce

DOUGH
- 2 g (3/4 tsp) active dry yeast
- 200 g (~3/4 cup + 1 tbsp) warm water
- 155 g (~1 cup) 00 flour
- 155 g (~1 cup) all-purpose flour
- 8 g (1 tsp) salt
- 4 g (1 tsp) olive oil
- 200 g (~4 oz) sliced whole milk low-moisture mozzarella
- pepperoni/salami/prosciutto/other light toppings (optional) 
- fresh basil for final garnish (optional)

SAUCE
- 28 oz. tin whole peeled tomatoes (San Marzano or other good quality ones)
- 2-3 cloves peeled garlic

METHOD
  1. SAUCE: blend the garlic and whole peeled tomatoes + whatever liquid is in the tin. Cook in a slow cooker on High for 3-4 hrs, or on stovetop at medium heat for 1 hr. Use right away or store in the fridge for up to 3 days, then freeze if not using.
  2. DOUGH: Proof the yeast in warm water (barely warm, not hot or the yeast cells will die): add the yeast to the water and give it a quick stir, let it sit for a few minutes while you prep the flour mix.
  3. Mix the flours and salt in the bowl of a stand mixer fitted with the dough hook (or any large bowl if making by hand). Add the proofed yeast mixture and oil to the flour, mix at lowest speed.
  4. Knead for 3 min. at medium speed, let it rest for 15 min., knead for 3-4 min. to form a smooth dough. Remove the dough ball and give it a light coating of olive oil. Put it in a bowl that fits in your fridge, cover with a towel, let it rise in a warm, draft-free place for 2 hrs. After 2 hours outside, put the dough in the fridge and let it rise for 8 - 24 hrs.
  5. Remove the dough from the fridge 1-2 hrs before you want to make the pizza. At the same time, put your pizza stone or cast iron pan into the oven and preheat the oven to the highest heat.
  6. After the oven has stayed at the highest temperature for 1-2 hrs, make the pizza: Divide the dough into two equal-ish parts. Shape each into a pizza, top with sauce (see recipe below), cheese, and toppings. Put the pizzas in the oven, together or one by one, set the timer for 6 min.
  7. After 6 min. broil on high for 1-2 min. Remove and garnish with fresh basil leaves. Serve!

Thursday, October 18, 2018

GOUGÈRES: CHEESE PUFFS

Gougères are light and delicious cheese puffs made with pâte à choux, the same pastry dough that's used for profiteroles, eclairs, etc. It's a quick and fairly easy dough to make, somewhat fool-proof since it relies on aerating rather than a rising agent like baking powder or yeast.

Typically, gougères are made with Comté or Gruyère cheese, but really any cheese that melts will be fine if you don't specifically want the flavours of Comté or Gruyère cheese. This time, since I was pairing them with a slew of southern Rhône wines, I used a mix of Comté and Füürtüfel - a terrific spicy Swiss cheese.


GOUGÈRES: CHEESE PUFFS
makes: ~20 medium gougères

- Equipment: hand mixer with two beaters
- 1 cup milk
- 1 cup all-purpose flour
- 3 large eggs
- 4 tablespoons butter
- 1/4 teaspoon salt
- 1-1/2 cups grated Comté, Gruyère or other Swiss cheese
1/2 tsp cayenne pepper (optional)
Optional: Fleur de sel to sprinkle on top before baking
  1. Bring the milk, butter and salt (and cayenne, if using) to a boil in a medium saucepan. Remove from the heat, add the flour all at once, and mix vigorously with a wooden spatula until the mixture forms a ball, taking care to scrape up all the flour/dough from the base and sides of the pan. Return the pan to medium-low heat and cook for about 1 minute to dry the mixture a bit. Stir to make sure the dough doesn't stick to the pan. Remove from the heat and let cool for 5 minutes.
  2. Add the eggs and use the hand mixer to mix thoroughly and aerate for 4-5 minutes. Let the choux pastry dough cool for 7-10 minutes.
  3. Preheat the oven to 400 °F/200 °C. Line 1 large or 2 medium baking trays with parchment paper.
  4. Add the grated cheese to the dough and stir just enough to incorporate. Use 2 spoons - 1 to scoop the gougère dough and 1 to help drop it on to the baking sheet - to place the dough on the baking tray, spaced ~2 inches apart. Sprinkle a few grains of the coarse salt, if using, on each gougère.
  5. Bake for about 30 minutes, until browned. Do *not* open the oven while the gougéres are baking or they might: not puff up, deflate after cooling, remain dense!
  6. Remove from the oven and let cool for 5 minutes. Serve lukewarm or at room temperature with wine - including champagne - or any other beverage.

Monday, March 27, 2017

FONDANT AU CHOCOLAT: MELTED CHOCOLATE CAKE + WALNUTS


This fondant (melted, in French) is so easy to make, keeps well overnight so it's perfect to make ahead if you're serving it at a party, and - most importantly - it's unbelievably delicious! No need for special ingredients other than the very best dark chocolate you can get, no complicated techniques, no gadgets needed other than a whisk or a spoon, and takes no more than 45 min. from start to finish (once you have all the ingredients lined up... mise en place)!

In all the years I've made this cake, I can't believe I haven't photographed it until now. Enjoy!

FONDANT AU CHOCOLAT: MELTED CHOCOLATE CAKE + WALNUTS
makes: 1 8 in. cake, 6-8 servings

- 3/4 cup sugar
- 2/3 cup water
- 6 oz. dark chocolate, roughly chopped (I usually use 55%-65% Valrhona)
- 3/4 cup butter, diced
- 2 eggs, lightly beaten
- 1/2 cup AP flour
- 1/2 cup chopped walnuts (or any other nuts, or none if you want a plain cake)
Confectioner's sugar for dusting (optional)
  1. Combine the sugar with the water in a medium saucepan and heat until it simmers and the sugar is dissolved. Don't boil the sugar and water mixture! Add the chocolate and stir until melted. Add the butter and stir until melted. Remove from heat and let it cool for a few minutes while you prep the next steps. 
  2. Put a deep baking sheet (or an oven-proof pan large enough to hold the cake pan) in the middle of the oven. Preheat the oven (with the baking sheet/pan in it) to 350F/180C. Grease an 8 in. cake pan with butter and line the bottom with parchment paper; lightly brush the parchment with butter. Boil 2-3 cups water.
  3. Add the lightly beaten eggs into the chocolate mixture and whisk until mixed well. Mix in the flour and chopped walnuts (or whatever nuts you're using, if any). Pour the batter into the greased cake pan, set the pan on the rimmed baking sheet in the oven, and pour hot water into the rimmed baking sheet until it reaches a depth of 1/2 in. or so.
  4. Bake for 30 to 35 minutes, until the center is firm (but not too firm or else the sides will be overcooked). Let it cool for a while before turning it out onto a serving plate, and let it cool completely before dusting with confectioner's sugar.
  5. Serve as is with coffee, or with whipped cream (the cake is sweet enough that we like it with unsweetened whipped cream). Or if you have an impossibly sweet tooth: serve with vanilla ice-cream.

Saturday, June 20, 2015

LAHMACUN: SPICY TURKISH "PIZZA"


Lahmacun: Spicy Turkish "Pizza"
makes: 8-10 lahmacun

Crust:
- 2-1/2 cups AP (all-purpose) flour
- 3/4 cup milk or water (milk will make the bottom of the crust a nice golden colour)
- 2 tbsp. olive oil
- 1 tsp. salt
- 1/2 tsp sugar
- 1-1/2 tsp. active dry yeast

Topping:
- 1/2 lb. ground lamb
- 1 green chile, finely chopped (cayenne, jalapeño, serrano, any...)
- 1 tomato, finely chopped
- 1 onion, finely chopped
- 2 cloves garlic, minced
- 1 tbs. Turkish red pepper and tomato paste
  (if you can't find this, use a coarsely blended roasted red capsicum and tomato)
- 2 tsp. red chile powder
- 1 tsp. cumin powder
- 1 tsp. black pepper powder
- 2 tsp. salt
- 1 tsp. smoked red paprika
- 1/4 cup fresh parsley, minced
- 1 tbsp. olive oil
  1. In a large bowl mix the topping ingredients until everything is mixed well but don't over mix. Let everything sit in the fridge for a few hours, up to 24 hrs.
  2. Combine all the ingredients for the crust in a bowl. Mix and knead for 5-7 min. into a smooth supple dough, using a bit more water or milk if needed. Transfer into a large bowl and let it rise for 1-1/2 to 2 hrs. It doesn't need to rise like pizza dough so don't worry if it hasn't doubled after rising.
  3. After the dough has risen, gently deflate and divide into 8 - 10 small balls (about the size of a lemon). Cover with a kitchen towel so the dough balls don't dry out, and allow to rest for 10-15 min.
  4. Preheat the oven to 400 F / 200 C.
  5. Flour your work surface, and roll out one dough ball at a time into a fairly thin round, about as thick as a tortilla or a wrap or a roti. Evenly spread 1 - 1-1/2 tbsp. of the meat mixture on the dough. Don't make too thick a layer of meat otherwise it won't cook properly.
  6. On a pizza stone or in a baking tray, bake each lahmacun for about 5-7 min. All ovens heat differently so keep a close eye on the oven when baking the first couple to figure out the exact time your oven takes to fully cook these.
  7. Continue rolling, topping, and baking the lahmacuns and stack them as they come out of the oven.
  8. Before eating, squeeze a bit of lemon on your lahmacun, top with red chile flakes and a bit of green salad if you want, roll and enjoy! Store leftovers in the fridge for up to 2 days.

Monday, December 8, 2014

EASY PUMPKIN PECAN CAKE (AND A CHURCH WITH A STORIED PAST)


This is an easy cake full of autumn flavours... the warm spices, buttery pecans, and gorgeous pumpkin colour make it irresistible! It takes almost no time to prep and makes the kitchen smell *amazing*! You can use walnuts or almonds instead of pecans.

Pecans are native to the US and Mexico, and are the only type of tree nut that grows naturally in the US. The thin-shelled variety that we all know and enjoy was developed in the mid-1800s by an obviously brilliant slave gardener in Louisiana, using grafts from a wild pecan variety with large, thin-shelled nuts. Pecan trees with large and small nuts are very commonly seen throughout the Louisiana countryside, even in parking lots! Free pecan picking!


I used Louisiana pecans that came from the tree in the photo below. I was back in  western Louisiana for a few days and went to one of my favourite places: the St. Augustine Catholic Church (behind the tree). It's a small church in Isle Brevelle, LA, a small town - mostly  Creole community - of descendants of French and Spanish colonials, Africans, Native Americans, and Anglo-Americans. The area is calm and extremely beautiful with tree-lined roads winding along the Cane River. The church was established by Nicolas Augustin Metoyer, a freed slave and son of former slave Marie Thérèse Coincoin (read more about her here), and is the first church built by and for free people of colour in Louisiana. After being freed, the Metoyer family went on to own their own plantation - now known as Melrose Plantation - and the church is on land that was then a part of the Metoyers' plantation. Behind the church is a cemetery with headstones dating back to the 1800s, and a handful of recurring last names including Metoyer.

The parking lot is lined with several mature pecan trees and pecan season is October through December. In November, I was in luck! There were pecans all over the ground under the trees... I enjoyed a lot of them while walking around near the river, and brought a lot back to CA. Something local, something natural, something edible: my favourite type of souvenir!


Easy Pumpkin Pecan Cake
makes: 12-14 servings

- 1 cup oil (any neutral oil: safflower, grapeseed, or other)
- 3 eggs
- 1 (15 oz.) can pumpkin puree (or 1-3/4 cups pureed roasted pumpkin)
- 1 tbsp. vanilla extract
- 2 cups sugar (I use demerara but any sugar will do)
- 2-1/2 cups unbleached all-purpose flour
- 1 teaspoon baking soda 
- 2 tsp. apple pie spice (or an equal parts mix of allspice, nutmeg, cinnamon)
- 1/4 teaspoon salt
- 1/2 cup coarsely chopped raw pecans

  1. Preheat oven to 350 F / 175 C. Grease one 10-in. bundt pan (or any other cake pan).
  2. In a large bowl, cream together the oil, beaten eggs, pumpkin and vanilla. Sift the flour, sugar, baking soda, apple pie spice, and salt together.
  3. Add the flour mixture to the pumpkin mixture and mix until just combined. Stir in the pecans and pour the batter into the prepared pan.
  4. Bake for 55 min. to 1 hour, or until a tester (I use a bbq skewer) inserted in the middle comes out clean. Let the cake cool in the pan for 5 minutes then turn out onto a plate and dust with confectioners sugar.
  5. Serve plain or with ice-cream, whipped cream, or warm custard.

Tuesday, August 26, 2014

SUMMER VEGETABLE QUICHE


Summer Vegetable Quiche
makes: 1 9 in. quiche/4 servings

1/2 recipe basic yeast dough, (or any pizza/bread dough of choice) after the first 60 min. rise
- 3 eggs
- 1/4 cup milk
- 1/2 cup grated cheese of choice
- 1 tsp. salt
- 1 tsp. red pepper flakes
- 1 garlic clove, peeled
- 1 tbsp. dried mixed herbs (or any herbs of your choice)
- 1/2 tsp. nutmeg powder
- 1 zucchini, sliced
- 1 pint cherry tomatoes, halved 
- 1/2 onion, sliced
- 1 serrano, jalapeño or any pepper of your choice, sliced (optional)
  1. Lightly grease a 9 in. cake pan. Roll the dough into an approximately 9 in. circle and lay it in the pan. Starting from the centre and working your way out, push the dough up the sides of the pan to form approximately 2 in. high sides to get a deep shell.
  2. Let the dough rise for 20 min. Preheat oven to 350 F/180 C.
  3. Using a fork prick holes all over the dough and bake for 20-25 min. till the shell is lightly browned and has pulled away from the pan. Remove from the oven and let it cool for a few minutes.
  4. Turn the oven up to 425 F/220 C.
  5. Arrange the zucchini slices in a more or less single layer in the quiche shell. Arrange the onion slices on top of the zucchini slices.
  6. Blend the next eight ingredients (eggs through nutmeg) and pour into the quiche shell. Arrange the tomatoes cut sides down on the eggs (it's ok if they float a little). If using, arrange the sliced pepper in the spaces between the tomatoes.
  7. Bake at 425 F/220 C for 20 min. then turn the heat down to 350 F/180 C and bake for another 15 min. or till the filling appears set and the top is lightly browned. 
  8. Remove from the oven and let it rest for 15 min. Remove from the mould.
  9. Cut the quiche into wedges and serve over a salad or on it's own. Store leftovers in fridge for up to 3 days... it reheats really well!

Wednesday, July 30, 2014

POLENTA TART WITH ROASTED CARROTS AND SUN-DRIED TOMATOES


I love polenta in any form - it's so versatile, light, and quick to cook. Perfect for when you want to cook something awesome and fast. I used roasted carrots but really any roasted vegetables are fantastic on this tart... yellow squash, zucchini, cauliflower, sweet potatoes, broccoli, cherry tomatoes, even winter squash like butternut or acorn.

Serve this tart with a salad and a glass of wine and you've got yourself a superb meal in no time!

Roasted Carrot + Sun-Dried Tomato Polenta Tart
makes: 2 servings


- 2 carrots, peeled and quartered lengthwise
- 2 cups water
- 2 tsp. salt
- 1 tbsp. fennel seeds (optional)
- 1 clove garlic, crushed
- 1/2 cup polenta
- 2 tbsp. extra virgin olive oil
- 1/4 cup crumbled feta cheese
- 1/8 cup chopped sun-dried tomatoes
- 1/4 cup minced parsley (or basil)
  1. Preheat the oven to 450 F/230 C. Grease a baking tray and an 8 in. pie plate (or other medium sized ovenproof pan).
  2. In a bowl, toss the carrots with 1 tsp. salt and 1 tbsp. olive oil. Transfer to the baking tray and bake for 15 - 20 min. or until the carrots are just browned at the edges. Remove from the oven and cool. Turn the oven down to 375 F/190 C.
  3. While the carrots are roasting, bring the water to a rolling boil in a pan.
  4. Lower the heat to medium and add 1 tsp. salt, fennel seeds, garlic, polenta, 1 tbsp. olive oil, feta cheese, and tomatoes. Stir quickly to mix everything well.
  5. Lower the heat to medium-low and cook for 5-7 min., stirring frequently to keep the polenta from sticking to the pan. Turn off the heat and stir in the parsley.
  6. Transfer the polenta to the greased pie plate and use the back of a spoon to spread it into an even layer. Arrange the carrots on the polenta and gently press into the surface. Bake for 15 - 20 min.
  7. Remove from the oven and serve immediately or at room temperature.

Sunday, March 30, 2014

ONION AND HERB FOCACCIA


A bread by any other name... focaccia, fougasse, hogaza, schiacciata, pizza... all contain the same basic ingredients: high-gluten (strong) flour, salt, yeast/leavening, oil, water. Focaccia, the predecessor of pizza is thicker, whereas pizza is thin, almost like a flatbread. But both are great with a variety of toppings.

Focaccia is great as a snack on its own, sliced with a bit of meat, cheese, a fried egg, or vegetables inside, with soup, roasted vegetables, meats, cubed and toasted into croutons, in a breakfast strata... the ideas are endless.


The one difference between any focaccia-like bread and pizza is that focaccia has a distinct olive oil flavour thanks to the generously greased pan in which it's baked, and the drizzle of olive oil it gets before baking. Don't skimp on the quality or quantity of oil - in this recipe, I've already pared down the oil so definitely don't reduce the quantity of oil in any step otherwise you'll end up with a dry crust, bottom, and crumb - essentially a dry loaf. No fun.


Onion and Herb Focaccia
Makes: 1 loaf, 17 in. x 12 in.

Dough:
- 2-1/2 cups whole wheat flour 
- 2-1/2 cups bread flour
- 2-1/2 tsp. active dry yeast (not Rapid Rise)
- 1 tbsp. salt
- 1 tbsp. lemon juice
- 2 tbsp. olive oil, plus more for greasing the baking tray
- 2 cups warm water (not hot - or the yeast will die and the dough won't rise!)

Topping:
- 1 tbsp. fennel seeds
- 1-1/2 tbsp. rosemary leaves, fresh or dried
- 1 tbsp. thyme, fresh or dried
- 1 tbsp. crushed red pepper flakes
- 1 tsp. black pepper, freshly ground
- 3 tbsp. olive oil
- 1 small red onion, thinly sliced
- 1 jalapeño, thinly sliced
- 1 tbsp. flaked or coarse salt
  1. In a large bowl, make the yeast sponge: mix 1 cup warm water, 1 cup whole wheat flour, and yeast. Set aside for 15 minutes - after 15 minutes the mixture should look frothy and feel "spongy" when stirred with a spoon.
  2. In a small bowl, mix the fennel seeds, rosemary, thyme, crushed red pepper, black pepper, and the 3 tbsp. olive oil. Set aside.
  3. To the yeast sponge, add the rest of the whole wheat flour, bread flour, 2 tbsp. olive oil, lemon juice, and salt. Mix well - the dough will be dry and clumpy. Add 1/2 cup warm water and mix into a dough. If needed, add more warm water, 1/4 cup at a time, to bind the dough into a ball. Knead till smooth and supple, about 5 minutes. The dough should be soft but not wet and sticky. If it is, add flour 1 tbsp. at a time until the dough is soft but not wet or sticky.
  4. Form the dough into a ball and put into a large bowl. Cover the bowl and put it in a warm, draft-free place until the dough has risen and doubled in size, at least 1 hour.
  5. Generously grease a 17 in. x 12 in. rectangular jelly roll pan / metal baking tray with olive oil.
  6. Gently push down the risen dough. Transfer to the greased pan and using your fingers, flatten the dough to fill the pan. The dough may spring back - let it rest for a minute and continue to flatten into an even layer.
  7. Let the dough rise in the baking tray for 20 - 30 minutes.
  8. Make sure there's a middle and lower rack in the oven. Preheat the oven to 425 F / 220 C. Fill an oven-proof tray with 1 - 2 in. water.
  9. Using your finger tips, make "dimples" all over the dough.
  10. Brush on the olive oil and herb mixture all over the dough. Gently press the sliced onion and jalapeño on to the dough. Evenly sprinkle the salt, if using, on the dough.
  11. Put the pan (with the dough) on the middle rack, and the tray with water on the lower rack.
  12. Turn the temperature down to 400 F / 200 C and bake for 25 - 30 minutes until the focaccia is golden at the top and bottom (use a spatula to lift a corner and check).
  13. Remove from the oven and cool for 3-5 minutes. Serve warm or at room temperature. Store leftovers in an airtight container at room temperature for up to 1 day or in the fridge for up to 2 days.

Sunday, November 10, 2013

GOUGÈRES: BAKED CHEESE PUFFS


The French have done it again. They may have been fashionably late in nearly every one of the America's Cup races here in San Francisco, but they've been trailblazers when it comes to revolutions. I'm referring to revolutions of our taste buds, of course. Not any that were the consequence of inappropriately timed discussions on whether the members of the public ought to eat cake.

So back to the French and their food alchemy... take the gougère for example. Flour, eggs, cheese, salt, pepper. And sometimes herbs or other seasonings. All spooned onto a tray and baked for a bit. Et voila! Un amuse-bouche, comme il faut! Make them a bit large, make them quite small and bite-sized, serve as an amuse-bouche, or hors d'oeuvre. However you serve them, they're delicious. They're perfect even if you don't have company. On evenings when you're feeling peckish and want just wine, olives, nuts, crudités, and something just a bit more.

This is quite a versatile recipe. Usually I use Gruyère or Comté (the French version of Gruyère, and also called Gruyère de Comté) cheese and don't add much other than salt and pepper. But this time around I had the last bit of parsley and a serrano pepper that needed to be used, a lovely hunk of salty, grainy Pecorino Romano and a small bit of aged Gouda so I used those. The important thing is to use good quality cheese since you will definitely taste it. Also be careful when using soft wet cheeses like blue cheese or goat cheese because they can make the dough too wet, causing the gougères to deflate. They'll still taste fine, so if this happens, no need to panic.

Gougères will keep their shape even after cooled, so make them a few hours or even a day ahead of when you want to serve them. Rewarm in a 350 F / 180 C oven for 5-7 minutes or until warmed, and enjoy!


Gougères: Baked Cheese Puffs
Makes: approximately 30 gougères

- 1/2 cup + 2 tbsp water
- 3 tbsp butter, salted or unsalted, cut into cubes
- 1/2 cup all-purpose flour
- 2 large eggs
- 1/4 cup minced parsley
- 1 serrano pepper, finely chopped 
- 3 ounces (approx. 3/4 cup) grated cheese, Pecorino Romano, Gruyère, Comté, or a combination of cheeses
- 1/4 teaspoon salt (optional) - You won't need salt if you use salty cheese like Pecorino Romano, Grana Padano, or Parmigiano Reggiano.

  1. Preheat the oven to 425F / 220 C. Line a baking sheet with parchment paper.
  2. Heat the water, butter, and salt, if using, in a saucepan until the butter is melted.
  3. Dump in the flour all at once and stir vigorously until the mixture pulls away from the sides into a smooth ball.
  4. Remove from heat and let the dough rest for a couple of minutes - this is important!
  5. Add the eggs, one at a time, stirring quickly to make sure the eggs don’t ‘cook’. The batter will look a bit lumpy, but after a minute or so, as you stir it will smooth out. (You can do this step of mixing in the eggs in a food processor or electric mixer, but I've never needed to do that.)
  6. Add the grated cheese, parsley, and chopped serrano, and stir everything until well-mixed.
  7. Make small 1 in. balls from the dough and put on the baking tray. If your dough is wetter and can't be rolled into balls - sometimes mine is, depending on what cheese I use of how large the eggs are - use two spoons to mound the mixture on to the baking tray.
  8. Bake for 10 minutes, then turn the oven down to 375 F / 190 C and bake for an additional 15 minutes, until the gougères are completely golden brown.
  9. Serve warm.

Saturday, November 9, 2013

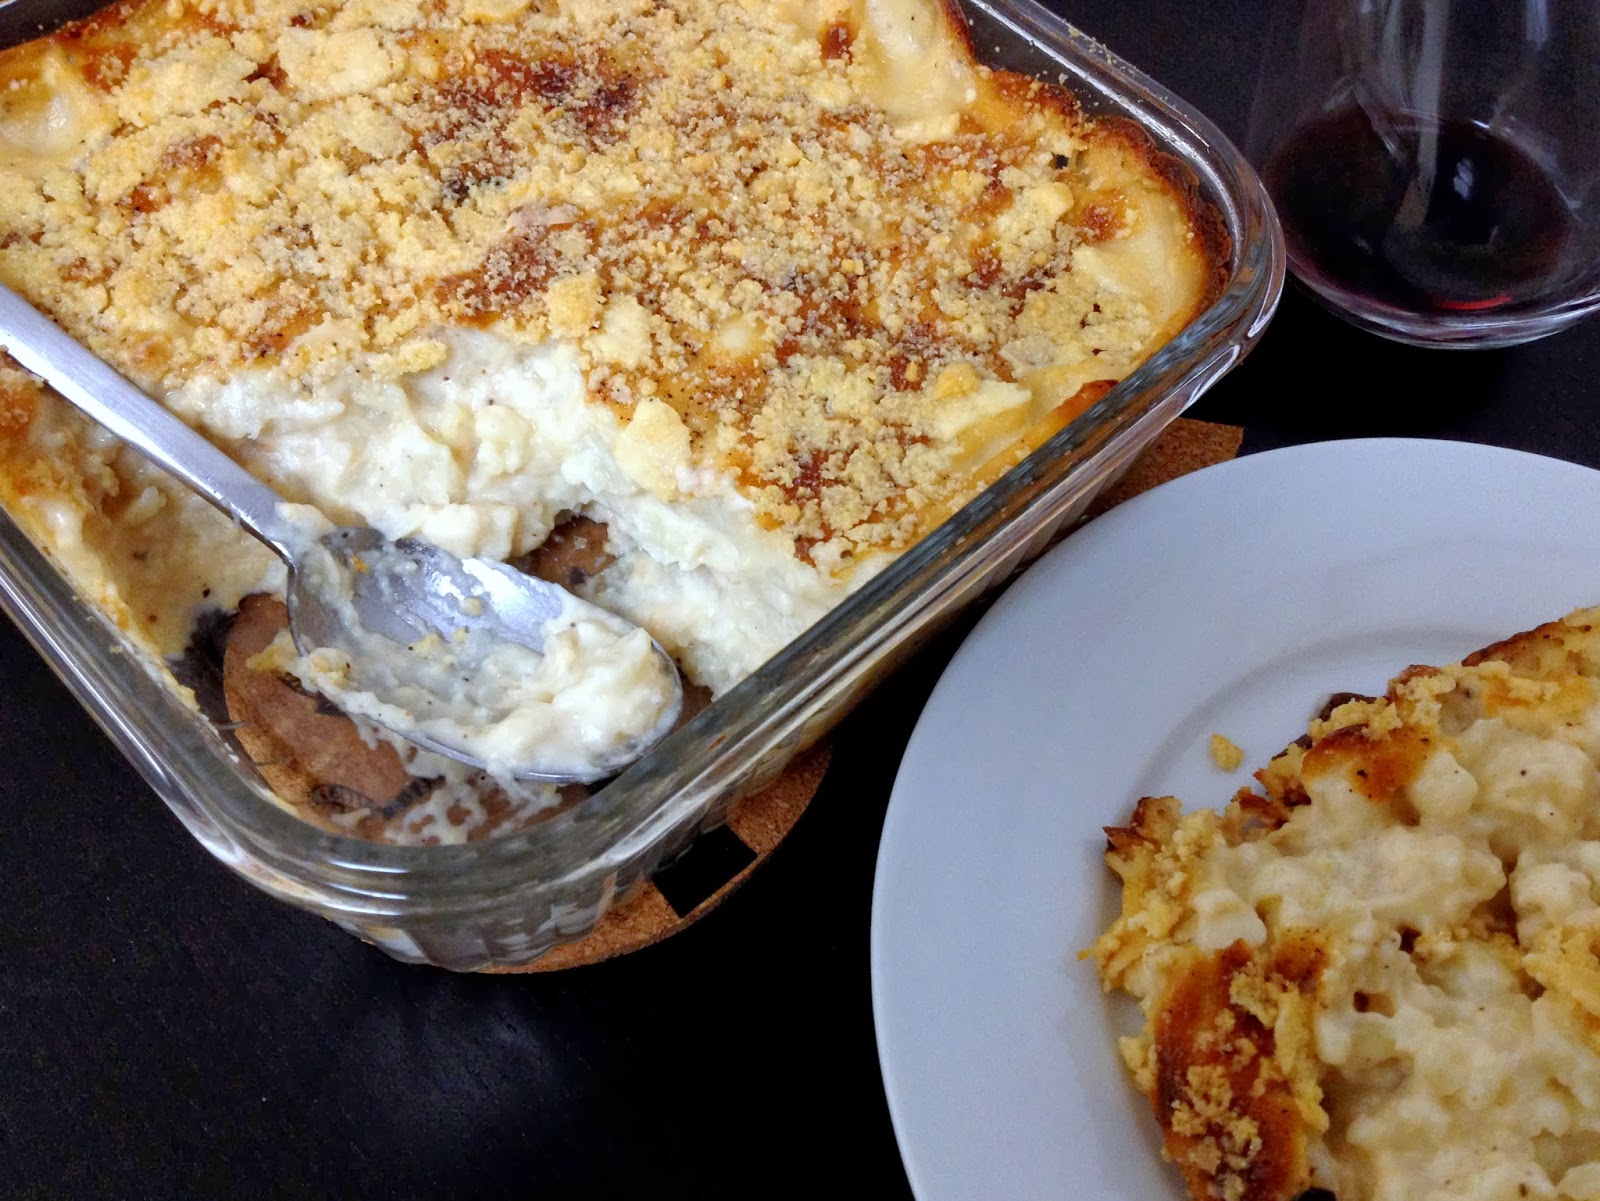
CAULIFLOWER GRATIN OR, HOW TO MAKE BÉCHAMEL SAUCE


Nothing fancy here, just a classic French homey gratin, and as much a comfort food of childhood as now. Gratin refers to the pan in which this is cooked, and so all things cooked in a gratin are gratin. :-) With a salad and perhaps bread, this is an easy dinner. It's a make-ahead kind of dish that can sit in the oven for as long as an hour without drying out thanks to the béchamel sauce.

It's also quite a versatile dish - if you want, add a cubed potato or two to the cauliflower. Traditionally, you rub the gratin pan with garlic but I add minced garlic to the béchamel. Sometimes I add a chopped shallot as well. Contrary to what some recipes say, the classic gratin does not require cream of any kind. Just milk - preferably whole, but at least 2%. Skim milk is a waste of time.

In this gratin the star of the show is the béchamel sauce - one of the mother sauces of French cuisine, best presented in Escoffier's Le Guide Culinaire or his 800 page, 2000 recipe compendium Ma Cuisine. I bought a hardbound old copy of Ma Cuisine for $2 at a used book store in Half Moon Bay years ago. I have no idea why anyone would get rid of this book, but they did, and I scored! Anyway so béchamel is the base of other sauces such as Mornay and soubise. The quality of bechamel however, depends on the quality of the roux. Roux is nothing more than about equal parts of flour and butter - slightly more flour than butter - cooked together to form a binder for the other ingredients. There's brown roux, pale roux, and white roux. The color of the roux, logically, will determine the colour of your sauce.

Gratins such as potatoes dauphinoise, this cauliflower gratin, and other recipes where béchamel sauce is used, require a white roux which is used for white sauces. A brown roux is used for dishes that call for a brown sauce, and a pale roux is used for veloutés - velvety cream sauces.

Béchamel is really easy to make once you can make roux correctly. Cook the roux on a low-medium flame, never medium or high. You want to allow time for the starch cells in the flour to burst so that the butter combines with the starch without burning the starch (which high heat will do, and therefore require more roux in your béchamel which therefore will be really sludgy and overpower the other ingredients). You will see that as the starch and butter combine, the flour-butter mixture goes from the initial large clump to a soft, loose, stir-able mixture. And it will smell nutty. 


It's very important to keep an eye on the roux when it starts to smell nutty because then it will turn colour from white to brown - which we don't want for béchamel. So once it's loose and stir-able, cook for a minute or so and add the milk, salt, pepper, and whatever seasonings and spices you're using.


Cauliflower Gratin: Gratin de Chou-Fleur
Makes: 4 servings

- 1-1/2 lbs florets of white cauliflower
- 5 tbsp unsalted butter
- 6 tbsp all-purpose flour
- 3 cups milk, 2% or whole
- 1-1/2 tsp sea salt or any other good quality salt
- 1 tsp freshly ground black or white pepper
- 1/4 tsp grated nutmeg
- 1 clove garlic, minced or chopped
3 cloves, whole (don't use powdered!)
- 1/4 cup shallot, finely chopped (optional)
- 1/2 cup grated Comté, Gruyere, Emmenthaler, or Pecorino Romano cheese
  1. Preheat the oven to 350 F / 180 C.
  2. Boil a generous amount of water - enough to completely submerge the cauliflower - in a large stainless steel pan and add the cauliflower florets. Bring everything to a boil, and cook, uncovered, for about 5 minutes. Drain and set aside. Or you can steam the cauli for 5 minutes.
  3. Melt the butter in a medium saucepan. Add the flour and cook over low heat for about 2 minutes, stirring with a whisk. Don't let the mixture brown - it should be white, maybe very slightly off-white. 
  4. When the flour-butter mixture feels and looks loose and smells nutty, add the milk and bring to a boil over medium heat, stirring constantly to prevent it from burning or sticking to the pan.
  5. Simmer over low heat for 2 minutes. Add the salt, pepper, nutmeg, garlic, and cloves if using. Bring to a boil. Remove from the heat.
  6. At this point you can remove the whole cloves if you want, but I always leave them in because they don't overpower the flavour and give the gratin a warm fragrance which I love.
  7. Generously butter or oil a gratin dish. Put half of the cauliflower florets in the dish and evenly pour half of the béchamel over the florets.
  8. If using shallots, sprinkle the chopped shallots over the béchamel, add the remaining cauliflower florets and evenly pour the remaining béchamel over the florets.
  9. Sprinkle with the cheeses and bake for about 30 minutes, or until golden brown.
  10. Pull the bubbling gratin out of the oven and let it stand for 10-15 minutes before serving.
  11. Enjoy!

Saturday, October 12, 2013

MOIST CHOCOLATE BANANA CUPCAKES

There isn't a whole lot to say about this recipe... except that it's fantastic! I adapted it from a recipe on the Joy of Baking website (link below, just before the recipe). I used a vanilla frosting, but the one on the website sounds delicious, and as are most recipes on the website, it's very manageable. Although this recipe says it's for cupcakes, it's my go-to recipe for a moist, delicious chocolate cake. This recipe makes one 8 in. round cake.

The hot water makes a difference because it activates the cocoa and draws out the chocolate-y flavour without being over-bearing. Also, butter, olive oil, or coconut oil are really the only fats I use for baking. Generally, if a recipe calls for oil, I use olive oil. I always have it at hand, and it's got natural emulsifiers that results in cakes with a moist crumb even after refrigeration. And no, you won't get an olive oil flavour in your cake at all.

I used *very* ripe bananas for the best flavour. Really ripe. Blackened skin ripe. Blackened skin, soft to the touch ripe. But really, even if your bananas have lots of black spots on them, they're fine to use. Don't bother using unripe bananas... won't work.


Moist Chocolate Banana Cupcakes
Servings: 12 regular cupcakes, 24 mini cupcakes

Adapted from this recipe.

**See Notes for additional information on sugar, oil, and eggs**

- 1 cup all-purpose flour
- 3/4 cup demerara sugar
- 1/3 cup cocoa powder, unsweetened regular or Dutch-processed
- 3/4 tsp baking powder
- 3/4 tsp baking soda
- 1/4 tsp salt
- 1 large egg
- 2 medium sized ripe bananas, mashed
- 1/2 cup hot water, not boiling
- 1/4 cup milk
- 1/4 cup olive oil
- 3/4 tsp vanilla extract
- 3/4 tsp almond extract (optional)

1. Preheat oven to 350 F/180 C.
2. Line 12 regular or 24 mini muffin cups with paper liners, butter each cup, or spray with your favourite non-stick vegetable spray.
3. In a large bowl mix well the dry ingredients - sugar, flour, cocoa powder, baking powder, baking soda, and salt.
4. In another large bowl, whisk together the wet ingredients except hot water - eggs, mashed banana, milk, oil, vanilla extract and almond extract if using.
5. Add the wet ingredients to the dry ingredients and stir or whisk until combined.
6. Add the hot water and mix. The batter will be quite thin but don't worry it's fine.
7. Pour or spoon the batter into the muffin cups no more than 3/4 full, and bake for about 20 minutes or until a toothpick inserted in the center of a cupcake comes out clean.
8. Remove from oven and let cool on a wire rack.
9. Frost with your favourite frosting - or serve plain with a side of whipped cream or ice cream.

Notes:
1. I always use demerara sugar, but you can also use any other unprocessed sugar like evaporated cane juice. White granulated sugar is heavily processed and I don't recommend it for anything but use it if you must.
2. Olive oil has natural emulsifiers that make cakes moister and softer, so I like using olive oil for baking rather than any other oils. Also, that's really the only oil I always have at hand.
3. I use organic free-range eggs for eating and baking but any eggs will do.

Friday, September 6, 2013

ZUCCHINI BANANA NUT BREAD

I love baking with olive oil. It has natural emulsifiers that result in very moist and delicious cakes and quick-breads like this one... 

Sometimes I have a toasted, generously buttered slice of this bread for breakfast, or sometimes I make an open-faced sandwich with sliced apples or kiwi fruit. Irresistible!


Zucchini Banana Nut Bread
Makes: 1 9 in. x 4 in. loaf

- 1 cup unbleached all-purpose flour
- 1 cup cake flour
- 1 tsp. cinnamon powder
- 1 tsp. baking soda
- 1/2 tsp. baking powder
1 tsp. salt
- 1/2 cup olive oil (or grapeseed oil or melted coconut oil)
3/4 cup demerara sugar (or regular white granulated sugar)
- 2 eggs
- 2 medium over-ripe bananas
- 2 small zucchini, shredded
- generous splash of vanilla extract

- 1/2 cup almonds (or walnuts/any other nuts) - optional
- 2 tbsp. unsweetened shredded dessicated coconut - optional

1. Preheat the oven to 350 F/180 C.
2. Grease and flour a 9 in. x 5 in. loaf pan.
3. In a bowl, mix together the flours and other dry ingredients except the sugar and reserve for later.
4. In a large bowl, using a spoon mix the oil and sugar till the mixture is creamed - it will feel thickened.
5. Add the vanilla extract and break the eggs directly into the bowl.
6. Mix well till the eggs are completely mixed-in.
7. Peel and dice the bananas - I dice them directly into the mixing bowl.
8. Mix well and mash up the bananas coarsely against the wall of the bowl. Over-ripe bananas should easily mash up.
9. Add in the shredded zucchini and the dry ingredients. Also add in the nuts and coconut if using.
10. Mix well into a batter.
11. Pour into the greased, floured loaf pan.
12. Bake at 350 F/180 C for 1 hour.
13. Remove from the oven and insert a skewer or thin knife into the center of the loaf to check doneness. When the skewer or knife comes out dry, the loaf is done.
14. Let it rest and cool for 15 minutes in the loaf pan.
15. Loosen the sides with a knife and invert the loaf pan over a plate to remove the loaf. 
16. Put the loaf right side up on a cooling rack and let it cool completely, about an hour.
17. Enjoy!

Notes:
1. If you don't have cake flour, you can make it! Here's how: Measure out the all-purpose flour that you’ll need for your recipe. For every cup of flour you measured out, take out two tbsp. of flour and return it to the flour bin. Replace the two tbsp. of flour that you removed with two tbsp. of cornstarch. Sift the cornstarch and flour 4-5 times so that the cornstarch is well mixed with the flour. Et voila! Cake flour!