Showing posts with label dip. Show all posts

Tuesday, January 13, 2015

HABANERO-SWEET POTATO HOT SAUCE


This spicy, sweet, tangy hot sauce is so addictive you'll find yourself having it with everything! And the colour is so pretty too.

I first had this hot sauce at the incredible Cochon in New Orleans a few weeks ago. And since then I was a bit obsessed. It was so utterly delicious with enough spice, sweetness, and tang to want it over and over, that I had my muffaletta practically doused in it. As a parting gesture, I photographed the ingredients on the label (they sell bottles at the restaurant and also have the same bottles at each table).

Well I came home and couldn't get it out of my mind, so I looked at the photo with the ingredients and created a version of it. I must say this is pretty darn close to the Cochon version, with a bit more spice and a slightly thicker texture so that I can use it as a dip and a spread. And now I always have some in the fridge!

I've made it with sweet potatoes of all colours - white, yellow, orange, and they're all terrific! So use any type of sweet potato that is available to you. And if you don't have apple cider vinegar, use distilled and adjust the sugar to balance the taste.


Habanero-Sweet Potato Hot Sauce
makes: 16 oz./2 cups

- 2 medium sweet potatoes, washed and unpeeled
- 4 habanero peppers, cut into large pieces (remove the seeds from two if you want to tone the spice down a bit)
- 3 cloves garlic, cut into large pieces
- 1/2 white or yellow onion, cut into large pieces
- 1/2 cup apple cider vinegar
- 1/2 cup distilled vinegar
- 1-1/2 tbsp. sugar
- 1 tsp. salt (optional)
  1. Preheat oven to 375 F.
  2. Place the sweet potatoes on a baking tray and bake for 40 - 50 min. until a knife slides easily into the sweet potatoes. Remove from the oven and let cool.
  3. In a small pan, bring the distilled vinegar to a simmer. Add the garlic, onion, and habanero and simmer until the onion is mostly softened, 5 - 7 min. Remove from the heat and allow to cool.
  4. Put the peeled sweet potatoes, vinegar mixture, apple cider vinegar, sugar, and salt (if using) in a blender jar and blend until smooth. You may need to thin with apple cider vinegar, 1 tbsp. at a time, to help blend well.
  5. Taste and adjust sugar if needed. Transfer to a jar and store in the fridge for a few weeks.
  6. Enjoy with eggs, tamales, sandwiches, burgers, empanadas, steak, chicken, pizza... whatever you please!

Wednesday, July 2, 2014

AVOCADO AND CARROT DIP


This dip comes together in a snap, and freezes really well, so it's a great way to use ripe avocados before they lose it! I'm not sure how I thought of adding carrots to my guacamole but I did, and loved it. So that's how I make it now... but technically it's not guacamole so I call it avocado and carrot dip instead. Regardless, it's totally delicious, refreshing, healthy, and tastes great no matter what you serve it with. I like it with tacos or a few different salsas and chips, or in warm tortillas like a taco, or with roasted vegetables. I very often use it in place of salad dressing - a large dollop of this dip is excellent on a salad.

Hope you all like it as much as I do!


Avocado and Carrot Dip
makes: 3 cups

- 3 ripe avocados
- 1 large carrot (or 2 small ones), cut into chunks
- 3 garlic cloves
- 1/2 white onion, cut into 3-4 large chunks
- 15-20 cilantro sprigs
- 2 serrano chiles, finely chopped
- 1 lime, juiced
- 1 tbsp. sea salt
- 1 roma tomato, finely chopped (optional)
  1. In a food processor, process the carrot, garlic, onion, and cilantro to a medium dice.
  2. Cut the avocados in half, remove the pits, and scoop out the flesh.
  3. Add the avocado flesh, salt, lime juice, and serranos to the food processor with the other diced vegetables. Process to a chunky-ish consistency till the avocado is mixed in, but don't make a paste! Stir in the chopped tomatoes if using. Taste and adjust the salt and lime.
  4. Transfer to a bowl and serve with tacos, chips, tortillas, crudités, crackers, or roasted vegetables. Store leftovers in the fridge up to 3-4 days, or freeze.

Friday, May 16, 2014

SKINNY DIPPING: NO-OIL SPROUTED LENTIL DIP


I *love* this dip! I love all dips - I make hummus, other chickpea/bean dips, and vegetable dips every week. Blending things together in a dip makes the flavours meld together into savoury heaven for the taste buds that just gets more heavenly in a few hours! And, you can get creative with seasonal produce to make a huge variety of dips that are tasty, healthy, and nourishing.

I like having dips with pita or other breads, roasted or raw vegetables, or sometimes just on their own by the spoonful! This dip freezes really well, in case you make extra or have leftovers (which you won't).


Skinny Dipping: No-Oil Sprouted Lentil Dip
Makes: 1-1/2 cups

- 1-1/4 cups water
- 2 cups sprouted lentils
- 1 bay leaf
- 1 large clove garlic
- 3 tbsp. tahini
- 1 lemon, juiced
- 1 tsp. garam masala (or any Indian curry powder)
- 1/2 - 1 tsp. crushed red pepper
- 1 tsp. salt, or to taste
- 1 tsp. cayenne pepper or paprika for garnish (optional)
  1. Bring 1 cup of water to a boil and add the sprouted lentils, bay leaf, and garlic. If needed, add the 1/4 cup water to keep the lentils from burning and sticking to the pan. When the lentils are cooked (soft but not mushy), remove the pan from heat and cool to room temperature. Remove the bay leaf and discard.
  2. Blend in a blender (or process in a food processor) the lentils, garlic, tahini, lemon juice, garam masala, crushed red pepper, and salt. If needed add water, 1 tbsp. at a time, to help blend the lentils to your desired consistency. If the lentils stick to the sides of the blender jar or food processor bowl, scrape them off the sides and continue blending.
  3. Serve at room temperature garnished with a dusting of cayenne pepper or paprika.

Wednesday, March 19, 2014

CRÈME FRAÎCHE AND ONION DIP


This dip is so delicious that I cannot stop eating it. With everything. Roasted vegetables are way better than a spoon or fork to deliver food to your mouth anyway, so with those, or with chips, flatbreads, crackers, in a sandwich, over salmon, with boiled new potatoes, over poached eggs... the list is long!


And, it's fresh, herb-y, and takes no time to put together. It's based on a fantastic recipe my friend Kara sent me, but I made some changes based on what I had at home. I used crème fraîche, red onion, lemon, white pepper, less sugar, and added garlic.


Crème Fraîche and Onion Dip
Makes: 1-1/2 cups

- 1 cup crème fraîche, preferably home-made
- 2-1/2 tbsp. dill, finely minced
- 2 tbsp. red onion, finely diced
- 1 small clove garlic, smashed to a paste
- 1-1/2 tsp. freshly ground pepper
- 1 tbsp. lemon zest
- 1/2 lemon, juiced
- 1 tsp. salt, adjust to taste
- 1/2 tsp. sugar

  1. Put the crème fraîche in a medium bowl.
  2. Stir in the rest of the ingredients and stir well to mix.
  3. Refrigerate for up to 3 days, or serve immediately.
Notes:
  1. Although you can serve it right away, the dip will taste better after a few hours or the next day.
  2. The dip will thicken in the fridge but that's ok. Just stir and serve when you're ready.

Wednesday, January 29, 2014

SKINNY DIPPING: MUTABBAL (AUBERGINE DIP)

Mutabbal, or baba ghanouj as it's more commonly (and some might say erroneously) known, is somewhat similar to the many varieties of baingan bharta, ringan nu bharthu, begun pora, etc. in India, in that they all use roasted aubergine (eggplant). But really the similarity ends there. The flavours and appearance of mutabbal couldn't be more different from any of the Indian roasted eggplant dishes which are heavily spiced, very fragrant, and anything but pale in colour.


Nevertheless, mutabbal is easy to make and delicious as part of a mezze or by itself with some fresh Arabic bread.


Mutabbal or Baba Ghanouj: Aubergine Dip
Makes: approximately 1-1/2 cups


- 1 large aubergine (eggplant)
- 3 cloves garlic
- 2 tbsp. tahini
- 1 lemon, juiced
- 1 tsp. salt (or to taste)
- 2 tablespoon olive oil
Garnish ideas: a pinch of sumac, 1 tbsp. minced parsley, or 1-2 tbsp. pomegranate arils
  1. Rinse the eggplant, cut 3 slits in it, and tuck a garlic clove deep enough into each slit so it doesn't fall out during roasting.
  2. Roast the eggplant in one of the following ways till it's completely charred, very soft, and shriveled (see the photo above):
    1. Directly on a medium flame if you have a gas stove, turning occasionally to cook evenly.
    2. On a grill.
    3. In a pan in the oven at 400 F/200 C. 
  3. Remove the roasted eggplant from the heat. When it is cool enough to handle, rince and cut the eggplant in half and scrape the roasted flesh and garlic into the bowl of a food processor. Discard the skin and stem.
  4. Put all the other ingredients (except garnishes) into the food processor and pulse a few times to get a chunky dip or more to get a smooth dip. Taste and adjust salt and lemon.
  5. Spread the mutabbal in serving plate, drizzle with olive oil and garnish with parsley, pomegranate arils, or a sprinkling of sumac. Serve warm or chilled with Arabic bread.

SKINNY DIPPING: SYRIAN ZUCCHINI DIP

A perfect easy dip for late spring or summer when zucchini are abundant. It taste great warm, at room temperature or chilled. And as all good dips often do, it tastes terrific the next day after all the flavours have known each other for a bit.

Serve by itself with any good Arabic bread or as a part of a mezze with hummusroasted red pepper and walnut dip (muhammara), feta, and olives.


Mfarakit Kusa: Syrian Zucchini Dip
Makes: approximately 1-1/2 - 2 cups

- 4 small-medium zucchini, grated or very finely diced
- 1 small (1/2 cup) yellow or white onion, diced
- 4 cloves garlic, crushed into a coarse paste
- 2 tbsp. olive oil
- 1 lemon, juiced
- 1 tbsp. dried mint or dill
- 1 tbsp. minced parsley (optional)
- 2 tsp. salt
- 1-2 tbsp. olive oil, for garnish
  1. Heat the olive oil in a pan over medium heat.
  2. Add the onion and garlic and cook till translucent, about 4 - 5 minutes. 
  3. Add the zucchini and stir.
  4. Cook till the onions and zucchini are very soft and easily mash. Zucchini release water when cooked so cook till the water evaporates. Turn the heat to High if needed for a couple of minutes to let all water evaporate.
  5. Stir in the mint / dill and lemon juice, salt to taste, and parsley, if using.
  6. Put 1 cup of the dip in a shallow dish or bowl, spread with the back of a spoon into a flattish layer.
  7. Serve garnished with a generous drizzle of 1 tbsp. or more olive oil.

Tuesday, January 28, 2014

SKINNY DIPPING: HUMMUS


Hummus is such a favourite of mine! I make it very often when I'm in town consistently. When I'm in town inconsistently, I get hummus nearly everyday at lunch from a Mediterranean restaurant near office. Along with hummus I also get grape leaves, baba ghanouj, olives, and salad from there, but that's another story. Suffice to say I eat mostly vegetarian and mostly Mediterranean food - and I don't get tired of it.

Hummus is: chickpeas, tahini, garlic, lemon, salt. Drizzled with good olive oil.

Hummus is not: blended with any "flavours". No kalamata olives, roasted red peppers, sun-dried tomatoes, basil, spinach, artichokes, etc. Cilantro and chipotle? Yikes!

You can add whatever you want to your dip including chickpeas, and I'm sure it's delicious, but it's not hummus. It's some other dip, by any other name. I do it too, and I make up names for those dips.


Hummus: Chickpea Dip with Tahini
Makes: approximately 3-1/2 cups

- 2 cups dried garbanzos/chickpeas
- 1/3 cup tahini
- 4 cloves garlic
- 1 lemon, juiced
- 2-1/2 tsp. salt
- 3-4 tbsp. olive oil, for garnish
  1. Put the chickpeas in a large bowl. 
  2. Add enough water to cover the chickpeas by 2-3 inches. They will absorb water and swell so you need abundant water for soaking.
  3. Let the chickpeas soak for up to 24 hours, but at least 4 hours.
  4. Drain the water and cook the chickpeas in one of the following ways:
    1. Pressure cook
    2. Slow-cook on low overnight - chickpeas and just enough water to cover by 1 inch
    3. Boil on the stove for 1 hour or till very soft
  5. Drain most of the cooking water and let the chickpeas cool till just cool enough to blend. To get a smooth hummus you want to blend the chickpeas while the skin is still soft. You can obviously make hummus with refrigerated chickpeas but it will be slightly grainy - still delicious! Or, you can warm up the chickpeas with a bit of water so everything's softened up.
  6. Put the chickpeas, garlic, tahini, lemon juice, salt, pepper, and 3/4 cup of the cooking water or fresh water into a blender.
  7. Blend to get a very smooth puree.
  8. Add more water in 1/4 cup increments if needed to help with blending. The hummus will get thicker as the chickpea puree absorbs some water.
  9. Adjust salt and lemon to taste.
  10. Put 1 cup of the hummus in a shallow dish or bowl, spread with the back of a spoon into a flattish layer.
  11. Garnish with a generous drizzle of 2 tbsp. olive oil and: paprika, minced parsley, or boiled chickpeas.
  12. Repeat with the remaining hummus or refrigerate for 3-4 days.
  13. Serve cool or chilled with any good Arabic bread.

Tuesday, January 14, 2014

CELERY LEMON TAHINI SALAD DRESSING


This is such a refreshing and light mix of flavours, and a total snap to make. I use it as a salad dressing and dip with fresh pita or pita crisps.

- 1/2 cup tahini
- 1/2 cup water
- 1 tbsp. olive oil
- 5 celery stalks
- 2 tbsp. honey
- 1 small clove garlic
- 1/2 tsp. good quality salt
- 1 tsp. freshly ground black pepper
- 1 lemon, juiced
- 1 tbsp lemon zest (optional)
  1. Put everything in a blender and blend on high till the dressing is smooth.
  2. Adjust to taste. I sometimes add more celery to give the dressing a bit more thickness.

Saturday, November 16, 2013

SKINNY DIPPING: FETA, TANGERINE, AND HERB DIP


I'm not quite Marcel Duchamp, but this recipe is a bit like art with found objects. Objects you find in your fridge or pantry, that want to be seen in a new perspective. Objets trouvés, of a different kind.

It takes all of 5 minutes to put together, not counting the time to dig through the fridge and cupboards for the ingredients. I had some feta in the fridge that I didn't really like on its own with anything, so I figured I'll dress it up a bit with parsley, tangerine juice, and seasonings. Then I also saw a grapefruit and I thought, hmmm...

You can use cilantro if you want, or dill, as long as you're using fresh herbs because the herb-y flavour should really come through. Vary the proportions to what you have on hand. The important thing is to combine flavours that work well together.


Feta, Orange, and Herb Dip
Makes: approx. 1 cup


- 3/4 cups feta cheese
- 1/4 cup fresh parsley
- 1 tbsp dried or fresh rosemary
- 1 clove garlic, peeled
- 2 tsp. red or black pepper
- 1/3 cup tangerine and/or grapefruit juice (juice from 1 tangerine, 1/2 grapefruit)
  1. In this order put the: feta, parsley, garlic, pepper, and juice in a blender. Blend till smooth. 
  2. Serve with crackers, pita, crostini, crudités, roasted vegetables, as a sandwich spread, or tossed with pasta.

Tuesday, October 15, 2013

CHICKPEA, MINT, AND CITRUS DIP (WITH TOASTED PEPPERCORNS)

I seldom write effusive blog posts, but sometimes things just fall into place. Sometimes you have exactly the amount of things you need to fall into place. Or into your blender! Like this delicious dip that will take an unexpected turn in your mouth thanks to the smoky toasted peppercorns and fresh grapefruit.

I pulled a shoulder muscle and was in pain all day at work but I reeeeally wanted to workout like I normally do in the evening. It's the thing I look forward to every single day, because it's fun! And lively. Well anyway a workout was just a preposterous idea because my "trial" moves in the work bathroom left me unable to move much for a good 15 minutes. So I took the hint and came home, certainly not up to cooking or eating.

But - I had cooked chickpeas, a beautiful bunch of fresh mint, which is one of my favourite herbs, and over half a bunch of equally beautiful fresh parsley. And an aging grapefruit.

And - I absolutely hate wasting food and always feel dreadful about having to throw away food, especially if it's because of my own neglectfulness. 

So - I decided that the chickpeas would have to become my usual hummus that I could take to work as a snack, and the herbs would become a persillade but with mint and parsley. And the grapefruit - especially great with toasted pepper and a light sprinkle of salt - would be a snack. That, I reckoned, was the way to dispense with things expeditiously so I could mope about having to stay in all evening.

But as I was laying everything out, the smell of the torn mint and parsley leaves, the lemon, peppercorns, and grapefruit halves was just so heady together that I figured I'd have a go at putting it all together in a dip. And it turned out to be phenomenal - gorgeous light green, with a garlic-ey, herbal scent and the smokiness of toasted peppercorns. Love it!

Chickpea, Mint, and Citrus Dip (with Toasted Peppercorns)
Makes: approximately 1-3/4 cups

- 1-1/2 cups chickpeas, cooked
- 1/4 cup fresh mint leaves
- 1/8 cup parsley
- 1/2 cup grapefruit juice (from 1 medium grapefruit)
- 1 Meyer lemon or a regular lemon, juiced
- 2 large cloves garlic
- 1 tsp minced ginger
- 1 tbsp olive oil
- 2 tsp freshly ground toasted black pepper, or regular black pepper
- 1 tsp salt, or to taste

1. Blend everything until it is smooth. Adjust seasonings to taste - add more lemon juice, salt, pepper, and olive oil to taste.
2. Garnish with minced parsley or a drizzle of olive oil, or both.
3. Let it sit for a few hours/overnight to let the flavours meld and let the dip thicken a bit as the chickpeas absorb some of the liquid before serving. Or, serve immediately as an appetizer with bread/pita, pita chips, crostini, lavash, roasted vegetables, crudites, or as a main with roasted salmon.

Sunday, July 28, 2013

GO NUTS: HOMEMADE ALMOND BUTTER

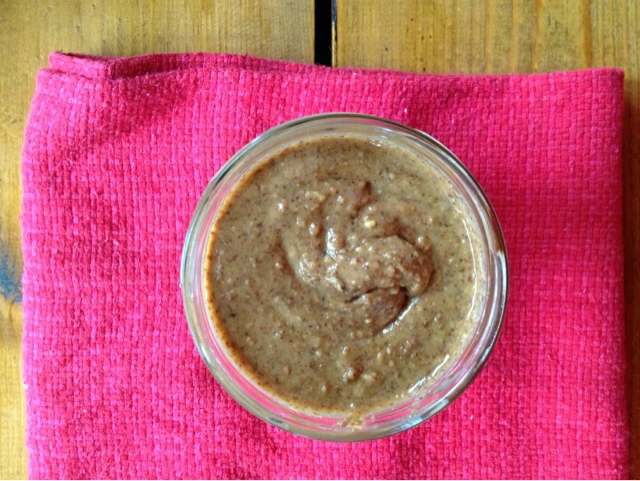
You guys have to make this make itself! Because that's what almond butter does. It makes itself. (Sorry, the photos are a bit rubbish, but I was too eager to make the almond butter so I could have it in my smoothie that evening.)

It's heavenly on toast but get creative... on ice cream, on waffles, as a dip mixed with cinnamon, honey and cocoa powder, as a savoury dip mixed with roasted garlic, lemon, salt, chili powder, cinnamon, and whatever other spices you want, orrrr just by the spoonful!

Just make it, and it'll inspire you to get creative with it.


Almond Butter
Makes: 2 cups

- 2 cups dry-roasted almonds (I use 50% Less Salt dry-roasted almonds from Trader Joe's)
- food processor

1. Put the almonds in the food processor.
2. Start the food processor.
3. Stop-and-go till you get almond butter, loosening the almond meal/paste from the sides as needed.
4. The almonds will go through a few stages - chopped, ground, pasty, smooth (almond butter).
5. If you're adding honey, spices or other things, add them when the almonds are pasty, or just before removing the almond butter from the food processor.
6. Enjoy!

Notes:
1. Raw almonds, like all raw nuts and seeds, are quite heavy on the digestive system and I don't recommend using them for almond butter or for eating.
2. Blanched or sprouted (soak almonds for 12 - 24 hours in water) almonds would work if you dry them completely first.
3. To dry: put the wet almonds on a towel to "surface-dry", transfer to a pan/baking sheet and let them air-dry in a single layer.

Thursday, May 23, 2013

SKINNY DIPPING: FRESH FAVA BEAN DIP

It's no secret that I love dips... eating them and making them. I have a few standard, no-fail, go-to dips for parties or just having around at home for snacking. As most things I like to cook, the dips I make are seasonal. This is one of my favourite springtime dips! Beautiful colour, fresh tasting, herb-y...

... and fat-free if you don't add olive oil. I often don't add oil because I find the fava beans creamy enough, and I always have olives around, which go well with the dip and bread/vegetables. Or I have a chunk of feta with it all. If I am not serving olives or feta with the dip, I do add the olive oil because the flavour of olives and fresh fava beans is heavenly! 


Fresh Fava Bean Dip
Servings: makes 1-1/2 cups

- 1-1/2 lbs. (~1 kg) fava beans/broad beans, shelled (about 1-1/2 cups shelled beans)
- 3/4 - 1 tsp. salt, I used Himalayan pink salt
- 2 medium cloves garlic
- 1/2 tsp. crushed red pepper
- 1/4 tsp sugar, or less, or none
- 2 tsp. minced fresh mint leaves, or 1 tsp. dried
- 1 tsp. fresh dill, or 1/2 tsp. dried
- juice of 1 small lemon or lime
- 1 tbsp. water or more, as needed to blend or process into the desired consistency
- 2 tbsp. extra virgin olive oil (optional - I don't usually add it)

Serve with:
Bread of any type, baked pita chips, roasted potatoes, skinny fries, raw carrots, zucchini, cucumbers, or as a side with baked/grilled fish

1. Boil enough water to submerge the fava beans up to 1 in. 
2. Add the fava beans and cook for about 5 minutes.
3. Drain and rinse under cold water until cool. Or, drain and let the fava beans cool on their own for about 15 minutes.
4. Using your finger-tips, remove and discard the pale green outer skins and put the bright green fava beans in a bowl.
5. In a food processor or blender, add all the ingredients including the beans.
6. Process/blend to the desired consistency. I like it smooth, not coarse.
7. Refrigerate and remove from the fridge 30 minutes before serving to allow the dip to come to room temperature.
8. Really good the next day, when the flavours have melded!

Notes:
1. Since fava beans, mint, and dill are springtime produce, the flavours are exceptionally complementary. But you can use other herbs like cilantro/coriander or parsley. Or a combination of herbs of your choice. I definitely don't recommend rosemary or any other fall/winter herbs.
2. As always, adjust salt and red pepper to taste, or use freshly crushed black/white pepper.