Showing posts with label olive oil. Show all posts

Sunday, March 30, 2014

ONION AND HERB FOCACCIA


A bread by any other name... focaccia, fougasse, hogaza, schiacciata, pizza... all contain the same basic ingredients: high-gluten (strong) flour, salt, yeast/leavening, oil, water. Focaccia, the predecessor of pizza is thicker, whereas pizza is thin, almost like a flatbread. But both are great with a variety of toppings.

Focaccia is great as a snack on its own, sliced with a bit of meat, cheese, a fried egg, or vegetables inside, with soup, roasted vegetables, meats, cubed and toasted into croutons, in a breakfast strata... the ideas are endless.


The one difference between any focaccia-like bread and pizza is that focaccia has a distinct olive oil flavour thanks to the generously greased pan in which it's baked, and the drizzle of olive oil it gets before baking. Don't skimp on the quality or quantity of oil - in this recipe, I've already pared down the oil so definitely don't reduce the quantity of oil in any step otherwise you'll end up with a dry crust, bottom, and crumb - essentially a dry loaf. No fun.


Onion and Herb Focaccia
Makes: 1 loaf, 17 in. x 12 in.

Dough:
- 2-1/2 cups whole wheat flour 
- 2-1/2 cups bread flour
- 2-1/2 tsp. active dry yeast (not Rapid Rise)
- 1 tbsp. salt
- 1 tbsp. lemon juice
- 2 tbsp. olive oil, plus more for greasing the baking tray
- 2 cups warm water (not hot - or the yeast will die and the dough won't rise!)

Topping:
- 1 tbsp. fennel seeds
- 1-1/2 tbsp. rosemary leaves, fresh or dried
- 1 tbsp. thyme, fresh or dried
- 1 tbsp. crushed red pepper flakes
- 1 tsp. black pepper, freshly ground
- 3 tbsp. olive oil
- 1 small red onion, thinly sliced
- 1 jalapeño, thinly sliced
- 1 tbsp. flaked or coarse salt
  1. In a large bowl, make the yeast sponge: mix 1 cup warm water, 1 cup whole wheat flour, and yeast. Set aside for 15 minutes - after 15 minutes the mixture should look frothy and feel "spongy" when stirred with a spoon.
  2. In a small bowl, mix the fennel seeds, rosemary, thyme, crushed red pepper, black pepper, and the 3 tbsp. olive oil. Set aside.
  3. To the yeast sponge, add the rest of the whole wheat flour, bread flour, 2 tbsp. olive oil, lemon juice, and salt. Mix well - the dough will be dry and clumpy. Add 1/2 cup warm water and mix into a dough. If needed, add more warm water, 1/4 cup at a time, to bind the dough into a ball. Knead till smooth and supple, about 5 minutes. The dough should be soft but not wet and sticky. If it is, add flour 1 tbsp. at a time until the dough is soft but not wet or sticky.
  4. Form the dough into a ball and put into a large bowl. Cover the bowl and put it in a warm, draft-free place until the dough has risen and doubled in size, at least 1 hour.
  5. Generously grease a 17 in. x 12 in. rectangular jelly roll pan / metal baking tray with olive oil.
  6. Gently push down the risen dough. Transfer to the greased pan and using your fingers, flatten the dough to fill the pan. The dough may spring back - let it rest for a minute and continue to flatten into an even layer.
  7. Let the dough rise in the baking tray for 20 - 30 minutes.
  8. Make sure there's a middle and lower rack in the oven. Preheat the oven to 425 F / 220 C. Fill an oven-proof tray with 1 - 2 in. water.
  9. Using your finger tips, make "dimples" all over the dough.
  10. Brush on the olive oil and herb mixture all over the dough. Gently press the sliced onion and jalapeño on to the dough. Evenly sprinkle the salt, if using, on the dough.
  11. Put the pan (with the dough) on the middle rack, and the tray with water on the lower rack.
  12. Turn the temperature down to 400 F / 200 C and bake for 25 - 30 minutes until the focaccia is golden at the top and bottom (use a spatula to lift a corner and check).
  13. Remove from the oven and cool for 3-5 minutes. Serve warm or at room temperature. Store leftovers in an airtight container at room temperature for up to 1 day or in the fridge for up to 2 days.

Wednesday, October 30, 2013

HERBED HONEY LIME SALAD DRESSING, GRILLED CORN CHOPPED SALAD

This is easily the best salad dressing I have ever made! And I've always made salad dressing myself, I never buy it. This dressing truly dresses up a salad, with clean ingredients and bright flavours! Best of all, it's quite a forgiving recipe so you can vary the quantities of ingredients however you prefer.

Although, I wouldn't do anything insane like adding parsley instead of mint or - heaven forbid - herbs like rosemary, sage, tarragon and all that. That would be nothing short of a travesty of this dressing!

If you're making the salad too: roasted corn is important in the salad. It rounds everything out with its smokiness. In corn season I buy a bunch of corn, roast it on my gas burner stove top, shave off the kernels, and freeze for use later. That is of course better than frozen store-bought roasted corn, but really, Trader Joe's frozen roasted corn is quite up to par. So definitely use that if you want or have to.


Herbed Honey-Lime Salad Dressing
Makes: approximately 12 oz.

- 1/4 cup fresh lime juice
- 1/8 cup fresh juice from navel, tangerine, or mandarin oranges
- 1/8 cup olive oil
- 2 tbsp honey
- 1 cup fresh cilantro, roughly torn and including tender stems
- 1 cup fresh mint, roughly torn and including tender stems
- 1/2 jalapeño pepper
- 1 garlic clove, peeled
- 1 tsp good quality salt
- 1/4 cup or more water as needed to blend to a smooth, easily pourable, liquid consistency

1. Put everything in a blender or smoothie mixer and blend to a smooth consistency.
2. While still in the blender, taste the dressing and adjust flavours to your taste. Blend again to make sure it's all smooth.
3. Enjoy over salad leaves, roasted vegetables, raw vegetables, rice and raw vegetable salad, or a mixed chopped salad like below...

Grilled Corn Chopped Salad
Makes: a lot, or approximately 10 cups

1. Mix in a bowl small-medium sized dice of:

- 1 cup yellow or red onion
- 1 cup jicama
- 3 Persian cucumbers
1 cup capsicum of any colour
- 1 cup carrots

2. Add
- 1 cup celery, sliced not diced
- 1 pint grape tomatoes, halved
- 1 cup kernels from grilled corn (or use Trader Joe's frozen grilled corn)

3. Toss with three quarters of the salad dressing, adding more if required.

4. Enjoy on its own or as a salsa with tortilla chips! Or stuffed in a pita, as a soft taco with corn tortillas, with a bit of rice on the side, or filled in endive spears.

Saturday, October 12, 2013

MOIST CHOCOLATE BANANA CUPCAKES

There isn't a whole lot to say about this recipe... except that it's fantastic! I adapted it from a recipe on the Joy of Baking website (link below, just before the recipe). I used a vanilla frosting, but the one on the website sounds delicious, and as are most recipes on the website, it's very manageable. Although this recipe says it's for cupcakes, it's my go-to recipe for a moist, delicious chocolate cake. This recipe makes one 8 in. round cake.

The hot water makes a difference because it activates the cocoa and draws out the chocolate-y flavour without being over-bearing. Also, butter, olive oil, or coconut oil are really the only fats I use for baking. Generally, if a recipe calls for oil, I use olive oil. I always have it at hand, and it's got natural emulsifiers that results in cakes with a moist crumb even after refrigeration. And no, you won't get an olive oil flavour in your cake at all.

I used *very* ripe bananas for the best flavour. Really ripe. Blackened skin ripe. Blackened skin, soft to the touch ripe. But really, even if your bananas have lots of black spots on them, they're fine to use. Don't bother using unripe bananas... won't work.


Moist Chocolate Banana Cupcakes
Servings: 12 regular cupcakes, 24 mini cupcakes

Adapted from this recipe.

**See Notes for additional information on sugar, oil, and eggs**

- 1 cup all-purpose flour
- 3/4 cup demerara sugar
- 1/3 cup cocoa powder, unsweetened regular or Dutch-processed
- 3/4 tsp baking powder
- 3/4 tsp baking soda
- 1/4 tsp salt
- 1 large egg
- 2 medium sized ripe bananas, mashed
- 1/2 cup hot water, not boiling
- 1/4 cup milk
- 1/4 cup olive oil
- 3/4 tsp vanilla extract
- 3/4 tsp almond extract (optional)

1. Preheat oven to 350 F/180 C.
2. Line 12 regular or 24 mini muffin cups with paper liners, butter each cup, or spray with your favourite non-stick vegetable spray.
3. In a large bowl mix well the dry ingredients - sugar, flour, cocoa powder, baking powder, baking soda, and salt.
4. In another large bowl, whisk together the wet ingredients except hot water - eggs, mashed banana, milk, oil, vanilla extract and almond extract if using.
5. Add the wet ingredients to the dry ingredients and stir or whisk until combined.
6. Add the hot water and mix. The batter will be quite thin but don't worry it's fine.
7. Pour or spoon the batter into the muffin cups no more than 3/4 full, and bake for about 20 minutes or until a toothpick inserted in the center of a cupcake comes out clean.
8. Remove from oven and let cool on a wire rack.
9. Frost with your favourite frosting - or serve plain with a side of whipped cream or ice cream.

Notes:
1. I always use demerara sugar, but you can also use any other unprocessed sugar like evaporated cane juice. White granulated sugar is heavily processed and I don't recommend it for anything but use it if you must.
2. Olive oil has natural emulsifiers that make cakes moister and softer, so I like using olive oil for baking rather than any other oils. Also, that's really the only oil I always have at hand.
3. I use organic free-range eggs for eating and baking but any eggs will do.

Thursday, August 1, 2013

WALNUT-RED PEPPER DIP: MUHAMMARA

Long on hunger, short on time? Make muhammara! It will quickly become one of those things that you always serve when people come over, or even when no one comes over. And the colour is gorgeous... never hurts to be around good looking people and good looking food!

Simply omit the bread to make it gluten-free.


Walnut-Red Pepper Dip: Muhammara
Servings: makes about 2 cups

- 1 jar roasted red peppers (capsicum), drained or 2 - 3 fresh red capsicum, roasted
- 2 - 3 cloves garlic, peeled
- 1/2 cup walnut halves, toasted if you want
- 1-1/2 - 2 tbsp. pomegranate molasses
- 1-1/2 tsp. crushed red pepper (the kind you put on pizza)
- 1/4 or so of a pita, or a chunk/slice of any other bread (omit for a gluten-free dip)
- 1 tsp. salt, or to taste
- 1 - 2 tbsp. olive oil
- 1/2 tsp. cumin (optional)

1. Put everything in a food processor or blender.
2. Process till you get a well blended dip.
3. Adjust seasonings to taste.
4. Enjoy with pita, any other bread, over grilled chicken, or with crudites.

Notes:
1. Pomegranate molasses is easily available at any Middle Eastern store. You can also reduce 1/2 cup of pomegranate juice and use that instead of pomegranate molasses.
2. Make it gluten-free: omit the bread.

Thursday, May 9, 2013

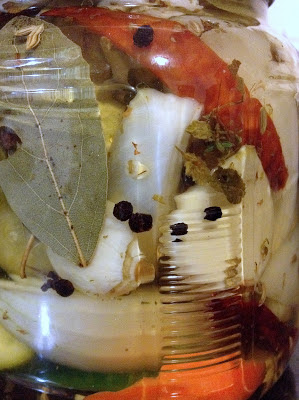
CHILES EN ESCABECHE: PICKLED FRESH CHILES (WITH VEGETABLES)

It's no secret that I love pickled vegetables! Of all kinds, from all cuisines. I grew up eating a slew of them, nearly always seasonal. Some that have to be left alone for months before eating, some that you can eat right away. When I was a kid, I ate SO much of our traditional athaanu (Gujarati pickled raw mangoes) with every Gujarati meal, that mum had to put a stop to it - no pickles for me for many months. A variety of pickled stuff would always be at the table during meals, but I couldn't eat any of it. It was tough, really, it was. I love pickles that much.

Even now, the only thing I ask mum to bring me from India is homemade athaanu. I seldom eat the athaanu because Indian food doesn't taste the same here in the US so I don't make it unless someone's asked me to make it for them. But I just feel good having athaanu around and knowing mummy's made it.

Pickles are so old-world, delicious, and I love the progressive transformation of young, fresh, bold, sprightly vegetables thrown in together, into a cohesive, mellow, unified entity in a bottle. It's a bit like growing up together with siblings and cousins.

Anyway so on to the ubiquitous Mexican chiles en escabeche (in Spanish escabechar = to pickle/marinate). I was having friends over so I made these a few days before, to give the vegetables time to get into it a bit. For dinner I'd made enguacatadas (like enchiladas but with an avocado sauce rather than chile sauce), black beans, rice, and probably something else that I can't recall. Perhaps dessert. Who knows... but the pickled chiles and vegetables I really enjoyed making. They're super with everything... beans and rice, in soups, with grilled meats, in sandwiches, chopped and mixed with sour cream as a dip, whatever else you can think of.


Chiles en Escabeche: Pickled Fresh Chiles (with Vegetables)
Servings: makes 1/2 quart

- 1/2 lb. carrots, cut into 1/2 in. slices on the bias
- 1/2 lb. white onions, quartered or cut into eighths
- 1/4 lb. or more, fresh jalapeno or Serrano chiles, or both
- 1/4 lb. or more, cucumbers cut into 1/2 slices on the bias
- 1 head garlic, separated into cloves and peeled
- 3 bay leaves
- 1/4 tsp whole black peppercorns
- 3/4 tbsp. dried Mexican oregano (Italian will do)
- 3 sprigs fresh thyme
- 3 sprigs fresh marjoram
- 1 tsp. salt
- 1 cup white vinegar
- 1/2 cup water
- 1/4 cup olive oil

1. Combine the vegetables and spices in a large glass jar.
2. Bring the vinegar and water to a boil, remove from heat and add olive oil, stirring to combine.
3. Pour pickling mixture over the vegetables in the jar, mix well, cover and marinate 4 days before using.
4. After the 4 days, keep pickled vegetables in the refrigerator for longer storage.

Wednesday, February 20, 2013

CACIO E PEPE, TOASTED PEPPERCORNS

Smoky, toasted peppercorns are the only way I use pepper now! And pasta cacio e pepe... well it's pasta, olive oil, cheese, pepper, what's not to love?!


Toasted Peppercorns
makes: 1/2 cup

- 1/2 cup good quality black peppercorns (Tellicherry or such) 
- pan that can hold the peppercorns in 1 layer (I use a cast-iron skillet)

1. Put the peppercorns in the pan and turn on the heat to medium-low to toast.
2. Toss or stir occasionally until the peppercorns are fragrant.
3. When you smell the aroma, turn off the heat
4. Immediately remove the peppercorns into a bowl - they will continue to toast and then burn if you leave them in the hot pan.
5. Let the peppercorns cool completely and store in a jar.


Cacio e Pepe
makes: 2 servings

- 1/4 lb. pasta of choice (I used spaghetti this time; I don't use whole wheat pasta) 
- 1 tbsp. olive oil
- 1/3 cup good Parmigiano Reggiano or Pecorino Romano, finely grated
- 1 tsp. toasted pepper, coarsely ground

1. Bring a medium sized pot of salted water to a boil.
2. Add the pasta and boil until al dente, turn off the heat.
3. Heat olive oil in a pan, add a generous 1/2 tsp. coarsely ground toasted pepper.
4. Using tongs, remove the pasta from the water and add to the pan.
5. Swirl the pasta to coat with olive oil and pepper.
6. Turn off the heat.
7. Add the grated cheese immediately and swirl until the cheese coats the pasta.
8. Serve with additional cheese and pepper to taste. Here I've served it with roasted mushrooms, green beans, and brussels sprouts.

Notes:
1. 1/4 lb. pasta (long shapes like spaghetti, naturally you can't measure short pasta this way!) is a bunch approximately 1 inch in diameter.
2. Make an approximately 1 inch circle with your index finger and thumb. Whatever fits in the circle is roughly 2 servings.

Sunday, February 17, 2013

FUNGUS AMONG US: SAUTEED MUSHROOMS

Gorgeous mushrooms that make a terrific topping for crostini, or a side dish. Shown here are yellow and brown tree oysters, maitake (hen of the woods), shiitake, and other assorted mushrooms.


Sauteed Mushrooms
makes: 3-4 servings (as a side)

- 1 lb mixed mushrooms, wiped clean of any soil - do not wash mushrooms unless you like soggy 'shrooms!
- 5-6 cloves garlic, chopped finely
- 2-3 tbsp. olive oil
- 5 tbsp. fresh parsley or cilantro, coarsely chopped
- 1/3 cup small flat-leaf parsley leaves, coarsely chopped
- Salt, to taste
- Freshly ground black pepper, to taste (I used toasted peppercorns)

Optional
- A splash of sherry, white wine, or vermouth while sauteeing
  - or -
- A squeeze of lemon at the end

1. Heat olive oil - make sure it doesn't smoke.
2. Put the chopped garlic and sautee till the garlic starts turning light brown. The idea is to let the oil absorb the garlic flavour, rather than frying the garlic to a crisp.
3. Add the mushrooms to the pan and sautee till the mushrooms start to wilt.
4. Add the sherry, white wine, or vermouth if using.
5. Continue to sautee the mushrooms until fully cooked.
6. Add the chopped parsley before serving warm or at room temperature.

Thursday, January 31, 2013

PIZZA - BEST DOUGH AND SAUCE EVER!

The sauce sounds strangely plain, but it's not. Try it and you'll know what I mean! I like all of the crust to have sauce so I spread it to the edge.


Pizza Dough
makes: 5 loaves, of 7 oz. each (enough for approximately 4-5 thin crust pizzas)

- 4-1/2 cups unbleached Tipo 00, bread, or unbleached all-purpose flour
- 1-2 tsp. active dry yeast
- 1/4 cup olive oil (optional, but I recommend it - it makes the dough supple and lovely)
- 1-2 tsp. salt
- 1-3/4 cups cold water (ice cold, not room temperature)
- Semolina or cornmeal for dusting the pan (I use cornmeal since I always have some)

1. If your yeast is old, it may not be alive - proof the yeast as described in the Notes below to check if it is alive.
2. Stir together the flour, salt, and yeast in a large bowl. If you are proofing the yeast, mix the flour and salt well, then lightly mix in the yeast mixture, then follow the instructions below.
3. Mix oil and water into the flour with a metal spoon or by hand.
4. Knead the dough for 5-8 minutes or until it is smooth, springy, and elastic. Don't over-knead or you'll get a chewy pizza crust later!
5. The dough should clear the sides of the bowl. If it's sticky, add flour by the tablespoon; if it's dry, add water by the tablespoon, until the flour comes together.
6. Let the dough rest for 10 minutes, knead gently for barely 30 seconds, and put in a large bowl.
7. Cover the bowl and put in a warm place (not hot) for 1 hr. or until the dough has doubled in size.
8. Deflate the dough and shape into a ball.
9. Coat the dough ball lightly with olive oil and refrigerate overnight or for up to 3 days, in a large airtight container.
10. Remove the dough from the fridge at least 1 hr. before using (room temperature dough is easier to work with, and prevents over-working the dough).
11. Preheat oven to 450 F/230 C.
12. Sprinkle semolina or cornmeal on baking trays.
13. Divide the dough according to the number of pizzas you want to make.
14. Stretch the dough with floured hands and place in the baking trays. (Rolling pizza dough will overwork the gluten in the dough and make the crust too chewy/a bit leathery.)
15. Lightly shape the stretched dough in the trays to fit as needed.
16. Top with a thin layer of sauce and add toppings of choice. (Don't over do the sauce and toppings - it's a thin crust pizza so don't weigh the crust down)
17. Use good quality toppings. Skimp on quantity not quality.
18. Bake for 7-8 minutes or until the edges are browned, cheese is melted, and toppings sizzle.

NOTES:
1. Proofing yeast - even the regular non-Rapid Rise kind - is only done to prove that the yeast is alive before preparing a recipe. Proofing is not imperative in baking if you are confident that your yeast is alive.
2. To proof 1-2 tsp. yeast: heat 1/2 cup water to 80 F/26 C, stir in 1 tsp. sugar, sprinkle yeast on the surface, let it sit for 10 minutes. If it is frothy, your yeast is alive and the whole mixture can be added to the mixed dry ingredients. If the yeast does not react, it is dead and cannot be used for baking.

Pizza Sauce
makes: 28 oz. (enough for approximately 4-5 large thin crust pizzas)

- 1 14-oz. can crushed tomatoes
- 1 14-oz. can diced tomatoes (or use all crushed tomatoes, or buy canned Marzano tomatoes and crush them yourself)
- 3-4 tbsp. olive oil
- 2-3 cloves garlic, crushed
- salt

1. Mix the tomatoes, oil, and garlic in a pan.
2. Simmer for 30 minutes.
3. Season with salt.

NOTES:
1. This is a typical sauce used for Italian pizza. Unburdened with forced flavourings. Herbs, anchovies, and other things should be added on the pizza, never in the sauce.

Topping Ideas
makes: varies

- Caramelized onions, olives, anchovies
Crisp bacon, Gorgonzola, arugula
- Roasted sliced fennel, Italian sausage, garlic
- Pears, Fontina cheese, walnuts, grated lemon rind (under cheese or mixed in with pears)
- Burrata, tomatoes, pesto Genoese
- Feta, olives, basil
- Roasted sliced mushrooms, sauteed spinach, onions, prosciutto
- Roasted rosemary potatoes, anchovies, olives
- Roasted cauliflower, chevre, chives, truffle oil (drizzled on after baking)

Other Topping Ideas
makes: varies

- Sauces/spreads: Pestos of all kinds, tapenade, roasted garlic and olive oil.
- Cheese: buffalo milk mozzarella, burrata, asiago, Parmigiano-Reggiano, Grana Padano, fresh or aged goat's/sheep's milk cheese, feta, fontina, ricotta, Romano, or whatever strikes your creative fancy!
- Vegetables: sun-dried tomatoes, thinly sliced zuchhini, roasted corn, thinly sliced fresh chiles - jalapenos, serranos, or chiles de arbol (the thin Indian ones), roasted potatoes or aubergines, sliced mushrooms, roasted cauliflower, artichokes, roasted fennel, capsicum, fresh or caramelized onions, kalamata (or other) olives, capers, spring onions, sauteed leeks, roasted parsnips.
- Herbs (preferably fresh but dried will do): oregano, basil, parsley, tarragon, chives, ramps.
- Meats: anchovies, shrimp, roasted poultry, cooked ground beef, proscuitto, ham, salami, pepperoni, Italian sausage, Spanish chorizo, smoked sausage.

Sunday, December 23, 2012

ALMOND CRACKERS (GLUTEN-FREE)


Almond Crackers (Gluten-free)
makes: 20 - 24 crackers

- 1-1/2 cups almond flour (or make your own - see Notes)
- 1/2 - 3/4 tsp. salt
- 1-1/2 tsp. olive oil
- 1 egg
- 1 tsp. freshly crushed black pepper
- parchment paper/plastic wrap

Optional - 
- 2 tbsp. chopped dried/fresh herbs

1. Preheat oven to 350 F/175 C.
2. Mix all the ingredients in a food processor or by hand to make a dough.
3. One at a time, put 1 inch diameter balls of dough between the parchment or plastic wrap and roll into round crackers.
4. Put rolled crackers onto a baking tray large enough to hold them without crowding.
5. Bake for 12 - 15 minutes. Keep an eye on them - overcooked crackers will taste burnt.
6. Let the crackers cool completely before trying. Straight out of the oven they will not be crispy and will taste fine but feel undone. Don't put them back in the oven!

NOTES:
1. Salt and pepper to taste.
2. Make your own almond flour by pulsing almonds (I leave the skin on) in a food processor till they are finely ground but not pasty.
3. Don't over pulse or you'll make almond butter - sort of.
4. Use fresh parchment/plastic wrap during rolling if it gets too unwieldy or torn during rolling.