Showing posts with label baking. Show all posts

Monday, December 8, 2014

EASY PUMPKIN PECAN CAKE (AND A CHURCH WITH A STORIED PAST)


This is an easy cake full of autumn flavours... the warm spices, buttery pecans, and gorgeous pumpkin colour make it irresistible! It takes almost no time to prep and makes the kitchen smell *amazing*! You can use walnuts or almonds instead of pecans.

Pecans are native to the US and Mexico, and are the only type of tree nut that grows naturally in the US. The thin-shelled variety that we all know and enjoy was developed in the mid-1800s by an obviously brilliant slave gardener in Louisiana, using grafts from a wild pecan variety with large, thin-shelled nuts. Pecan trees with large and small nuts are very commonly seen throughout the Louisiana countryside, even in parking lots! Free pecan picking!


I used Louisiana pecans that came from the tree in the photo below. I was back in  western Louisiana for a few days and went to one of my favourite places: the St. Augustine Catholic Church (behind the tree). It's a small church in Isle Brevelle, LA, a small town - mostly  Creole community - of descendants of French and Spanish colonials, Africans, Native Americans, and Anglo-Americans. The area is calm and extremely beautiful with tree-lined roads winding along the Cane River. The church was established by Nicolas Augustin Metoyer, a freed slave and son of former slave Marie Thérèse Coincoin (read more about her here), and is the first church built by and for free people of colour in Louisiana. After being freed, the Metoyer family went on to own their own plantation - now known as Melrose Plantation - and the church is on land that was then a part of the Metoyers' plantation. Behind the church is a cemetery with headstones dating back to the 1800s, and a handful of recurring last names including Metoyer.

The parking lot is lined with several mature pecan trees and pecan season is October through December. In November, I was in luck! There were pecans all over the ground under the trees... I enjoyed a lot of them while walking around near the river, and brought a lot back to CA. Something local, something natural, something edible: my favourite type of souvenir!


Easy Pumpkin Pecan Cake
makes: 12-14 servings

- 1 cup oil (any neutral oil: safflower, grapeseed, or other)
- 3 eggs
- 1 (15 oz.) can pumpkin puree (or 1-3/4 cups pureed roasted pumpkin)
- 1 tbsp. vanilla extract
- 2 cups sugar (I use demerara but any sugar will do)
- 2-1/2 cups unbleached all-purpose flour
- 1 teaspoon baking soda 
- 2 tsp. apple pie spice (or an equal parts mix of allspice, nutmeg, cinnamon)
- 1/4 teaspoon salt
- 1/2 cup coarsely chopped raw pecans

  1. Preheat oven to 350 F / 175 C. Grease one 10-in. bundt pan (or any other cake pan).
  2. In a large bowl, cream together the oil, beaten eggs, pumpkin and vanilla. Sift the flour, sugar, baking soda, apple pie spice, and salt together.
  3. Add the flour mixture to the pumpkin mixture and mix until just combined. Stir in the pecans and pour the batter into the prepared pan.
  4. Bake for 55 min. to 1 hour, or until a tester (I use a bbq skewer) inserted in the middle comes out clean. Let the cake cool in the pan for 5 minutes then turn out onto a plate and dust with confectioners sugar.
  5. Serve plain or with ice-cream, whipped cream, or warm custard.

Tuesday, August 26, 2014

SUMMER VEGETABLE QUICHE


Summer Vegetable Quiche
makes: 1 9 in. quiche/4 servings

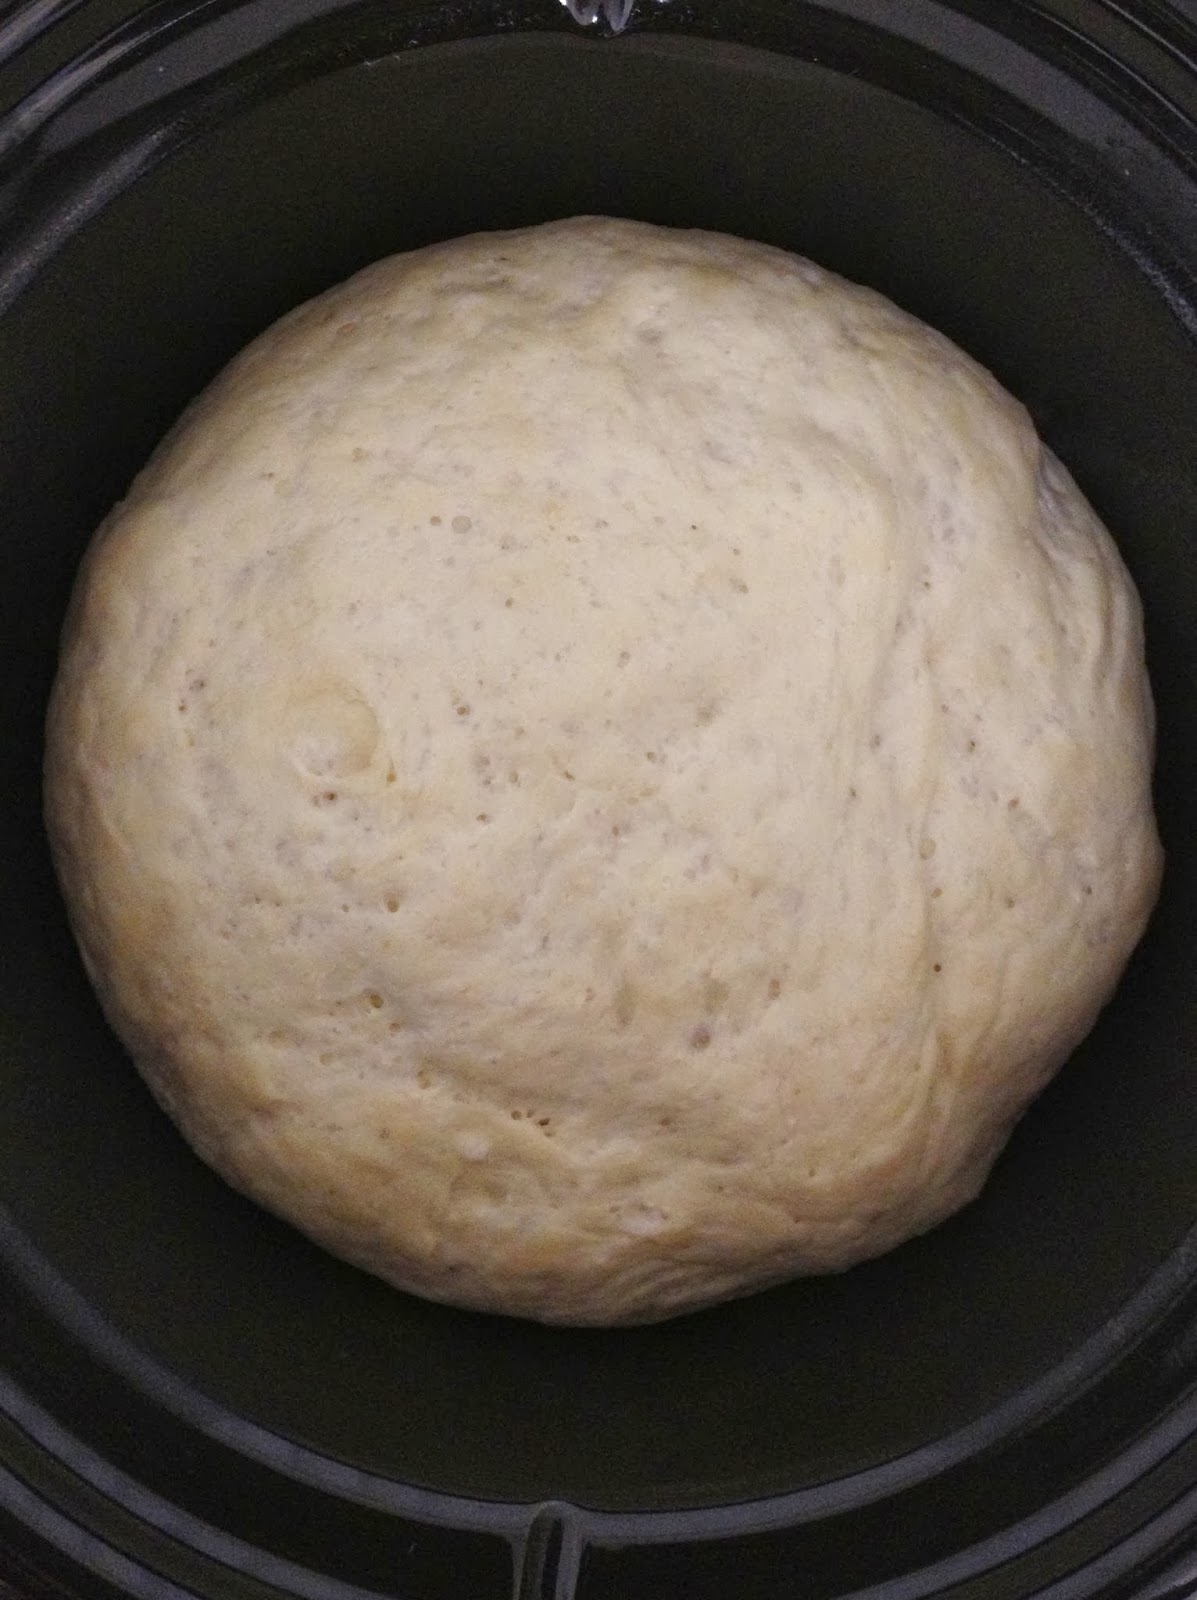
1/2 recipe basic yeast dough, (or any pizza/bread dough of choice) after the first 60 min. rise
- 3 eggs
- 1/4 cup milk
- 1/2 cup grated cheese of choice
- 1 tsp. salt
- 1 tsp. red pepper flakes
- 1 garlic clove, peeled
- 1 tbsp. dried mixed herbs (or any herbs of your choice)
- 1/2 tsp. nutmeg powder
- 1 zucchini, sliced
- 1 pint cherry tomatoes, halved 
- 1/2 onion, sliced
- 1 serrano, jalapeño or any pepper of your choice, sliced (optional)
  1. Lightly grease a 9 in. cake pan. Roll the dough into an approximately 9 in. circle and lay it in the pan. Starting from the centre and working your way out, push the dough up the sides of the pan to form approximately 2 in. high sides to get a deep shell.
  2. Let the dough rise for 20 min. Preheat oven to 350 F/180 C.
  3. Using a fork prick holes all over the dough and bake for 20-25 min. till the shell is lightly browned and has pulled away from the pan. Remove from the oven and let it cool for a few minutes.
  4. Turn the oven up to 425 F/220 C.
  5. Arrange the zucchini slices in a more or less single layer in the quiche shell. Arrange the onion slices on top of the zucchini slices.
  6. Blend the next eight ingredients (eggs through nutmeg) and pour into the quiche shell. Arrange the tomatoes cut sides down on the eggs (it's ok if they float a little). If using, arrange the sliced pepper in the spaces between the tomatoes.
  7. Bake at 425 F/220 C for 20 min. then turn the heat down to 350 F/180 C and bake for another 15 min. or till the filling appears set and the top is lightly browned. 
  8. Remove from the oven and let it rest for 15 min. Remove from the mould.
  9. Cut the quiche into wedges and serve over a salad or on it's own. Store leftovers in fridge for up to 3 days... it reheats really well!

Sunday, August 10, 2014

CARAMELISED PEAR UPSIDE DOWN CAKE


Barely adapted from here.

Caramelised Pear Upside Down Cake
makes: 8 servings

Caramel topping:
- 6 tbsp. (3/4 stick) salted or unsalted butter
- 2/3 cup sugar (I use Turbinado for everything but any sugar will do)
- 2 large pears, peeled, cored, sliced into 1/4 in. thick slices

Cake:
- 1-1/3 cups AP (all purpose) flour
- 2/3 cup sugar
- 2 tbsp. grated fresh ginger
- 1-1/2 tsp. powdered cinnamon
- 1/2 tsp. powdered nutmeg
- 1/2 tsp. powdered allspice
- 1 tsp baking soda
- 1/2 tsp. salt
- 3 eggs
- 1/2 cup safflower oil (or any other neutral oil) 
- 1 tbsp. vanilla extract
- 1 cup coarsely chopped pears 
  1. Preheat the oven to 350°F. Grease the sides of a 9 in. springform pan. 
  2. Make the topping: Melt the butter and sugar and pour into the greased springform pan. Working quickly, arrange the pear slices on the sugar, overlapping each slice over the previous. 
  3. Make the cake: Whisk the flour, sugar, ginger, spices, baking soda, and salt in medium bowl to blend. Whisk the eggs, oil, and vanilla extract in a large bowl to blend. Mix in the chopped pears. Mix dry ingredients into the egg mixture to make a batter. 
  4. Pour the batter over the pears in the prepared springform pan and bake the cake until a tester inserted into the center comes out clean, about 35 minutes. If the cake is not done yet, let it bake for another 5 minutes and test. 
  5. Cool the cake in the pan for 15-20 minutes. Remove the springform side of the pan. Put a plate on the cake and invert the cake onto the plate. Serve warm, with or without vanilla ice cream or whipped cream.

Friday, October 18, 2013

KHOUBZ aka PITA: IN AN INSTANT

Khoubz in Arabic, pita in the West via Greece. Whatever you call it, it's easy to make at home! And don't give up even if the first couple of times your loaves aren't the best or the roundest because... well because you can't make an omelette without breaking some eggs. So get to it!

I wanted to try making bread with instant yeast which I never use because it just sounds soul-less. And I am glad I tried it, because now I know why I never use instant yeast. Can't make an omelette without you-know-what!

Of course, it's better to use instant yeast and have bread rather than having none at all, but I missed the flavour of the yeast and delicious yeast-y smell of bread in the oven. If you have time, use the yeast dough method in my pizza dough post. Or make both a couple of times and see if you prefer one over the other.


Khoubz, or Pita
Makes: 8 - 10 loaves

- 3 cups flour
- 1-1/2 tsp salt
- 1 tsp sugar, I use demerara
- 2-1/4 tsp instant yeast (1 packet)
- 1-1/2 cups warm water
- 1/2 cup milk

- 2 tbs olive oil
  1. In a large bowl, mix the yeast, flour, salt, and sugar. Add the olive oil and 1 cup water and mix to form a ball of dough. If the dough is not holding together and is crumbly, add more water 1 - 2 tbsp. at a time. Mix the water really well into the dough each time - don't let the water just remain on the surface of the dough otherwise all you'll get is a sticky mess!
  2. Once you have a ball of dough, put it on the counter-top, baking tray, or cutting board and knead for approximately 5 minutes or until the dough feels smooth and supple. A simple hand kneading technique is to firmly press down on the dough with the palm of your hand, fold the dough in half toward you like you are closing an envelope, rotate the dough 90 degrees and then repeat these steps. But really, knead however you want and do whatever it takes to make that dough smooth like a baby's bum.
  3. Oil your palms with a tsp of olive oil and shape the dough into a ball. Let it rest in a covered bowl in a draft-free, warm place such as an unheated oven. After 60 - 90 minutes when the dough has risen and doubled in size, push it down gently to release some of the yeasty gases and divide the dough into 8 - 10 pieces.
  4. Preheat the oven to 425 F/220 C with or without a pizza stone.
  5. Roll each piece of dough into a ball, cover the balls with a damp kitchen towel, and let them rest for 15 - 20 minutes. Or, roll each ball of dough into a circle, and let it rest in baking trays or any other flat surface for 15 - 20 minutes.
  6. Put 2-3 or however many uncooked pita loaves fit without being crowded on your baking surface and bake for 5-6 minutes. When the bread puffs up and takes on a slight brown colour, remove from the oven. The bread *will* brown and eventually burn if you leave it in the oven for even a minute longer than 5-6 minutes. 425 F/220 C is hot!
  7. If you're not eating these immediately, take them out of the oven, put them in a large container and cover with a damp towel until you're ready to use them. Reheat as needed.

Saturday, October 12, 2013

MOIST CHOCOLATE BANANA CUPCAKES

There isn't a whole lot to say about this recipe... except that it's fantastic! I adapted it from a recipe on the Joy of Baking website (link below, just before the recipe). I used a vanilla frosting, but the one on the website sounds delicious, and as are most recipes on the website, it's very manageable. Although this recipe says it's for cupcakes, it's my go-to recipe for a moist, delicious chocolate cake. This recipe makes one 8 in. round cake.

The hot water makes a difference because it activates the cocoa and draws out the chocolate-y flavour without being over-bearing. Also, butter, olive oil, or coconut oil are really the only fats I use for baking. Generally, if a recipe calls for oil, I use olive oil. I always have it at hand, and it's got natural emulsifiers that results in cakes with a moist crumb even after refrigeration. And no, you won't get an olive oil flavour in your cake at all.

I used *very* ripe bananas for the best flavour. Really ripe. Blackened skin ripe. Blackened skin, soft to the touch ripe. But really, even if your bananas have lots of black spots on them, they're fine to use. Don't bother using unripe bananas... won't work.


Moist Chocolate Banana Cupcakes
Servings: 12 regular cupcakes, 24 mini cupcakes

Adapted from this recipe.

**See Notes for additional information on sugar, oil, and eggs**

- 1 cup all-purpose flour
- 3/4 cup demerara sugar
- 1/3 cup cocoa powder, unsweetened regular or Dutch-processed
- 3/4 tsp baking powder
- 3/4 tsp baking soda
- 1/4 tsp salt
- 1 large egg
- 2 medium sized ripe bananas, mashed
- 1/2 cup hot water, not boiling
- 1/4 cup milk
- 1/4 cup olive oil
- 3/4 tsp vanilla extract
- 3/4 tsp almond extract (optional)

1. Preheat oven to 350 F/180 C.
2. Line 12 regular or 24 mini muffin cups with paper liners, butter each cup, or spray with your favourite non-stick vegetable spray.
3. In a large bowl mix well the dry ingredients - sugar, flour, cocoa powder, baking powder, baking soda, and salt.
4. In another large bowl, whisk together the wet ingredients except hot water - eggs, mashed banana, milk, oil, vanilla extract and almond extract if using.
5. Add the wet ingredients to the dry ingredients and stir or whisk until combined.
6. Add the hot water and mix. The batter will be quite thin but don't worry it's fine.
7. Pour or spoon the batter into the muffin cups no more than 3/4 full, and bake for about 20 minutes or until a toothpick inserted in the center of a cupcake comes out clean.
8. Remove from oven and let cool on a wire rack.
9. Frost with your favourite frosting - or serve plain with a side of whipped cream or ice cream.

Notes:
1. I always use demerara sugar, but you can also use any other unprocessed sugar like evaporated cane juice. White granulated sugar is heavily processed and I don't recommend it for anything but use it if you must.
2. Olive oil has natural emulsifiers that make cakes moister and softer, so I like using olive oil for baking rather than any other oils. Also, that's really the only oil I always have at hand.
3. I use organic free-range eggs for eating and baking but any eggs will do.

Tuesday, February 12, 2013

PAGACH: SLOVAK CABBAGE-STUFFED BREAD

Part of the Abbecedario Culinario - Slovakia in February!


Pagach: Slovak Cabbage-stuffed Bread
makes: 2 loaves (7 inch x 10 inch)

Dough:
- 2-1/2 cups all-purpose or bread flour (not whole wheat; please get your fibre from fruits and vegetables!)
- 1-1/2 tsp. yeast
- 1 tsp. salt
- 1 tsp. sugar
- 1-1/2 to 2 cups (or more as needed) lukewarm water (not hot or the yeast will die and the dough won't rise)

  1. Mix 1 cup warm water, 1 cup flour, and the yeast. Set aside for 20 min. to 1 hr. It should be frothy.
  2. Add the remaining flour and mix. Add water 1/4 cup at a time and mix until the dough comes together without being sticky. If the dough is too sticky add flour 1 tbsp. at a time and incorporate into the dough until the dough stops sticking to your fingers. Knead into a smooth, pliable dough and put in a large bowl.
  3. Put the bowl in a draft-free place (usually in an unheated oven or a cabinet). Allow the dough to rise for 1 hr. our until doubled in size.
  4. Preheat the oven to 350 F/180C.
  5. Take the bowl of dough out of its resting place and push the dough down till it deflates. Divide the dough into 4 parts.
  6. Generously dust 2 baking trays with flour and using your fingers, push the dough into an approximately 1/4 in. thick rectangle. The size of the rectangle will vary depending on the amount of dough and how well you shape it, but the thickness should be no less than 1/4 in. or the bread will stick to the tray during baking because of the wet filling.
  7. Spread the filling (recipe below) within 1/2 in. to 3/4 in. of the edge of the rectangle.
  8. Using a second piece of dough, in the other baking tray, make another rectangle large enough to fit on top of the rectangle with filling. Press the edges to seal (since the dough is fresh there's no need to wet the edges to seal). If desired, top with caraway seeds, onion (nigella) seeds, or any other topping of choice.
  9. Bake at 350 F/180 C for 20 - 30 minutes or until the bread is lightly browned and sounds hollow when tapped.
  10. Remove from the oven, let it sit for 15 minutes, then cut and serve.
  11. Repeat with the other 2 portions of dough.
Cabbage Filling:
- 1/2 head of a medium cabbage, cored and shredded
- 1 small yellow onion, diced
- 1/2 green or red capsicum, diced
- 1 tsp. caraway seeds
- 2-3 tbsp. chopped fresh parsley
- salt and pepper to taste
- 1 tbsp. olive oil
- 1/4 cup water
- 1 tbps. crushed red pepper (optional)
  1. Heat olive oil in a pan until hot but not smoking.
  2. Add caraway seeds and turn heat to medium. After the caraway seeds sizzle, add the onion and capsicum and sauté until the onion starts to soften. Add cabbage, stir to mix, and allow to cook for 2-3 min.
  3. Add the 1/4 cup water to the pan and stir so the vegetables don't stick to the pan. Let the cabbage cook - it will reduce in volume and you will have approximately 1-1/2 to 2 cups filling. Season with salt and pepper, and crushed red pepper if using.
  4. Let the mixture cool completely before spreading it on the dough (as described above).
Notes:
1. If your yeast is old or you're not sure whether it is alive, proof it before mixing the flour to make the dough. Proofing yeast - even the regular non-Rapid Rise kind - is only done to prove that the yeast is alive before preparing a recipe. Proofing is not imperative in baking.
2. To proof 1-1/2 tsp. yeast: heat 1/2 cup water to 80 F/26 C, sprinkle yeast on the surface, let it sit for 10 minutes. If it is frothy, your yeast is alive. If the yeast does not react, it is dead and cannot be used for baking.

Thursday, January 31, 2013

PIZZA - BEST DOUGH AND SAUCE EVER!

The sauce sounds strangely plain, but it's not. Try it and you'll know what I mean! I like all of the crust to have sauce so I spread it to the edge.


Pizza Dough
makes: 5 loaves, of 7 oz. each (enough for approximately 4-5 thin crust pizzas)

- 4-1/2 cups unbleached Tipo 00, bread, or unbleached all-purpose flour
- 1-2 tsp. active dry yeast
- 1/4 cup olive oil (optional, but I recommend it - it makes the dough supple and lovely)
- 1-2 tsp. salt
- 1-3/4 cups cold water (ice cold, not room temperature)
- Semolina or cornmeal for dusting the pan (I use cornmeal since I always have some)

1. If your yeast is old, it may not be alive - proof the yeast as described in the Notes below to check if it is alive.
2. Stir together the flour, salt, and yeast in a large bowl. If you are proofing the yeast, mix the flour and salt well, then lightly mix in the yeast mixture, then follow the instructions below.
3. Mix oil and water into the flour with a metal spoon or by hand.
4. Knead the dough for 5-8 minutes or until it is smooth, springy, and elastic. Don't over-knead or you'll get a chewy pizza crust later!
5. The dough should clear the sides of the bowl. If it's sticky, add flour by the tablespoon; if it's dry, add water by the tablespoon, until the flour comes together.
6. Let the dough rest for 10 minutes, knead gently for barely 30 seconds, and put in a large bowl.
7. Cover the bowl and put in a warm place (not hot) for 1 hr. or until the dough has doubled in size.
8. Deflate the dough and shape into a ball.
9. Coat the dough ball lightly with olive oil and refrigerate overnight or for up to 3 days, in a large airtight container.
10. Remove the dough from the fridge at least 1 hr. before using (room temperature dough is easier to work with, and prevents over-working the dough).
11. Preheat oven to 450 F/230 C.
12. Sprinkle semolina or cornmeal on baking trays.
13. Divide the dough according to the number of pizzas you want to make.
14. Stretch the dough with floured hands and place in the baking trays. (Rolling pizza dough will overwork the gluten in the dough and make the crust too chewy/a bit leathery.)
15. Lightly shape the stretched dough in the trays to fit as needed.
16. Top with a thin layer of sauce and add toppings of choice. (Don't over do the sauce and toppings - it's a thin crust pizza so don't weigh the crust down)
17. Use good quality toppings. Skimp on quantity not quality.
18. Bake for 7-8 minutes or until the edges are browned, cheese is melted, and toppings sizzle.

NOTES:
1. Proofing yeast - even the regular non-Rapid Rise kind - is only done to prove that the yeast is alive before preparing a recipe. Proofing is not imperative in baking if you are confident that your yeast is alive.
2. To proof 1-2 tsp. yeast: heat 1/2 cup water to 80 F/26 C, stir in 1 tsp. sugar, sprinkle yeast on the surface, let it sit for 10 minutes. If it is frothy, your yeast is alive and the whole mixture can be added to the mixed dry ingredients. If the yeast does not react, it is dead and cannot be used for baking.

Pizza Sauce
makes: 28 oz. (enough for approximately 4-5 large thin crust pizzas)

- 1 14-oz. can crushed tomatoes
- 1 14-oz. can diced tomatoes (or use all crushed tomatoes, or buy canned Marzano tomatoes and crush them yourself)
- 3-4 tbsp. olive oil
- 2-3 cloves garlic, crushed
- salt

1. Mix the tomatoes, oil, and garlic in a pan.
2. Simmer for 30 minutes.
3. Season with salt.

NOTES:
1. This is a typical sauce used for Italian pizza. Unburdened with forced flavourings. Herbs, anchovies, and other things should be added on the pizza, never in the sauce.

Topping Ideas
makes: varies

- Caramelized onions, olives, anchovies
Crisp bacon, Gorgonzola, arugula
- Roasted sliced fennel, Italian sausage, garlic
- Pears, Fontina cheese, walnuts, grated lemon rind (under cheese or mixed in with pears)
- Burrata, tomatoes, pesto Genoese
- Feta, olives, basil
- Roasted sliced mushrooms, sauteed spinach, onions, prosciutto
- Roasted rosemary potatoes, anchovies, olives
- Roasted cauliflower, chevre, chives, truffle oil (drizzled on after baking)

Other Topping Ideas
makes: varies

- Sauces/spreads: Pestos of all kinds, tapenade, roasted garlic and olive oil.
- Cheese: buffalo milk mozzarella, burrata, asiago, Parmigiano-Reggiano, Grana Padano, fresh or aged goat's/sheep's milk cheese, feta, fontina, ricotta, Romano, or whatever strikes your creative fancy!
- Vegetables: sun-dried tomatoes, thinly sliced zuchhini, roasted corn, thinly sliced fresh chiles - jalapenos, serranos, or chiles de arbol (the thin Indian ones), roasted potatoes or aubergines, sliced mushrooms, roasted cauliflower, artichokes, roasted fennel, capsicum, fresh or caramelized onions, kalamata (or other) olives, capers, spring onions, sauteed leeks, roasted parsnips.
- Herbs (preferably fresh but dried will do): oregano, basil, parsley, tarragon, chives, ramps.
- Meats: anchovies, shrimp, roasted poultry, cooked ground beef, proscuitto, ham, salami, pepperoni, Italian sausage, Spanish chorizo, smoked sausage.

Thursday, January 17, 2013

KAAS-UIENBROOD (CHEESE-ONION BREAD)


Kaas-Uienbrood (Cheese-Onion Bread)
makes: 2 loaves, approx. 6 in. x 9 in. each

- 4-1/2 cups unbleached all purpose flour
- 2-1/4 tsp. active dry yeast
- 2 cups warm milk (I use goats milk when I have it)
- 1 tsp. salt
- 1 medium yellow or red onion
- 3-4 tbsp. chopped dried/fresh herbs (I used fresh rosemary)
- 2 tbsp. olive oil
- 2 cups grated cheese - gouda, edam, or any other aged cheese
  1. If your yeast is old, it may not be alive - proof the yeast as described in the Notes below to check if it is alive.
  2. Mix the flour, salt, yeast, and 1-1/2 cups milk in a bowl to make a smooth dough. If the dough is dry/crumbly, add milk and mix until the dough is supple.
  3. Allow the dough to rise in a warm, draft-free place for an hour or until doubled in size. I usually cover the dough with a kitchen towel and let it rise in the oven (with the oven off, of course!), or in a kitchen cupboard.
  4. While the dough is rising, peel, halve, and slice the onion, and mix in the olive oil and herbs. Also line 2 baking trays with parchment paper (not wax paper).
  5. Gently push the risen dough down and shape into a ball. Let it rise in a warm draft-free place again for about 45 minutes or until it has approximately doubled in size.
  6. Push the dough down lightly and divide between the baking trays. Using your fingers, form the dough into 3/4 in. thick rectangles. Top with the herbed onions and cheese and allow to rise for 20 - 30 minutes.
  7. Preheat the oven to 375 F/190 C. Bake the bread on the middle rack of the oven for 20 - 25 minutes, or until the bottom looks light brown. Transfer the baking tray to the top rack to "caramelize" the cheese and onions. (I usually bake one tray at a time: while the first one is baking, I shape and top the remaining dough and let it rise while the first round bakes.)
  8. Take the loaves out and allow to cool in the baking tray for 10 - 15 min. before slicing. Or cool completely and store in an airtight container.
NOTES:
  1. Proofing yeast - even the regular non-Rapid Rise kind - is only done to prove that the yeast is alive before preparing a recipe. Proofing is not imperative in baking.
  2. To proof 2-1/4 tsp. yeast: heat 1/2 cup water to 80 F/26 C, stir in 1 tsp. sugar, sprinkle yeast on the surface, let it sit for 10 minutes. If it is frothy, your yeast is alive. If the yeast does not react, it is dead and cannot be used for baking.

Friday, December 28, 2012

ORANGE CAKE


Orange Cake
makes: 1 loaf (9 inch pan)

Cake:
- 1/2 cup butter or margarine, softened
- 3/4 cup sugar
- 2 eggs
- 1/2 cup orange juice
- 2 tbsp. water or Cointreau (or other orange liqueur)
- 2 tsp. orange zest
- 1 tsp. almond extract
- 1 tsp. vanilla extract
- 1-1/4 cups cake flour
- 1-3/4 tsp. baking powder
- 1/2 tsp. salt

Whipped Cream Frosting:
- 1 cup heavy whipping cream
- 1/2 - 3/4 cup granulated or confectioner's sugar (not Demerara)
- 1 tsp. vanilla or orange extract  
Optional
- 1 tbsp. Cointreau (or other orange liqueur)

Cake:
1. Preheat oven to 350 F/175 C.
2. In a mixing bowl, cream butter and sugar.
3. Add eggs, one at a time, beating well after each addition.
4. Add the orange juice, Cointreau (or other orange liqueur or water), orange zest, and almond and vanilla extracts. Mix well.
5. In another bowl, combine the dry ingredients: flour, baking powder and salt.
6. Add the dry ingredients to creamed mixture. Beat for 2 minutes - resist the temptation to overmix!
7. Pour into a greased and floured 9-inch loaf pan.
8. Bake at 350° for 35-40 minutes or until a toothpick inserted near the center comes out clean.
9. Remove to a wire rack to cool completely.

Whipped Cream Frosting: 
1. Whip the cream on a medium-low speed (3 on a hand-held mixer) for 2 minutes or until it thickens slightly.
2. Add half of the sugar and increase the speed to high (4 or 5 on a hand-held mixer) for 2-3 minutes.
3. Add the rest of the sugar, vanilla or orange extract, and Cointreau (if using).
4. Whip on high until the cream is thick and holds soft-firm peaks.

Frost the Cake: 
1. Trim the top of the cake to make a flat surface. Cut the cake in half and brush off crumbs from the sides and the halved surfaces.
2. Spread a layer of the frosting on the bottom half of the cake and place the top half (cut side on the frosting).
3. Spread a thin layer of frosting on all sides and the top. This is the crumb coat that helps keep the crumbs in place and off the rest of the frosting.
4. Finish frosting the cake with the rest of the frosting.
5. Decorate with a dusting of cocoa or fruits or both.

Notes: 
1. This recipe makes a cake with a more pound cake like texture rather than a soft spongy crumb.
2. Next time I bake this, before filling the cake with frosting I will brush the cut surface of each cake half with orange juice or a mixture of orange juice and Cointreau for a more moist cake.